Thursday, January 31, 2013

Valentine Fortune Teller--FREE Printable!

Welcome to day 7 of Toys In The Dryer 14 Days of Valentines! 
From January 25 through February 7 we'll be posting non-stop Valentine's posts to celebrate this lovely holiday.

Who remembers paper fortune tellers from when you were younger?  My friends and I used to spend hours making and playing with them.
I was trying to come up with something unique to do for Nutty's Valentines this year and thought Valentine Fortune Tellers would be perfect!
I made them, printed them, and showed them to Nutty.  She LOVED the Fortune Tellers and can't wait to give them to her friends (classmates) for Valentine's Day!

I you want to give these unique Valentine's to your child's classmates for friends for Valentine's Day just click on the template to download.  

It fits on an 8.5 x 11 in paper and makes four at a time.


Click on the button below to see all of our past Valentine's posts.
14 days of valentines

Wednesday, January 30, 2013

Pintrest Inspired Valentine's Part Deux

Welcome to day 6 of Toys In The Dryer 14 Days of Valentines! 
From January 25 through February 7 we'll be posting non-stop Valentine's posts to celebrate this lovely holiday.

Last year we shared with you some of our favorite Pins floating around out there and it was such a huge hit that we thought we'd share again this year. Rather than give Pinterest the linky love, we'll be linking you directly to the websites the pins originally came from.  Feel free to pin stuff you like from the original source or find them on our Valentine board and re-pin them from there.

Top 14 Pintrest inspired Valentine's (in no particular order)

14. We love you because...yup it's one of ours and it was so popular that we're sharing it with you (and our newest readers.

13. My heart belongs to you. We love this project because it is something kids of ALL ages can do and be proud of.

12. Snowflake Valentine. How cute are these Valentine's? Crafty, easy to do, and fun for the kids.

11. Wax Paper Hearts. Simple to do, recycle old crayons, and create something new!

10. Panda Bear Valentine's Box. I mean come on! This is too cute NOT to make!

9. Valentine's Day lunches. A little extra time can mean a BIG difference. I know it makes my kids smile.

8. Valentine's Day Tic Tac Toe. I bet you have all of the supplies in your house. My kids love to play tic tac toe so I know a little added LOVE will make it even more fun.

7. Valentine's Day bath. I know this is meant for the kids but this could be a great idea for me to keep tucked away for Valentine's Day for my hubby too! I love the use of bubble wrap to add some extra fun!

6. Heart Bracelets. I saw all the tools needed for this project in the dollar section at Target. This is a great idea for fine motor skills.

5. Cupid's Treasure Hunt Jamie's fun filled treasure hunt with a Valentine's Day spin on it.

4. Be Mine Applique Shirt. It sounds difficult but trust me it's not...even a non-crafty person could pull this off!

3. Hand Print Valentine's. The best part about these is that they are a keepsake of your child's hand print too!

2. Woven Hearts. Come on....you remember doing these when you were a kid!

1. Valentine's Crayons. Recycling at its finest! Old broken crayons made new again!

Click on the button below to see all of our past Valentine's posts.
14 days of valentines

Tuesday, January 29, 2013

Candy Heart Bingo

Welcome to day 5 of Toys In The Dryer 14 Days of Valentines! 
From January 25 through February 7 we'll be posting non-stop Valentine's posts to celebrate this lovely holiday.

valentines games

Want a super easy, fun, and cute activity to do with your kiddos for Valentines? Look no further. HEART! (It's the Valentine's version of BINGO).

All you will need is:
Paper
Marker
Candy Hearts

Create a HEART board like mine below (use any numbers you wish...you can also get more creative and use animals, stickers, letters, etc).  Instead of regular BINGO chips you use Conversation Candy Hearts for your markers.

A few minutes to make and hours of fun for the kiddos. We've been playing HEART for a few days now and they don't seem to want to stop...maybe it's the game, maybe it's the family time, or maybe it's the fact that they get to eat the conversation hearts afterwards??? You be the judge.

Click on the button below to see all of our past Valentine's posts.
14 days of valentines

Monday, January 28, 2013

Picket Fence Valentine Magnet

Welcome to day 4 of Toys In The Dryer 14 Days of Valentines! 
From January 25 through February 7 we'll be posting non-stop Valentine's posts to celebrate this lovely holiday.

Need something to make for the Grandparents for Valentines? These picket fence Valentine magnets are super cute, fun to make, and are perfect as a gift from the kids to the Grandparents!

To make them you'll need:
  • 8 Craft sticks
  • Scissors
  • Glue
  • White paint
  • Valentine and flower related foam decor
  • Pink or red marker
  • Small photo of your kids
  • Magnets

 photo PicketFenceValentine1_zpsc13153b2.jpg

Start by using your scissors to cut points on one side of 6 of the craft sticks.


 photo PicketFenceValentine2_zps413a1198.jpgNext, have your child line up the 6 pointed sticks evenly across the 2 un-pointed sticks.  Have your child put glue dots on the un-pointed sticks where the pointed sticks meet them. (Yes, Tottie is putting glue dots on the wrong sticks in this photo. She got the first one right though).


 photo PicketFenceValentine3_zpsf9fe0086.jpg

Now glue the sticks together like the photo shows.  Make sure you leave a little more room on the top than on the bottom to make it look like a picket fence.  Tottie left a little more space than you need.


 photo PicketFenceValentine4_zps37547bd8.jpg


Once the glue is dry. Paint your fence white.


 photo PicketFenceValentine5_zpsf1b32109.jpg


Wait for the paint to dry then decorate however you want.  Make sure to leave room for the photo and to write "I/We Love You a Whole Bunch"


Glue your picture to the front and some magnets to the back and you're done!

What other type of things have your kids made or bought for their Grandparents for Valentine's Day?

Sunday, January 27, 2013

Dot Candy Valentine's

Welcome to day 3 of Toys In The Dryer 14 Days of Valentines! 
From January 25 through February 7 we'll be posting non-stop Valentine's posts to celebrate this lovely holiday.

Disclaimer: I originally made the paper dot candy just for fun but then realized that they would make great additions to Valentines for kids.  I ran out of red dye so I was unable to make more in Valentines colors that's why my photos look more Easter-like than Valentine-like.

make your own paper dot candy

Do you remember paper candy? I sure do! I don't remember if I actually liked the flavor or if I just like the appeal of it...you know...trying hard to get the dot of candy off the paper without leaving too much paper left stuck to the back of it. I like to think of all that paper consumed as fiber! ;)

Want to make your own??? It's actually really easy to do and kind of fun! You can stick with the traditional colors as I did or you can make them festive to the season such as pink, red and white for Valentines.

The recipe:
3 3/4 powder sugar
2 egg whites
6 T water
1/4 tsp Vanilla (or Almond) extract
Food coloring of choice
make your own paper dot candy

Mix all ingredients (minus the food coloring) in a bowl. Start out on low speed then change to high speed once the ingredients are all incorporated. Don't be alarmed at first if the "batter" looks REALLY soupy and thin...it will thicken up as the high speed goes on. Mix on the highest speed setting for about 10-12 minutes. Yay for my Kitchen Aid mixer...I couldn't stand there with a hand mixer for that long.
make your own paper dot candy

Transfer the batter into small bowls and add a dot or two of the color of your choice. Then spoon the batter into sandwich bags and cut a VERY VERY SMALL tip of the corner off of the plastic bag.
make your own paper dot candy

Carefully squeeze your batter onto wax paper or regular copy paper (please note...do not use parchment paper as I did....the dots didn't stick to the paper and afterwards I wasn't able to cut the paper I had to transfer the dots to a bowl instead).  Let the dots dry over night and warn the kids if they touch they will be in huge trouble the dots will be ruined.

Attach a strip of the dots to your child's Valentine or better yet, make your own Valentine and put the dots directly on them!

Click on the button below to see all of our past Valentine's posts.
14 days of valentines

Saturday, January 26, 2013

Until We Hug Again from Hallmark--Giveaway!

Welcome to day 2 of Toys In The Dryer 14 Days of Valentines! 
From January 25 through February 7 we'll be posting non-stop Valentine's posts to celebrate this lovely holiday.

Lindsi--Jamie and I had the pleasure of receiving Hallmark's "Until We HUG Again" bear and bunny last week. When I first got my package from Hallmark in the mail I opened it up and thought "oh, for cuteness sake!" The bear I received to review is incredibly soft and lovable. He has the cutest heart shaped nose and adorable patches sewn on him as well. (I will add that Hallmark must have paid very close attention to our families as they sent me the more "boyish" version and Jamie the more "girlish" version! Two thumbs up Hallmark!)


Each adorable animal comes in a chair shaped box with very clear instructions on the bottom. Hallmark has the most amazing patented Voice Save Technology which safely records, saves and plays back treasured voice recordings for years to come. The content is saved even when you change the batteries or they run out. So there is NO need to fear that the special message will be lost years down the road.


I brought the bear over to my grandfather's house and had him record a special message for my kids. This way years from now they will have this treasure and papa's voice saved! We did something similar with Hallmark's recordable books with my grandma. We asked her to read a story to the kids while she was on hospice and now that she is gone from our sights we have the special book with Grandma's voice on it! What a treasure!!

Jamie--Much to Nutty's dismay, Tottie claimed our Until We HUG Again bunny the minute we opened the package.  She has been sleeping with it every night since we got it and loves to hear "mom sing me the lullabye".  
 photo 2013-01-25_22-16-31_150_zps51519066.jpg

I am completely impressed at the quality of the bunny, how well the electronics are hidden so that the Velcro doesn't scratch and the voice box isn't too hard, and the detail that went into the design.  Here's my take:


a Rafflecopter giveaway

Click on the button below to see all of our past Valentine's posts.
14 days of valentines

Friday, January 25, 2013

We Love You Photo Card

Welcome to Toys In The Dryer 14 Days Of Valentines! 

14 days of valentines
For the next fourteen days straight (including Saturdays and Sundays) we'll be posting Valentines related posts!  We're going a little off of our usual schedule during this time, but we hope you enjoy our tribute to this lovely holiday.
make your own valentines

Ok, I'm braggin' here because I think this is one of the cutest Valentine's Day cards we have ever made in this house! It didn't really require a lot of effort or work and it turned out so cute.

make your own valentines
Have your kids (or if they're not old enough you can do it) write out the words "we" and "you"  and cut out a heart out of brightly colored construction paper.

make your own valentines
This next part is optional but I did it because I liked the look. Create a backdrop using a sheet, blanket or a piece of fabric and attach it to the wall.
make your own valentines

Have each child hold up their sign in front of the wall. Crop and edit your photos and create a simple Valentine's Day card. I used Shutterfly but you can use anything you choose. Many places offer GREAT deals for this time of year...so be on the look out! Right now if you swing on by and enter CARD4U you can get a FREE card!!! Be sure to drop on by and enter your code before 1/31/13.

Thursday, January 24, 2013

Homemade Mozzarella Sticks

It's been freezing in Minnesota this week.  We're talking highs of -4° F with wind chills of -20s to -30s F. What do Minnesotans do when it is this cold out (besides act normal, because hey, it's Minnesota and this is nothing new)?  We eat.  We eat fatty, carb loaded foods, and we love it!*tee hee hee...Lindsi is hijacking this post...ohmigosh that sounds AMAZING!*
Yesterday Tottie and I made homemade mozzarella sticks for our snack.  They were warm, hearty, and most of all, super yummy!  Oh, did I mention they are easy-peasy to make too?

Ingredients:

  • 4 string cheese sticks
  • 1/4 cup flour
  • 1 egg
  • 1 Tbsp milk
  • 1/2 cup Italian style Panko bread crumbs 
    • Or 1/2 cup plain Panko bread crumbs plus 1/2 to 1 Tbsp Italian seasoning
  • 1/4 tsp garlic powder

Things you'll need:

  • 3 bowls
  • greased cookie sheet
  • oven 
  • pancake turner

 photo HomemadeMozzarellaSticks1_zps5f6c4402.jpg

Start by preheating your oven to 400°.
Next cut the cheese sticks in half and put them in the freezer while you prep the rest.

Line up your bowls to make an assembly line.
In the first bowl put the flour.
In the second bowl combine the egg and milk.
In the third combine the bread crumbs and garlic powder.


 photo HomemadeMozzarellaSticks2_zps9c2823e1.jpg

Now take the cheese sticks out of the freezer and make sure they are nice and cold.
Start by coating one cheese stick with flour.
Then coat it in the egg mixture.
Finally, coat it with the bread crumb mixture and put it on your cookie sheet.


Bake your mozzarella sticks in the oven for 4-5 minutes, flip them and bake again for another 4-5 minutes.  Obviously if the sticks start to look brown or the cheese melts galore before the total 8-10 minutes is done, take them out--they're done!

 photo HomemadeMozzarellaSticks3_zpsb94a6c77.jpg
FYI: This is what happens when you forget to put the cheese sticks in the freezer and they are not super cold when you bake them.  The cheese spills out all over the place.  The mozzarella sticks taste just as good, they're just not as pretty :)
Does your family love mozzarella sticks?

Wednesday, January 23, 2013

A Mom's Review of the Nexus 7 Tablet by Google

My family debated on getting some kind of tablet for Christmas for the family to share.  Nutty uses them at school, Tottie plays with Grandma's when she visits, and I would love to have one to tote around to blog meetings and conferences instead of hauling around my large laptop.  Ultimately, however, we decided that we would spend our money on things for our boat because that's how we spend time together as a family in the summer.   
As luck would have it, a few weeks ago I fell into contact with a marketing rep from Staples who offered a Nexus 7 32GB Tablet from Google for my family to review.  I don't know who was more excited, me or the girls!

Our Nexus 7 Tablet arrived from Staples at the perfect time.  The girls were heading to Grandma and Grandpa's house for the long weekend which meant that I had time to play with it and set it up before the girls stole it got their hands on it.
nexus 7 photo.jpg
Set up was a breeze!  Since my cell phone runs on the same operating system (Android 4.1 Jelly Bean) and I downloaded all my phone apps from Google Play, once I logged into my Google account on my tablet, it automatically copied all my apps from my phone to our tablet!  No having to find and re-install all of our favorite apps!  I used the USB/charging cord that came with our tablet to connect it to my computer and transferred some photos over to use a screen backgrounds.  The set up was done!
 photo IMG_0315-2_zps9f1bb612.jpg
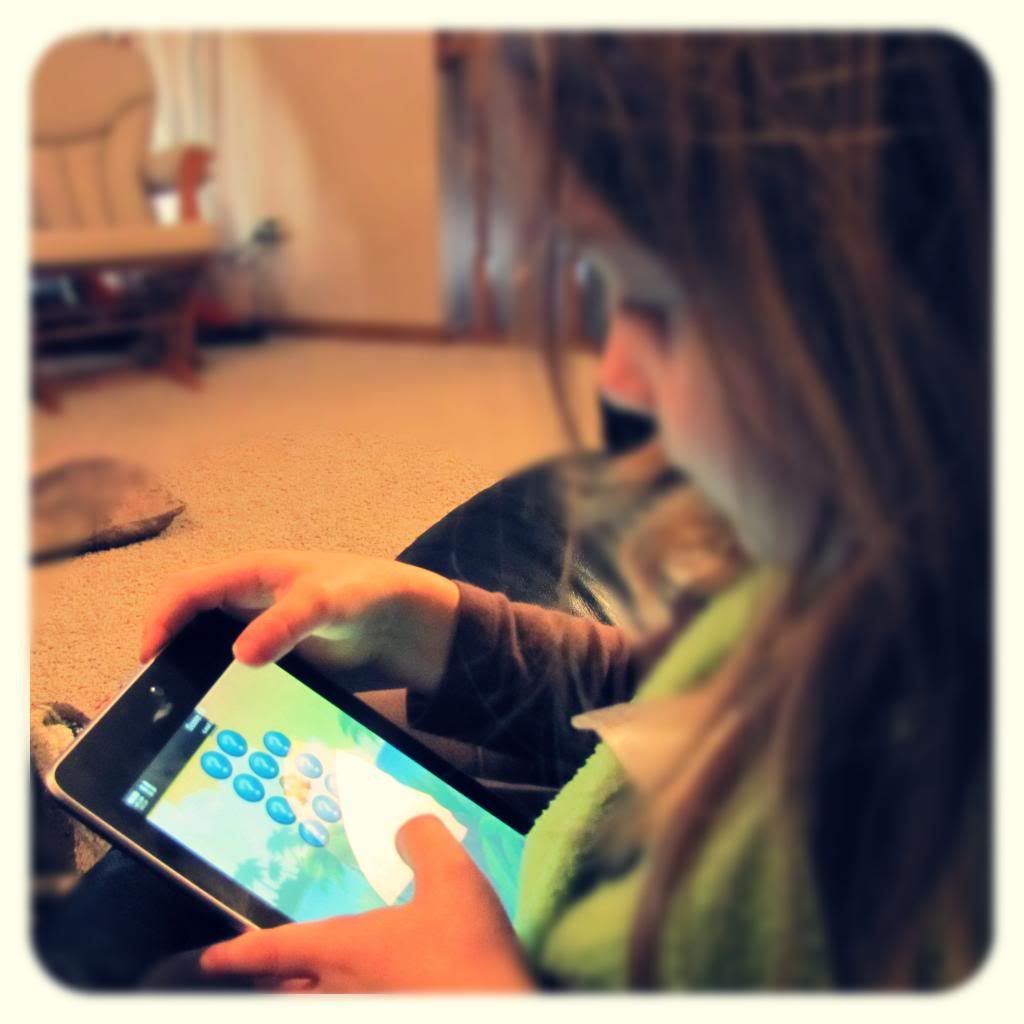
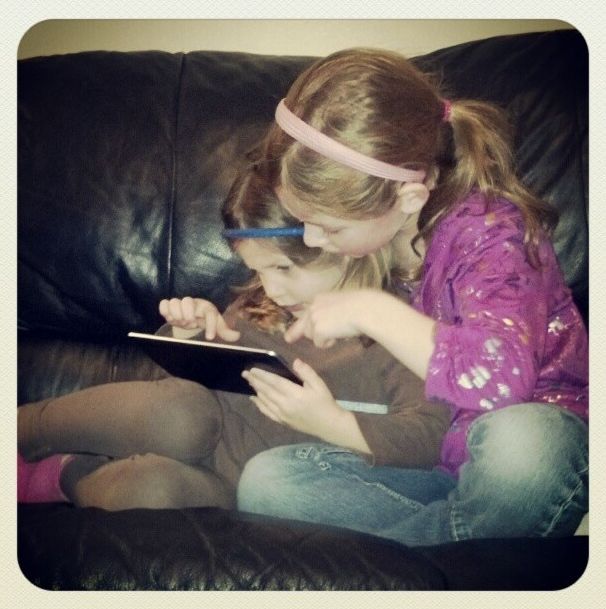
The actual usage is a breeze too.  It's just like a larger version of my phone.  Even my 4 year old navigates the Nexus 7 Tablet without problems because she's used to playing on my phone.

Just so I don't ramble on and on, I'm going to bullet point the rest of this post.  It's only fair so you can easily see the highlights of my review:

Pros of the Nexus 7 Tablet by Google:


•  Super easy to set up and if you already have an Android phone and a Google account

You already read that above :)

•  Light and portable!   

So much easier to carry around than my laptop!  It fits right in my purse and is great device for keeping my 4 year old busy during my physical therapy appointments!

•  Decent battery life

Since we got our Nexus 7 someone in our house has been on and off it all day.  The battery has lasted through the day with only the need to charge up at night.  Much better than my phone which dies after just a few hours of game playing!

•  High resolution screen

This is the one thing Hubby was thrilled about--Angry Birds™ on a larger, high-resolution screen.  I won't go into specs because I'm not technical.  Just know that things are not at all grainy or pixely (is that a word?)

•  Fast response 

I notice no lag in the response of the tablet.  Granted, as I said before, I'm not technical, I am an impatient person who does not like to wait for things and I don't feel like I'm waiting for anything when I play with the Nexus 7.
photo Nexus 7.jpg

Cons of the Nexus 7 Tablet by Google:


• Finger prints, finger prints, finger prints!

The glossy face of the tablet easily attracts and keeps finger prints (especially when the kids are using it).  I would suggest you get a screen protector that helps to cut down on them if you are going to let your kids play with your tablet.  (Off to Staples I go!)

• No 3G/4G only WiFi

Though not having 3G/4G isn't a deal breaker since most places we go have WiFi, it would be nice to be able to connect to the internet while we are in the car or in places where the WiFi isn't very good.

• No rear camera, poor front camera

Again, the cameras are not a deal breaker.  I have my phone and my real camera to take photos with.  After all, who wants to hold up a 7 inch tablet to take a picture.  The girls, however, wanted to take photos with the tablet since they can take them on my phone.

• Location of the power and volume buttons

The power and volume buttons are located on the side of the tablet but more toward the back.  It takes a bit of getting used to to locate them.

All in all, my entire family is thrilled with the Nexus 7 Tablet by Google.  Though there are some cons, for us they are not that big of a deal and can easily be worked around.  We are very happy with and thankful to Staples for allowing us to try out this awesome Tablet!  

Does your family own a tablet?  What types of things do you do with it?

Staples provided me with the Nexus 7 Tablet for my review.   I received no further compensation for this post.  All opinions are 100%  my own.  To see the full line of tablets that Staples offers visit Staples.com.

Tuesday, January 22, 2013

LEGO® Official YouTube Channel PLUS $1000 Giveaway #LEGOChannel


I loved LEGOS® growing up.  This past Christmas my girls got a ton of LEGO® Friends and are finally sharing in my love for the tiny little blocks.  My girls and I also love watching videos on YouTube.  It's fun to see what you can discover on it (with supervision from mom of course!).  LEGO® now combines two of our favorite things with their Official LEGO® Channel on YouTube!


There are over 500 videos on the Official LEGO® Channel with more being added daily.  What's best is that they are all kid-friendly so you can feel ok leaving your children to surf the channel while you look away for a few minutes (i.e. get the dishes or laundry done, or if you're really lucky, close your eyes for a 15 minute nap!).

We could have spent hours building a playlist off of this channel.  Nutty loved the LEGO® Friends Music Video, Tottie loved any of the LEGO® Monster Fighters videos (yes, she's my little monster lover), and I liked the short little LEGO® City clips.  We all liked the videos that fast forwarded people building large things from the tiny bricks.  Here's the beginning of what could be a very long playlist for us!:


To make your own playlist from The Official LEGO® Lego Channel follow these steps:
  • Visit Youtube.com/LEGO and watch one of your favorite videos
  • Click "Video Options"
  • Select "Add To Playlist"
  • Sign-In using your YouTube Login
  • Add your selected video to an existing playlist or create a new one
There is a lot of content on web; creating a playlist on the Official LEGO® Channel is a great way to ensure your kids are entertained and watching videos you can feel good about.

Visit the Official LEGO® Channel to build your own playlist to watch with your kids and then reply below for a chance to win one (1) prize of $1,000 to buy your family’s favorite LEGO® products!

This is a sponsored conversation written by me on behalf of LEGO. The opinions and text are all mine. Official Sweepstakes Rules.

Monday, January 21, 2013

Ice Fishing with your kiddos


ice fishing with kids
ice fishing with kidsEvery year, the day after Christmas, we take the long journey to the great wide open (also known as Papa Tractors). This year was extra special because, this year Papa Tractor took our oldest son ice fishing. He had a special hat made just for him and bought him his very own ice fishing rod. It was special indeed! He reserved a special ice house just for us for the entire day. We hopped in a Bombardier (see the photo)and headed to 5 mile point. It was five miles out in the middle of the lake and it took us nearly a half hour to get there. But was it worth it? Indeed!

ice fishing with kids
ice fishing with kidsWe spent nearly 7 hours out there and the only person who caught anything was Papa. But, it didn't really matter because the day wasn't totally about catching....it was more about the memory, the special time, the incredible gift of grandparents. It was a successful day for sure!

Have you ever been ice fishing? Do you have any amazing memories with your grandparents you want to share?
Related Posts Plugin for WordPress, Blogger...