Thursday, May 23, 2013

Memorial Day Popsicles

Zoku
If you are in the United States you know that Memorial Day is next week and I thought this might be a good time to whip out my favorite Zoku Quick Pop Maker. Now, you don't NEED one, you can make these the old fashioned way, but I will admit making 6 Popsicles in under 10 minutes TOTAL was a bonus!
Zoku

I used lemonade for all three colors because lemonade Popsicles are a favorite in our house. I just added a drop of red and blue food coloring to the lemonade.
Zoku
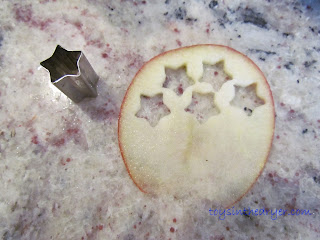
I sliced an apple really thin and used the star shaped cutter that came with my Zoku, but you can find these at your local craft supply store. I added the stars to the Quick Pop maker to add a little more of a festive look.
Zoku

I simply added blue to one of the pops and striped the red and plain lemonade to make the stripes. I love how the stars and strips pops turned out, and so did my kids!
Zoku
You can even get a little more creative and add more layers- good ol' Red, White, and Blue!
Zoku

Just remember to have fun and enjoy the time with your kids. Making Popsicles for my kids is one of my favorite treats for them because they love it and because I know EXACTLY what ingredients they are getting.

Friday, May 3, 2013

Personalized Disney Water Bottles

Walt Disney World
Welcome to our week of Disney! We will have five fantastic Disney inspired posts for you this week and a few giveaways! Make sure you come back each day and enter!


Last week at Target, in the dollar section, I found these awesome water bottles. They are red with black tops- PERFECT for what I had in mind! (Honestly, I was just about to purchase some custom water bottles on Etsy for $9.99 each!). I spent $3 on each bottle, and purchased five (I have four kids and my neighbor is coming with us to Walt Disney World so I made one for her as well.) I just happen to have a Cricut Die Cutting machine and knew exactly what I was going to do. I grabbed my Mickey Mouse cartridge and began cutting out the kids names in Disney font. For those who do not have the ability to do this you have a couple of options: you can purchase vinyl letters in Disney font on Etsy for a fairly cheap price, you can cut them out on your own using sharp scissors and some sticky vinyl, or you can make a stencil out of Disney font and paint them on with a permanent paint pen.
Walt Disney World


Wash and dry your water bottles very well, this helps the vinyl to stick properly.

Walt Disney World

Print off your names on sticky vinyl.

Walt Disney World

Carefully remove the back side of the vinyl and place it on your water bottles.

Walt Disney World

Firmly press every part of the letters to ensure they are stuck really well.

Walt Disney World

Peel off the top layer of your sticker and smile because you've just created an adorable thing! 

Thursday, May 2, 2013

Disney Shoes and Hair Bow

Mickey flip flops
Welcome to our week of Disney! We will have five fantastic Disney inspired posts for you this week and a few giveaways! Make sure you come back each day and enter!
Wanna know how to turn simple flip flops into adorable unique shoes for Disney and for the Disney fan? It is really easy. First, I found these adorable Mickey Mouse flip flops at Target for 7.99 but, any pair will do even the cheapies from the dollar store can be made cute!

You will need to cut six pieces of ribbon 4 inches long, and then cut a triangle out of each end of the pieces.
Mickey flip flops

Arrange the pieces of ribbon in the order you want them to appear in your decoration.
Mickey flip flops

Pinch the pieces of ribbon in half like this.
Mickey flip flops

Insert a needle with thread into the center of the ribbon and attach the remainder as well.

Mickey flip flops
Wrap the thread around the center of the ribbon stack several times, very tightly, then knot it and snip the end.
Mickey flip flops


Wrap a small piece of ribbon around the center to cover your string and glue it to a pony tail holder OR your shoes! Adorable!!!  Want a Mickey Mouse pony tail holder like the one above? Enter our giveaway!
a Rafflecopter giveaway

Wednesday, May 1, 2013

Cinderella Nails


Cinderella Nails
Welcome to our week of Disney! We will have five fantastic Disney inspired posts for you this week and a few giveaways! Make sure you come back each day and enter!
 
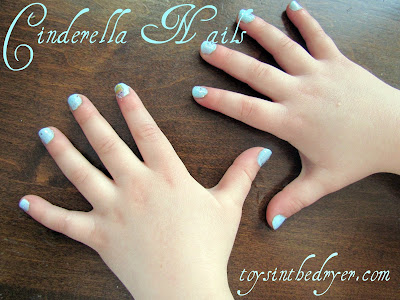
Here's an easy way to turn your princess into a REAL princess. Cinderella nails! I saw this done on adult nails and I knew I could pull this off on my daughter...and she was very pleased to let me try!
Cinderella Nails

Start with a pale blue nail polish. This may take 2-3 coats, since it is so pale.
Cinderella Nails

Next cut out Cinderella's face from a sheet of temporary tattoos. Make sure it is small enough to fit on the finger of your princess.
Cinderella Nails

Then add a bit of silver glitter nail polish.
Cinderella Nails

Last cover each nail with a top coat to keep the art in place for days to come.

Tuesday, April 30, 2013

Disney bags for our trip

how to make a drawstring bag
Welcome to our week of Disney! We will have five fantastic Disney inspired posts for you this week and a few giveaways! Make sure you come back each day and enter!

Measure and Cut the following in fabric:
2 pieces of fabric 14" by 30" (outer and inner bag)
1 piece 3 1/2" by 26" (casing)
1 piece of 1/2" ribbon measuring 2 yards


Fold your two long piece of fabric in half (right side to right side), sew each down the sides and finish the edges with a zigzag stitch.
how to make a drawstring bag

how to make a drawstring bag

Turn one of the pieces right side out. Place the lining inside outer fabric with wrong sides together, matching side seams.
how to make a drawstring bag

Pin them together, starting at the seams and zigzag stitch together close to edge. Set aside.
how to make a drawstring bag

Take your casing piece of fabric and press each short end down 3/8" and stitch to closed.


how to make a drawstring bag

Fold casing in half, lengthwise, and zigzag edges together leaving ends open. Match casing on outer fabric of bag with the ends meeting in the middle of the bag and straight stitch to bag.
how to make a drawstring bag


Press the casing around the the bag upwards and stitch a 1/4" straight stitch to keep the casing upright.
how to make a drawstring bag

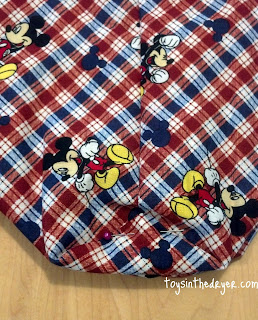
Thread your ribbon through the casing and pull throught so that both ends are even in length. Pin the right end to the left corner of the bag and the left end to the right corner of the bag.

how to make a drawstring bag


Stitch the ribbon in place and snip off excess. Turn bag inside out and fold bottom corners so the seam of the bag falls on the center bottom of the bag.
how to make a drawstring bag

Measure 1/2" from  the corner along the stitching line, and draw a 1" line at a right angle to stitching line and stitch across. Repeat on other corner.
how to make a drawstring bag

Turn the bag right side out and enjoy!
how to make a drawstring bag
Related Posts Plugin for WordPress, Blogger...