Friday, September 28, 2012

Be The First To Know--Tide VIVID White + Bright

My sister actually convinced me to buy white capris this summer.  (Insert look of sheer horror)  I NEVER wear white on the bottom (and I rarely wear all white on the top)!  I'm a magnet for stains and with my tom-boyish activities, white and I don't really match.  None the less, she convinced me to buy them and I actually wore them.  (Insert look of complete shock)  Want to know a secret?  I'm STILL wearing them despite it being past Labor Day!  Yes, I bought white capris this summer, I wore them, I'm still wearing them (past Labor Day),  and I LOVE them!  (Who is this person typing and what have you done with Jamie?)

My secret to helping me keep my white capris white despite high outdoor activities and the risk of getting them dirty this fall? Tide VIVID White + Bright.  Though you might not recognize the name, this is not a new product.  Tide plus bleach alternative is now Tide VIVID White + Bright!  An easier, more catchy name, with a fun new look.
With Tide VIVID White + Bright, my white capris look as good as new after washing them.  I've sat on dirty logs, in the sand on the beach, accidentally spilled juice, and even dug a hole in the ground (yes, I DID dig a hole in the ground while wearing white pants and high heels!) and you'd never know when looking at my capris.  I guess I CAN get used to wearing white.  Thank God I have a laundry detergent I can count on!

What about you?  Do you wear white?  Do you break any of the "rules of wearing white"?  How do you keep your whites white?  Answer in the Rafflecopter form below and be entered to win your own bottle of Tide VIVID White + Bright!

a Rafflecopter giveaway
Tide is a registered trademark of Procter & Gamble.  Images used with permission.  I received a bottle of Tide VIVID White + Bright and a bag of Tide VIVID White + Bright Boost in exchange for writing this post.  I am also entered to win a $500 gift card.  All stories and opinions are 100% my own.

Leaf Animals--Pinned it, Did it!

It's Friday which mean's another Pinned it, Did it! post!  This pin totally caught my eye and I decided that Tottie could easily do it!  She is only 4 so she needed some direction as to where to put the leaves but she had a ton of fun watching her moose come together on paper!
You'll need to gather some leaves of various shapes and sizes.  We simply looked at the photo from the pin and tried to find leaves that matched.  It was good lesson in leaves and matching for Tottie.
Then just glue the leaves like they are in the picture!  The website that the pin came from has many other leaf animals on it so I highly suggest you go check it out and try some other ones with your kids!
Not bad for a 4 year old huh?


Thursday, September 27, 2012

Chores and Allowance


Kids. Chores. Allowance.

At some level we all know that these three things should go together in some way. But the how and why of it all sometimes gets lost in the sleep deprivation and “don’t do that’s” of parenthood.

Let’s start with chores. The general school of thought is that kids should do chores. What those experts don’t tell us is how much work it is to make it happen!

Yes, kids should do chores – for many reasons. But enforcing a chore system in your house can sometimes seem like more trouble than it’s worth.

So let’s start with the benefits of chores:

The positives for mom are pretty awesome -

When the kids do chores, mom has a little bit less work to do – eventually. If our kids can ever get a handle on doing things like cleaning and laundry, then theoretically, our lives will get easier.

The other benefit is a greater level of respect for all that Mom does and how hard she works to keep things running.

The positives for kids are character rewards –

Kids who do chores learn how to work!  Since the majority of our lives are spent working, this lesson is a big one! I don’t want to raise lazy spoiled children who think it will all be done for them. Chores clear that issue right up.

Chores also teach my children that we are a team. Everyone helps! No one is above taking out the trash or feeding the cat. It’s so important for kids to know that they have something of value to share with the world – even if it’s just their ability to set the table.

So chores are a good thing. How soon? How much? Which ones?

Most kids can start helping around the house by age three. They can pick up their toys or bring down the bathroom trashcan to be emptied.

As kids get older, they can handle tougher chores. My guys (10, 9, and 5) are a real help around the house. They bring all the dirty clothes to the laundry room before they leave for school. I’ll wash, dry, and fold it for them, but they put it all away. My guys are also responsible for their own bathroom. They clean it! They scrub the tub and wipe down the sink and replace the hand towel. Don’t get me wrong - I supervise, but they do the work.

Should we pay kids for chores?

This is a tricky question, and there are a few different schools of thought here.

Some people think kids should just work for free – “I feed you and clothe you, so you do chores.” A valid argument.

Others pay by the job. If you don’t work, you don’t get paid. If you do all your chores, you get a set amount per chore – kind of like the real world where no work = no pay.

In our house, we sort of combine the two concepts.

Everyone works. No options. No exceptions. We all pitch in to keep the house running. And every week, everyone gets paid. Each child gets an allowance once a week.

What’s the point of an allowance?

Allowance gives kids the opportunity to learn how to handle money. I can’t think of many skills more important than knowing how to handle money: how to save, how to spend wisely.

If our kids never have any money to spend, how will they learn these concepts?

So I give them money. Not for free. They do work. I just don’t directly tie the chores to the cash. Everyone works, and everyone gets paid. A direct relationship between the chore and the pay was just too hard to keep track of.

We certainly don’t have it all figured out, but this chore/allowance thing is working at our house. My children are learning how to work and how to spend, save, and give. It’s a work in progress, but we are seeing results.

I would love to hear from you. How do things work at your house? What chores do your kids do? How do you get them to actually DO those chores? How much of an allowance do they get?

About Me!

So who is this girl who is inviting you over for coffee? What do you need to know about me?

I'm Dawn.
I'm a woman of faith.
I'm a wife, mom, and friend.
I have a husband I adore. But our marriage isn't perfect.
I have three sons. I love them, and sometimes even like them.
I have issues. I try to own them and work through them. I don't always succeed.
I'm a work under construction.

I started my blog, Come Over For Coffee, as a place to talk through the stuff of life - the sticky stuff like friendship and marriage, and the fun stuff like coffee and shopping. I don't claim to have all the answers. I definitely have lots of questions. I'm blogging under the assumption that together, women can figure stuff out.

My biggest soapbox is that being who we are - with no apologies for how we've been created - is the surest way to get the most out of life.

I'm easy to find. You can email me at comeoverforcoffee@gmail.com. You can follow me on Facebook or Twitter

Or you can just Come Over For Coffee!

Wednesday, September 26, 2012

Apple Painting

If you've been apple picking this fall, you probably have more apples than you know what to do with (unless you are a really good baker and can make super good apple pie or your own apple sauce).  Let's turn those apples into some super fun crafts like apple painting!
My daughter and her friend had a ton of fun painting with apples and there are a few different ways you can do it.  Any way you decide, you'll need:

  • Apples
  • Paper
  • Paints
  • Toothpicks
  • Paper towels
  • A small towel
  • Small cookie cutters (optional)
  • Gummy worms (optional)
  • Leaves (optional)
Step 1)  Cut your apples in half.  If you cut the apples vertically, they will come out looking like an apple.  If you cut the apples horizontally,  They will come out looking round but with a star in the middle.  Take the seeds out and set them aside for later.

Optional step:  Use cookie cutters to press shapes into the apples.  (See the green apple above)  You won't be able to cut out the shapes, but they will leave lines in your painting.  Remember to press your letters into the apples backward.  I learned the hard way when my "S" was backward on the finished painting!


Step 2)  Use a paper towel to dry off the cut edge of the apple.

Step 3)  Place your painting paper on a towel.  We all know that you won't be able to cut the apple perfectly straight so the towel gives you some padding to be able to press every bit of the apple onto the paper.  Make sense?

Step 4)  Have your kids paint the apples.  They can paint the entire apple like the green and red one on the right above, or they can paint just the edges like the red one on the left above.

Step 5)  Press the apple onto the paper.  Remember to press all over the apple to get every part stamped on the paper.
Step 6)  Spear an apple seed with a tooth pick then dip it in paint and stamp it on your paper in the middle of your apple.  Use another tooth pick dipped in paint to make the stem of the apple.

Optional steps:  Use gummy worms dipped in paint to make a worm coming out of your apple.

Use real leaves that you've painted to stamp leaves onto your apples.


Sit back and admire your beautiful work!  
Have you ever painted with apples with your kids?

Tuesday, September 25, 2012

Kmart's Big Layaway Giveaway

This is a Sponsored post written by me on behalf of Kmart for SocialSpark. All opinions are 100% mine.

Ok, so I know school just started, and it's only mid September, but the Holidays will be here before you know it!  Are you financially prepared to buy all your gifts at once?  I know I'm not.  With Kmart's free layaway you (and I) can start buying holiday gifts now and avoid a financial crunch as the Holidays get closer!

See those learning pads above?  I know my girls would love one and I can afford to buy it with Kmart's free layaway!  Simple, smaller payments over time vs one large payment makes the cost much easier to manage.  

BLG_Logo_Horizontal.jpg (3 documents, 3 total pages)

If I put one of those learning pads (I'm still trying to decide which one I like best) on layaway now, I'll be entering Kmart's Big Layaway Giveaway and I'll have a chance to win the remaining balance of my learning pad paid off!  That's right, each week until 11/17/12 Kmart will be paying off the balance of one winner per store's layaway item.  You might just get your Holiday gifts at a significant discount!

Kmart Free Layaway Grid 09_12.jpg

Kmart has one of the best layaway programs out there so you know you are in good hands when you put your Holiday gifts on layaway with them.  Just look at the grid above!

What are you waiting for?  Tell me which items you will purchase for Kmart's Big Layaway Giveaway...

Visit Sponsor's Site

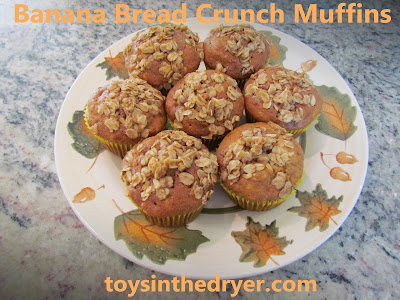
Banana Bread Crunch Muffins

banana bread muffins
Yummmmmmmmmmmmmmmmmm! Right? Yup, they are yummy! Here's an easy recipe that will surly be a winner in your home.

Combine:
3 ripe bananas, mashed
1 egg
1/2 vegetable oil
1 cup sugar
2 cups flour
1 1/2 tsp cinnamon
1/3 cup chopped walnuts (optional)

Bake in a greased muffin tin (or one lined with paper liners). Fill about 1/2 way.

In a separate bowl:
1/2 stick butter, melted
1 cup oats (oatmeal)
1 tsp cinnamon
1/2 cup brown sugar

Sprinkle oat mixture on top of each muffin and bake at 350 for 30-35 minutes. ENJOY!

Monday, September 24, 2012

Minnesota Blogger Conference #2 Recap

This past Saturday, I attended the third annual Minnesota Blogger Conference.  Lindsi and I went for the first time last year and it was fabulous, so I did not miss the chance to attend this year!
Like last year, I was so busy socializing, tweeting (until my phone died) and paying attention to the speakers that I completely forgot to take photos!  Unlike last year though, a LOT of people knew who I was (or at least had heard of Toys In The Dryer).  It may have helped that we were on the Minnesota Blogger Conference website's front page for a Q&A about last year's conference.  The funny thing though, is that I was most memorable for the logo t-shirts we wore to the conference last year.  Everyone asked why I wasn't wearing my shirt.  They also asked why my partner (Lindsi) wasn't with me.  Unfortunately, for personal reasons, she was unable to attend.
Photo is from our Plates In The Dryer event but it is a great shot of our shirts.

Again, I gained a wealth of information at the conference.  My favorite session was actually the first one I attended.  It was Behind the Scenes:  Brands and Blogger Relations Programs by Lauran Melcher of Trying All the Things.  She talked about how brands partner with bloggers, where brands look to find bloggers, and so much more!
 Her presentation actually helped me with ideas for a presentation I hope to do next month to a bunch of marketers about working with bloggers.  Her presentation even had me dreaming about pigs that night! (She talked about the MN Pork Board partnering with bloggers--we were wondering why they suddenly started following us on Twitter!).  I'm waiting for the end of today--hopefully everyone will have their presentations online and I can see the sessions that I wanted to attend but were my second option.

Thanks to donations from the attendees and Glimpses of Soul Photography donating the money received from head shots, we raised just under $1000 for the featured charity Free Arts Minnesota!  We have an awesome (and giving) group of bloggers in MN!  

Speaking of Glimpses of Soul, that head shot in our header is from last year's conference.  Unfortunately, Lindsi was not with me this year to update our head shot together but I did get an individual one that I can't wait to see!  I KNOW  it's going to be good--just look at last year's!
Again, I am amazed that being on your phone, laptop, and/or tablet while someone is presenting is ok (and even expected!) at this conference.  It's just funny to look ahead of you, or down the row, and see almost everyone's faces in their electronic devices instead of looking at the speaker.    

Thanks to Missy Berggren and Arik Hanson (the founders of the conference), the entire planning team (can be found here--too many to name), and the sponsors:
Allina Health
Pioneer Press/Twin Cities.com
National Camera Exchange
Strother Communication Group
Mall of America
Plum District
Sleep Number
Padilla Speer Beardsley
Glimpses of Soul Photography
Art House Print
Muddy Paws Cheesecake
for an awesome conference again this year!  I look forward to it again next year!

Friday, September 21, 2012

Book Pumpkin- Pinned It, Did It

how to make a pumpkin out of a book
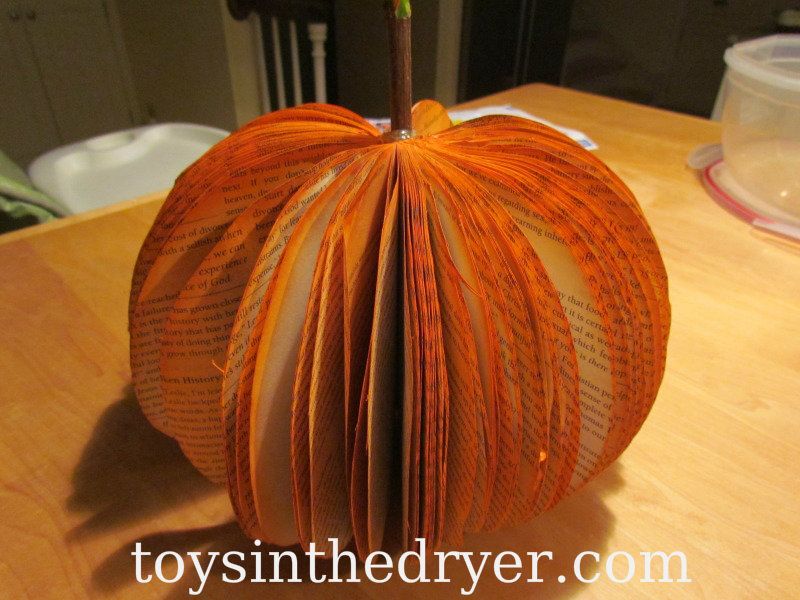
Last year I saw, in a great magazine, the steps needed to make adorable Christmas trees out of old paperback books. I made about 3 or 4 of them and made sure they were different sizes too! I had such a blast making them and my kids like them too. This year when Fall came around (well, here at least) I found the best idea yet! Pumpkins made out of old paperback books! I just love it when I get to reuse something, or try a new twist on something. This pin made me run to my stack of old books and grab the necessary tools to make one for my fall decor. My oldest son really enjoyed watching me make it. It was pretty funny to hear him say after each piece "ooooh, a little closer mama!"

how to make a pumpkin out of a book
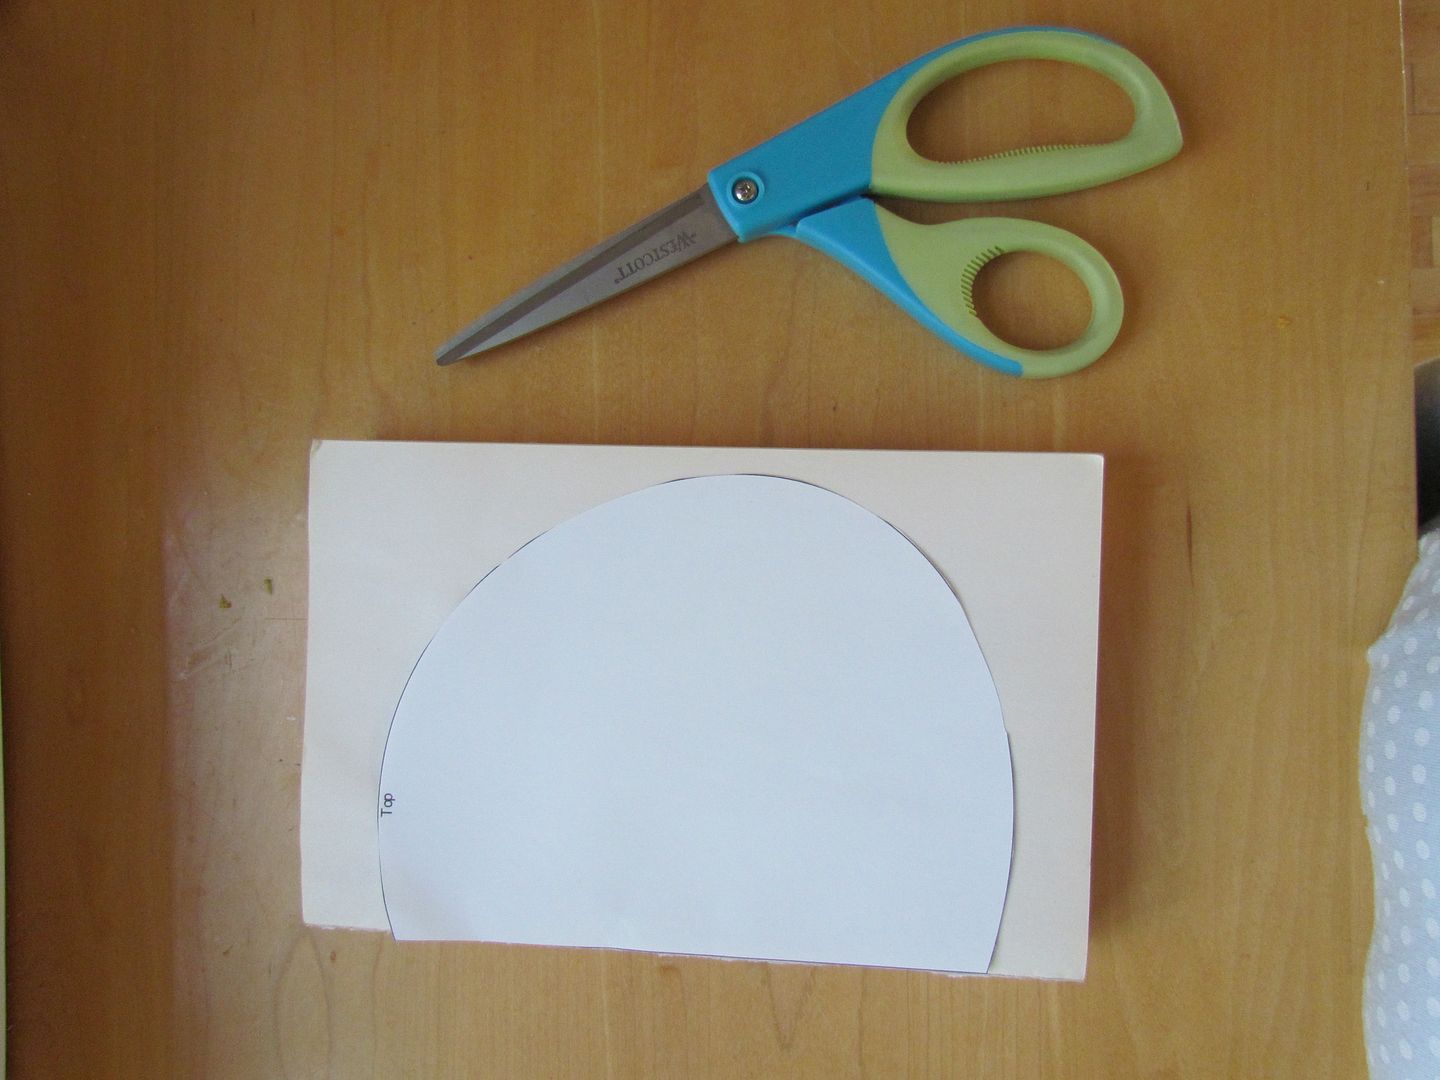
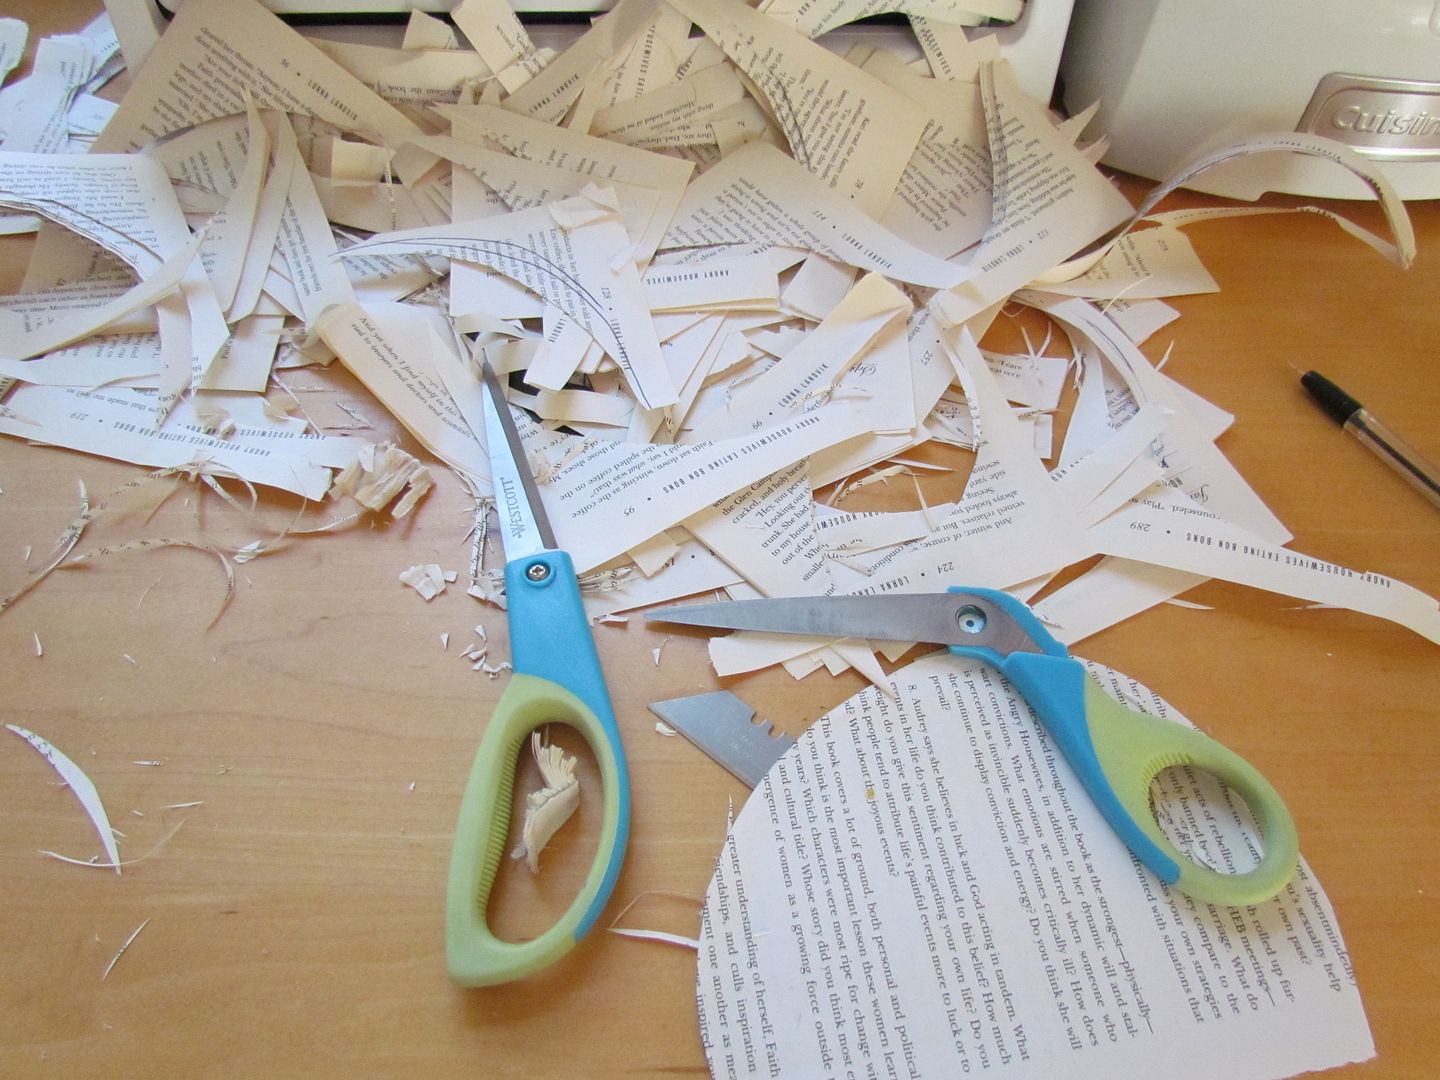
Easy enough! All you need is a little pumpkin half shaped piece of paper and a craft knife or razor blade. Wanna know why I am showing you scissors? Pay attention to the later photos. Trace your half pumpkin shape on the first and last page of the book.

how to make a pumpkin out of a book
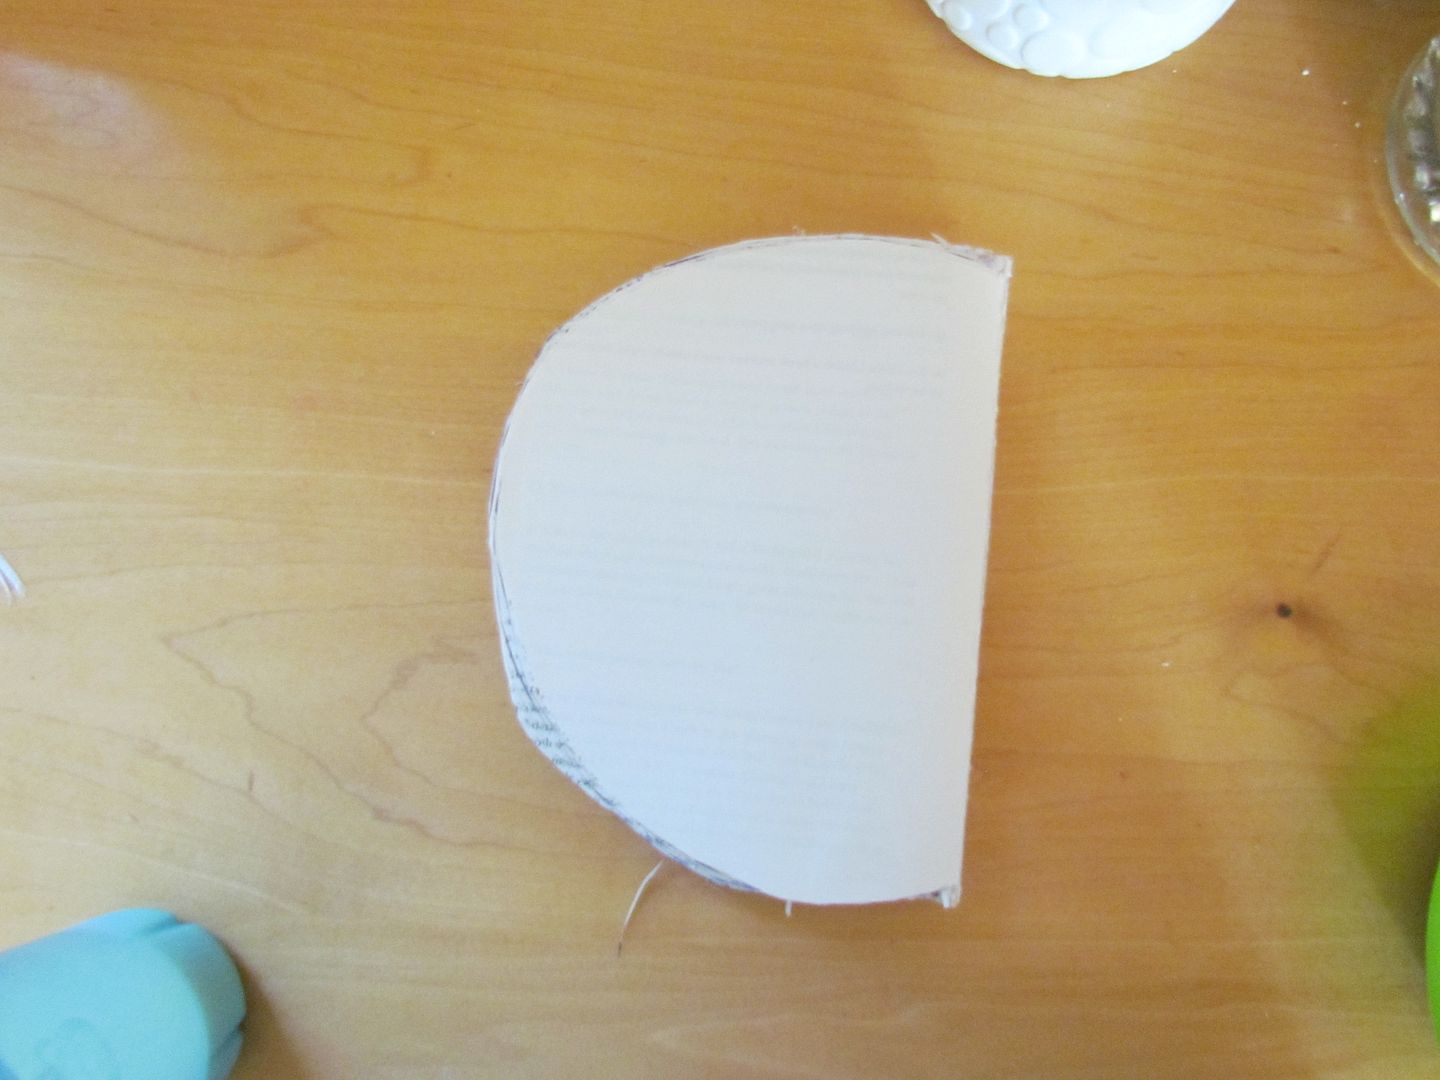
Cut around 5-8 pages at a time, no more or your edges will be pretty jagged and it won't look right. Continue cutting until you have the entire book cut out. For referance purposes this book was 278 pages...not that it really matters.

how to make a pumpkin out of a book
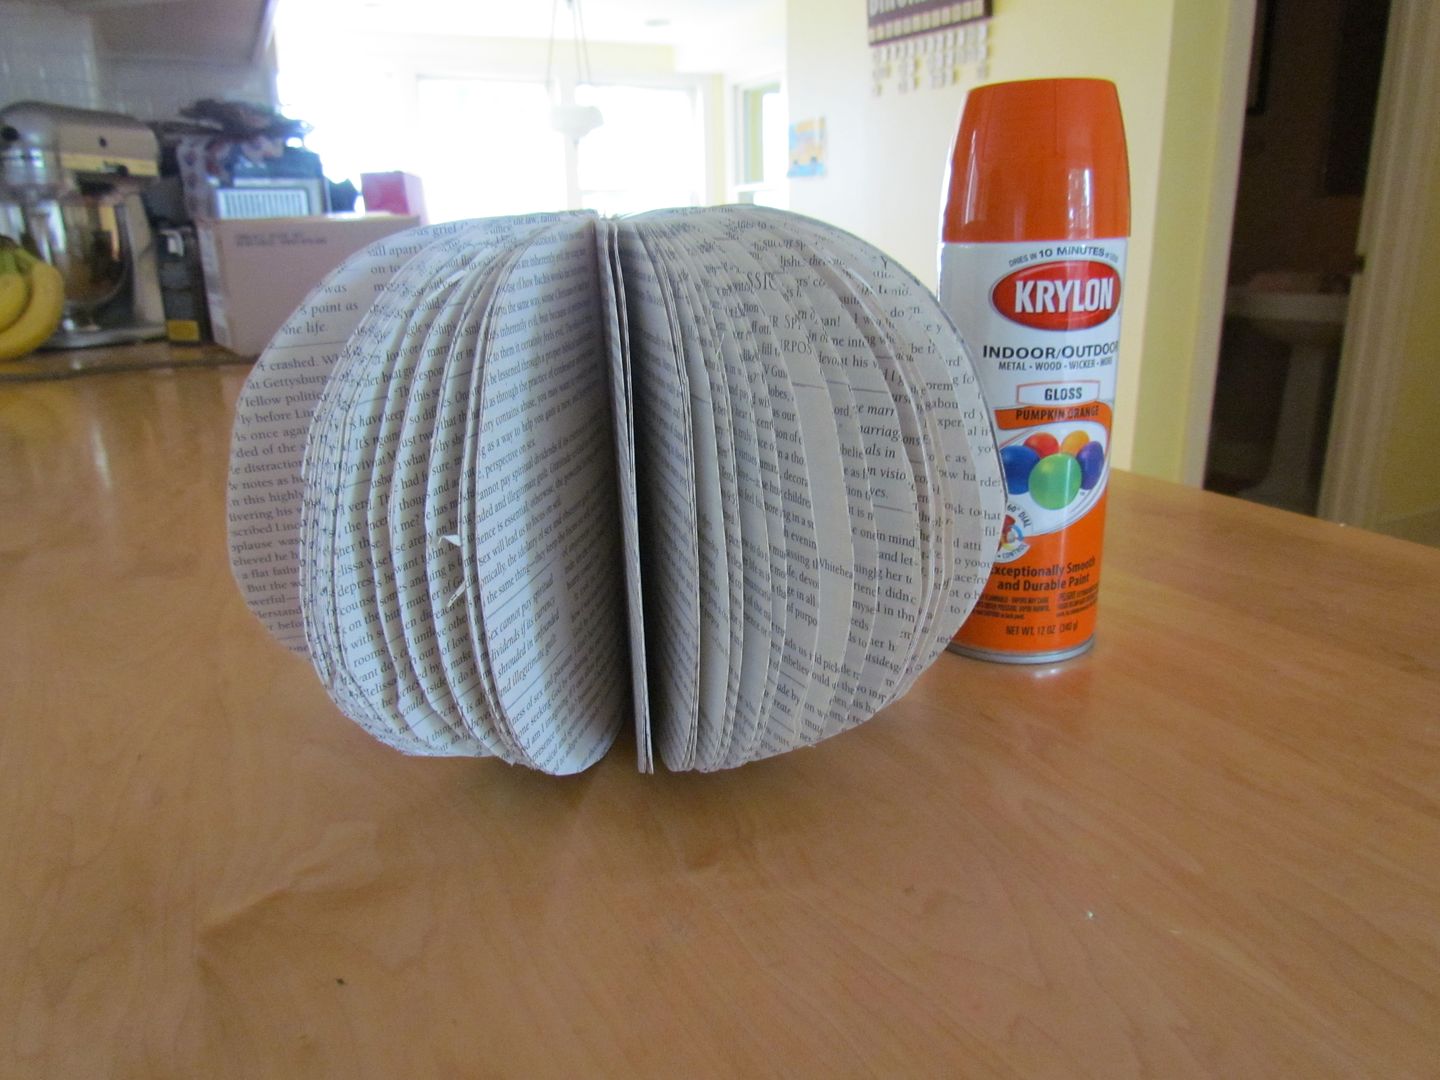
Hot glue the first and last page of the book together, but before you do make sure you break the binding of the book in several places. Doing this will allow the book to fully fan out into a pumpkin shape. Spray paint the book/pumpkin with orange paint. Don't worry about completely covering every page, it looks really neat if you allow a little different coverage on each page.
how to make a pumpkin out of a book
Grab a stick from the yard or the tree (if you're mean) and hot glue it to the top of the pumpkin. Now sit back and think to yourself "that was SUPER easy and gosh darn it, it's pretty cute too!"

Ooooh one last thing....remember about those scissors? Well after attempting to cut through several pages at a time mine ended up looking like this..............  boo hoo hoo
how to make a pumpkin out of a book

how to make a pumpkin out of a book

Thursday, September 20, 2012

Lunch Box Notes

We all know that bento box lunches are the rage lately.  Search the internet and you'll find all kinds of moms showing off how creative they can be with their kid's lunches.  In fact, Lindsi has come up with some great bento lunches!  I, however, am not that creative, nor do I feel I have the time to go crazy packing a lunch that my daughter may (or may not) scarf down in 10 minutes.  I bet most of you feel the same (kudos to those who are more like Lindsi though!).
So how do I make my daughter's lunch special?  How do I compete with an awesome bento box?  I put random notes in her lunch box!

This is not a new idea.  In fact, my mom used to put notes in my, my sister's, and even my dad's lunch box when I was growing up.  From a simple, "I love you," to a longer heartfelt letter, I loved being surprised when I opened my lunch.

I now pass the tradition on to Nutty and will continue it when Tottie is in school.  Like my mom, I have no set schedule.  Random notes are much more fun.

For now, my notes are simple.  Nutty is only in first grade and I want her to be able to read them herself.  They'll get more meaningful and personal as time goes on and she is able to read more.  Despite the simplicity, Nutty enjoys the notes and though she doesn't say it straight out, I know they make her feel special at lunch time.

Do you put notes in your child's lunch?

Wednesday, September 19, 2012

Fall Sun Spiral

My girls love anything you can hang from trees.  They love wind chimes, sun catchers, and wind socks.  Tottie and I had some time together this morning before preschool so I thought it would be fun to make a fall sun spiral with her.  When it was finished and hanging on the tree, she was so excited to watch it twirl around and catch the light!
To make your own fall sun spiral you need:
  • Clear contact paper (2 pieces, equal sizes)
  • Small leaves you find on the ground
  • Glitter
  • Any other flat, small decorations you may want (we used foam shapes)
  • Sharpie
  • Scissors
1) You'll start by drawing a spiral on one piece of your contact paper.  Make sure it is on the contact paper side and not the backing side.  Also make sure your lines are wide enough apart to fit your leaves in between them and have a bit of room left.
2) Next, peal the backing off the contact paper and add the leaves, glitter, and other decorations to the sticky side.  Make sure to keep the decorations inside the lines or you'll end up cutting them later.
3)  Take your second piece of contact paper and use it to cover the first piece, sticky side to sticky side.  Press down all over the papers to seal the edges and as much of it as you can.  Pay close attention to trying to seal the lines.  
4)  Cut along the lines.  (Look how determined Tottie is to get it right!)  Remember to cut off the excess contact paper at the beginning of your spiral and to leave a circle in the middle of your spiral.
5)  Punch a hole in the middle of the circle at the end of your spiral and use string to hang it from a tree.  Have fun watching it twirl around and catch the light!
Tottie had so much fun making the first fall sun spiral that she wanted to make a bigger one to hang on our door inside!  Though I tried to tell her it wouldn't twirl like the first, she was determined to do it anyway.

Do your kids like to make things to hang from trees?

Tuesday, September 18, 2012

Kids In The Kitchen--Guest Post

Getting your kids in the kitchen may seem like a lot of work, but it is one of the best ways to teach them life long lessons! I am going to tell you about the amazing benefits that you and your child will receive from spending time together in the kitchen while we bake monkey bread.

Let’s start with washing our hands. This is the perfect time to teach your child a thing or two about microbiology. You can say something like this:

There are teeny, tiny bugs that are invisible to your eye. They live all over the place! Some of them help us, but some of them can make us sick. It’s important to wash our hands so that we only keep the good ones around us.  Let’s sing happy birthday twice as we rub our hands together really fast with soap, and then we can rinse them with water. Why do we have to rub our hands together really fast? Good question! That’s what’s going to get the bad bugs off, since soap alone won’t do the trick, so rub, rub, rub!

Click photo to enlarge

Now it’s time to start baking the ooeey, gooey monkey bread!!

Step 1: Read through the recipe. If your kids are at an age where they can read, have them read it to you while you gather the supplies together. Hey, look at that! They are getting some reading practice and they will hardly even notice it! If they complain, then have them gather the supplies while you read it out loud to them. Little do they know, they have to read the labels on the containers to be sure that they have the right ingredients. Sneaky, sneaky…

Step 2: Make sure that you have all of the equipment that you need. A knife, a cutting board, a measuring cup, a measuring spoon, a plastic bag that zips shut, a baking pan, a microwave safe bowl, and a timer. As you do this you can discuss the importance of being prepared. Not only will it save you time, but you are less likely to be frustrated!

Step 3: Have your child read the directions of the recipe to you, or you can read it to them. Then begin the proces...
**While cutting up the dough, you can discuss knife safety and demonstrate to them how to safely use these sharp instruments.
**When you measure out the sugar, you can discuss different ways you can use the measuring cups to equal one cup.
**Be sure to show them how to level off the measuring spoon of cinnamon so that they can learn that baking requires precision. You can even discuss some of the chemical reactions that they may see in other recipes to help you explain the idea of why precision is important.
**When you melt the butter in the microwave, discuss why a microwave safe bowl is important. Let them know that you never want to put metal into the microwave and tell them why.
**Show them how to safely handle hot containers of food and explain to them why they need to wait for you to do these parts of the recipe.

Step 4: Once the recipe has been put together, bake it in a 350 degree F oven for 28 minutes. This is the perfect time to ask your kids if they have any questions. They may have questions that can open up a line of communication for you to discuss other things, like what is going on at school, or what they have been learning at friends houses.

Step 5: Once the monkey bread has cooled, be sure that you eat some of it together. By watching you eat something that they made, you are showing them that you appreciate their efforts. You are also showing them that you trust them to be good cooks. I promise you, not only will you and your kids have bonded, but their confidence will definitely be boosted too.

Carmen is the mom of three rambunctious little boys. She blogs about her family’s adventures at Adventures of the Triple B's, a place for parents with active kids to find comfort in stories that may or may not sound familiar. She uses her background in child development and her own experiences as a mother to offer tips about how to keep active children out of trouble. She talks about how to keep them safe, how to clean up their innumerable messes, and she offers recipes that they may slow down enough to actually eat. If you sometimes stop and ask yourself, “Why me?” especially while your child is scaling the walls, then come on over! Besides finding Carmen on her blog, you can chat directly with her on Twitter,Facebook, or by emailing her at adventuresofthetriplebs@gmail.com.

Monday, September 17, 2012

Saying Good-Bye to Lindsi

Photo from Jamie

It is with sadness in my heart that I let you, our readers, know that I am leaving Toys In The Dryer. It is something that Jamie and I have discussed in length and we both agree that given personal circumstances, it is the best choice for me at this time. The majority of things will remain the same around here, you just won't get my witty banter LOL. There will be a few minor changes but nothing extraordinary. You will continue to hear from me from time to time because I will "guest post" when I have the time to. Jamie will also be using some of my completed posts that are currently in draft.  Both Jamie and I have a mutual understanding that in the future I may come back full time, but for now I will take a step back.

Thank you to all of our loyal readers, we are SO grateful for your support, love and understanding.

Friday, September 14, 2012

Fall Cookies- Pinned It, Did It


fall cookies

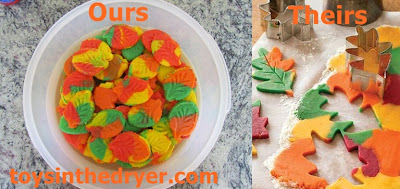
Have you ever had one of those moments (usually happens to me on Pintrest) where you stop and you go "oh DUH!"? Well that is what came to mind when I saw the original pin. I saw these cookies and knew I had to give it a whirl. It is SO easy too!
fall cookies

All you need is a bag of cookie mix, a rolling pin and a leaf shaped cookie cutter....and viola! Beautiful fall colored cookies.

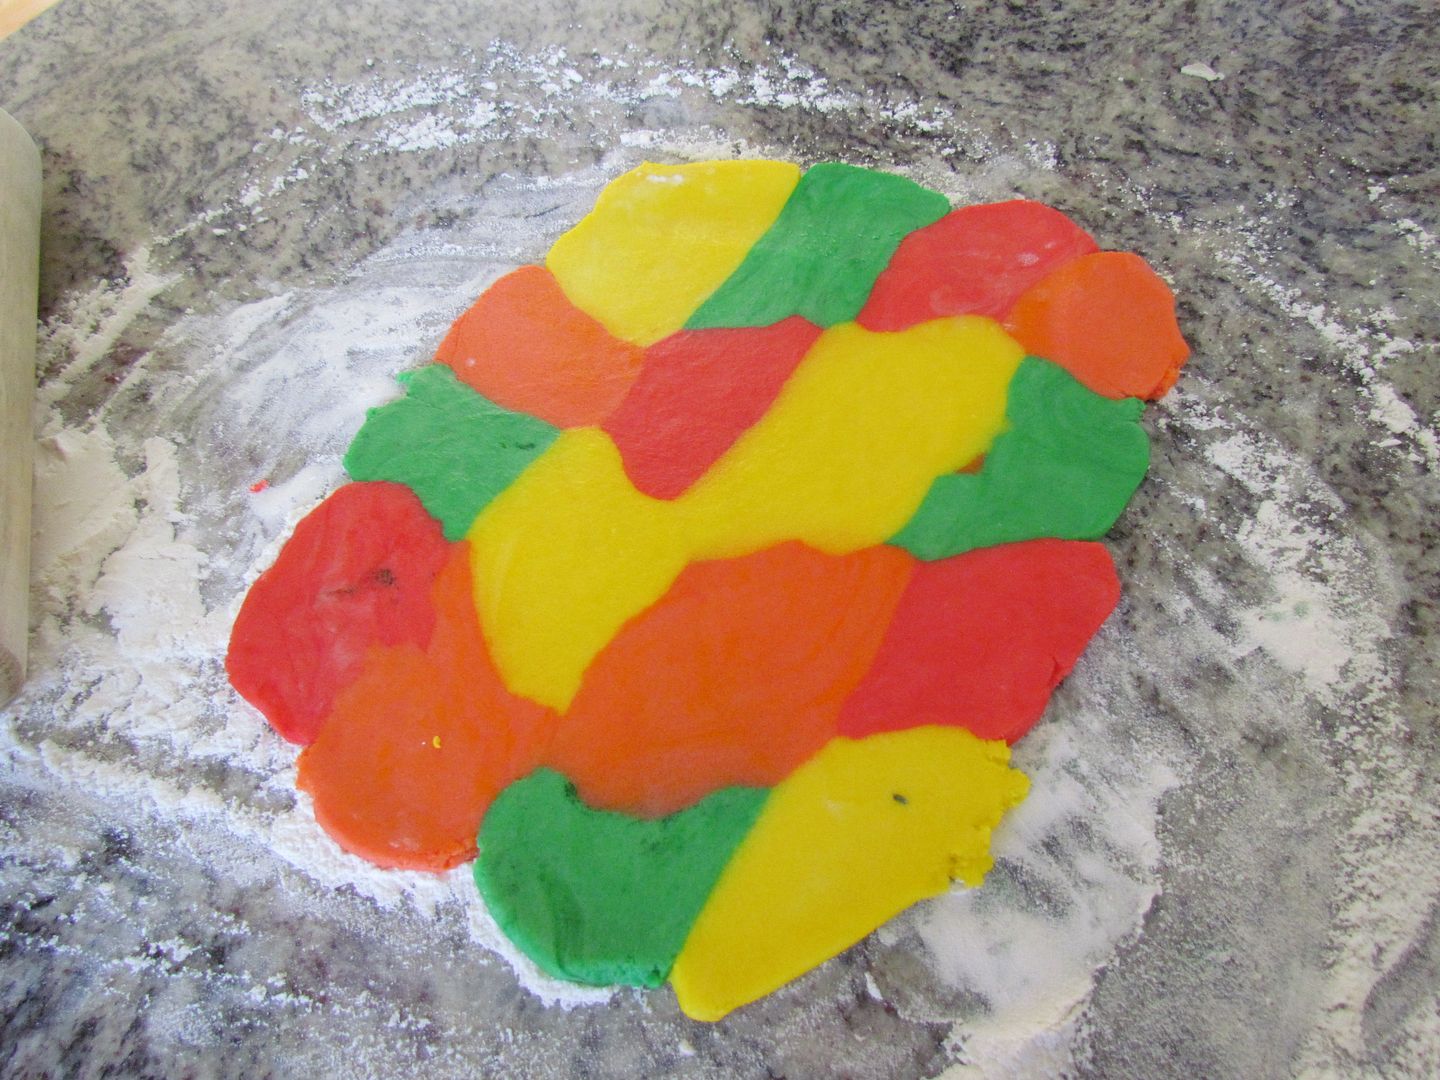
I made a double batch of sugar cookies to start. Next, I divided the batter up into four and colored each one a different fall color.
fall cookies

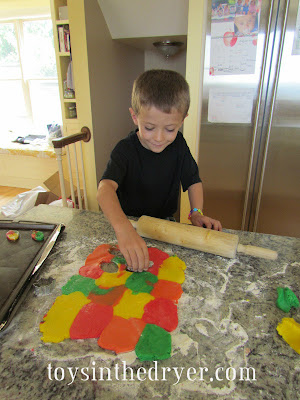
I grabbed a small chunk from each colored batch and lined it up next to each other then rolled it out.
fall cookies

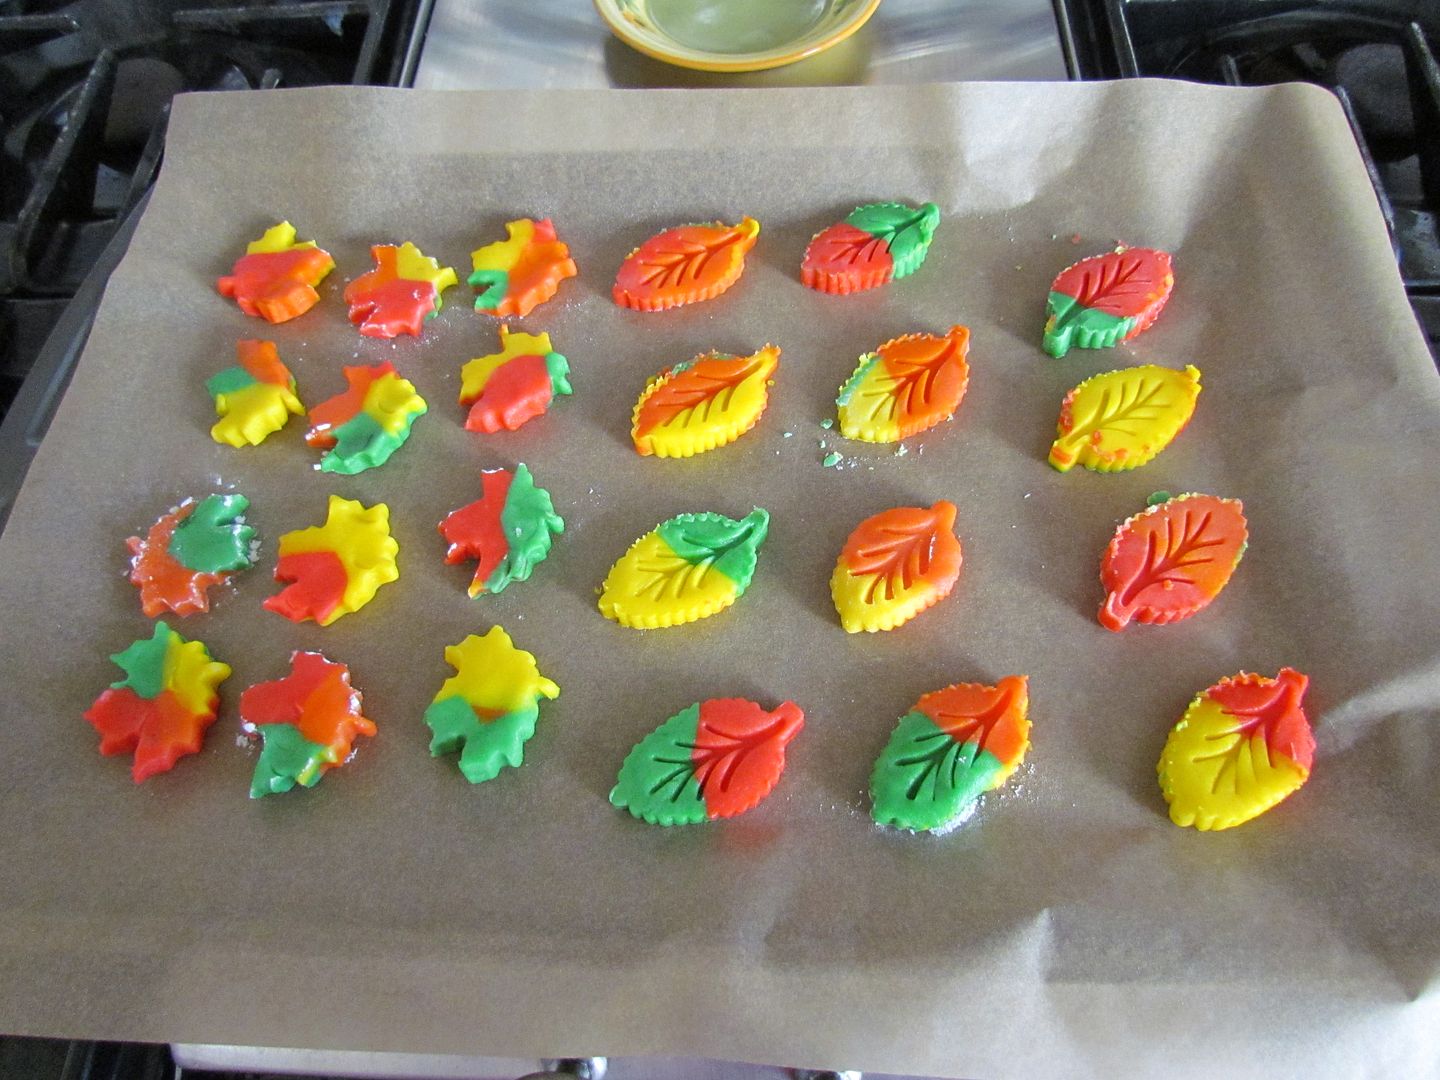
We used our two leaf shaped cutters to make the cookies and baked.
fall cookies

This sure was fun! I am totally adding this to my "to do list" for each fall.
fall cookies
Click on the button above to learn more about Pinned it, Did it!
Related Posts Plugin for WordPress, Blogger...