Showing posts with label Pinned It Did It. Show all posts

Wednesday, May 1, 2013

Cinderella Nails


Cinderella Nails
Welcome to our week of Disney! We will have five fantastic Disney inspired posts for you this week and a few giveaways! Make sure you come back each day and enter!
 
Here's an easy way to turn your princess into a REAL princess. Cinderella nails! I saw this done on adult nails and I knew I could pull this off on my daughter...and she was very pleased to let me try!
Cinderella Nails

Start with a pale blue nail polish. This may take 2-3 coats, since it is so pale.
Cinderella Nails

Next cut out Cinderella's face from a sheet of temporary tattoos. Make sure it is small enough to fit on the finger of your princess.
Cinderella Nails

Then add a bit of silver glitter nail polish.
Cinderella Nails

Last cover each nail with a top coat to keep the art in place for days to come.

Friday, April 19, 2013

Caught You Being Good FREE Printable--Pinned it, Did it!

I'm sure you've seen a bunch of those "Caught Ya Being Good" ideas all over Pinterest.  If you haven't, here and here are a few of them.  I LOVE the idea of "Caught Ya Being Good", and while I thought the jars were cute, I wanted make my own version of it.
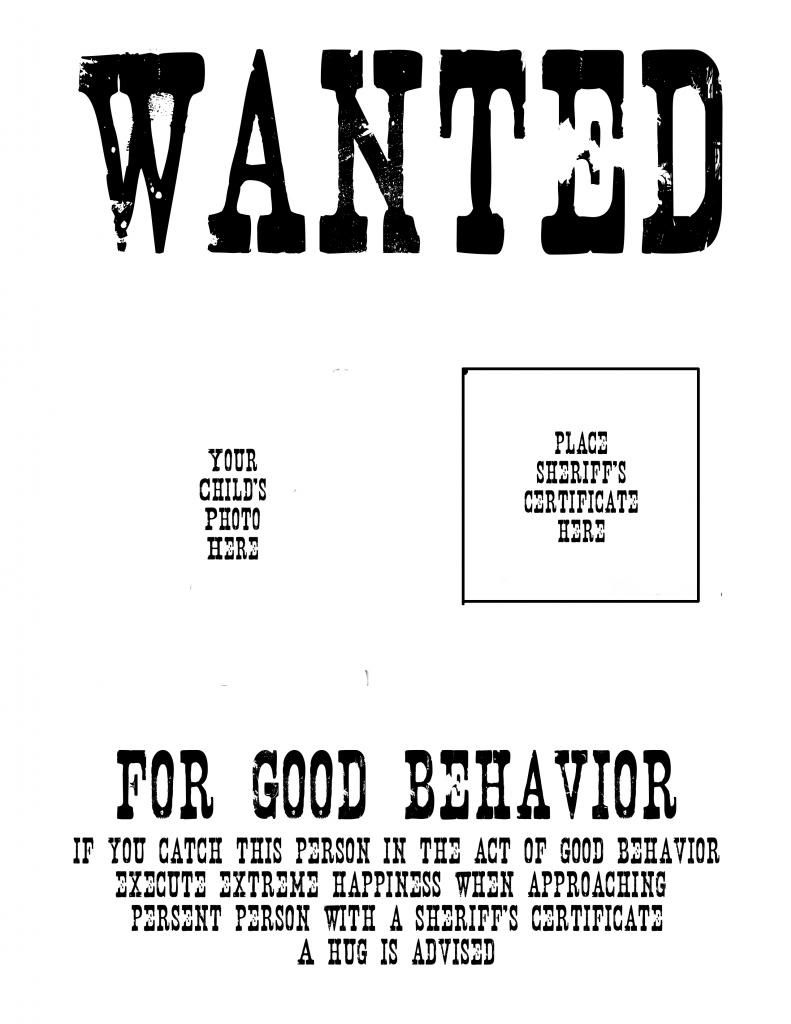
My variation is more like "Wanted For Good Behavior" and has a kinda western theme.  Yes, I know I have girls but I just couldn't resist a wanted poster so I had to tie in the rest. 

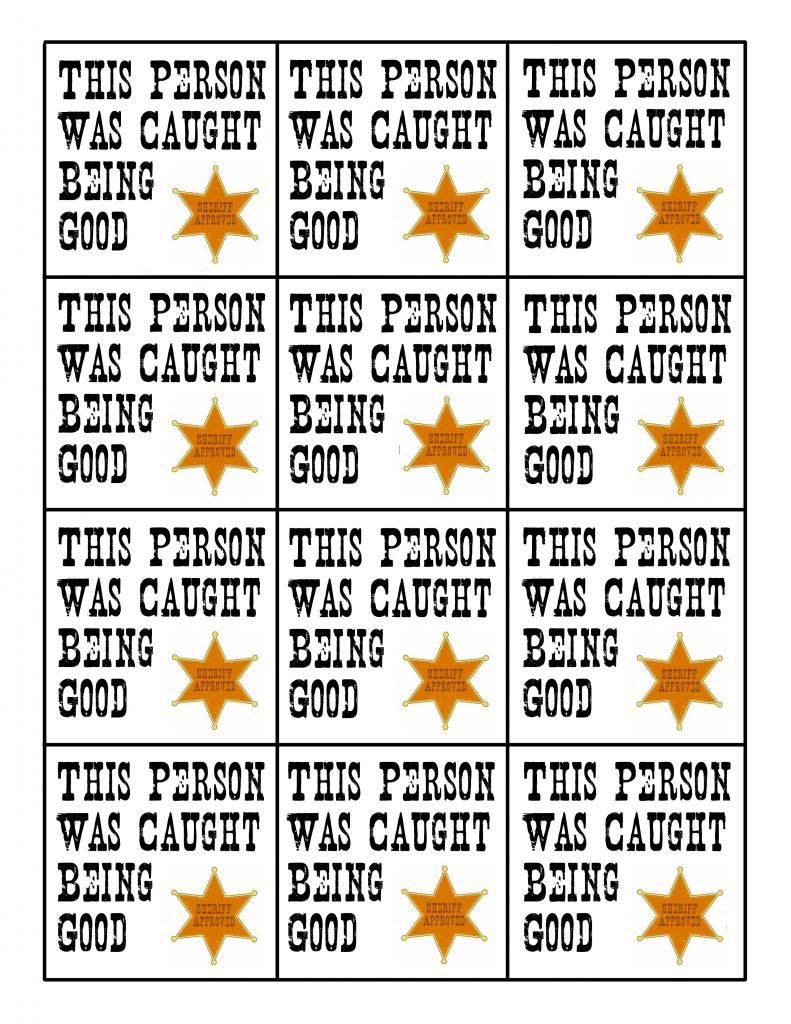
The principle is still the same--reward my girls for good behavior.  I'm just so sick of yelling at them all the time that I thought I should start acknowledging when they are good.  Now when I catch them being good (without me asking) they get a sheriff's certificate.  After they've gotten 10 certificates, they get a reward of their choosing whether it be $5.00 for their piggy bank, a date with mom or dad, or an extra treat before bed.
 photo caughtyabeinggood2.jpg
These certificates, however, are not easy to earn.  The girls only get them when they are CAUGHT being good, not when they are good after they have been asked to be.  They get them when they are nice to each other without being told to be, they get them when they play nicely by themselves, they get them for eating dinner without being hounded to eat (yes, it is a battle every night to get them to eat!), and they get them for doing chores above and beyond their normal ones.  These certificates are as much fun to give as they are to receive!

You can make a Caught You Being Good/Wanted For Good Behavior with these FREE PRINTABLES!!

caught you being goodpocketcaught ya being good
Click on each of the three parts to download them.

Hints for making your poster:
  • You can use photo editing software to replace the words "place your child's photo here" with your child's photo before printing, or you can simply print out the poster as is and glue your child's photo to it.
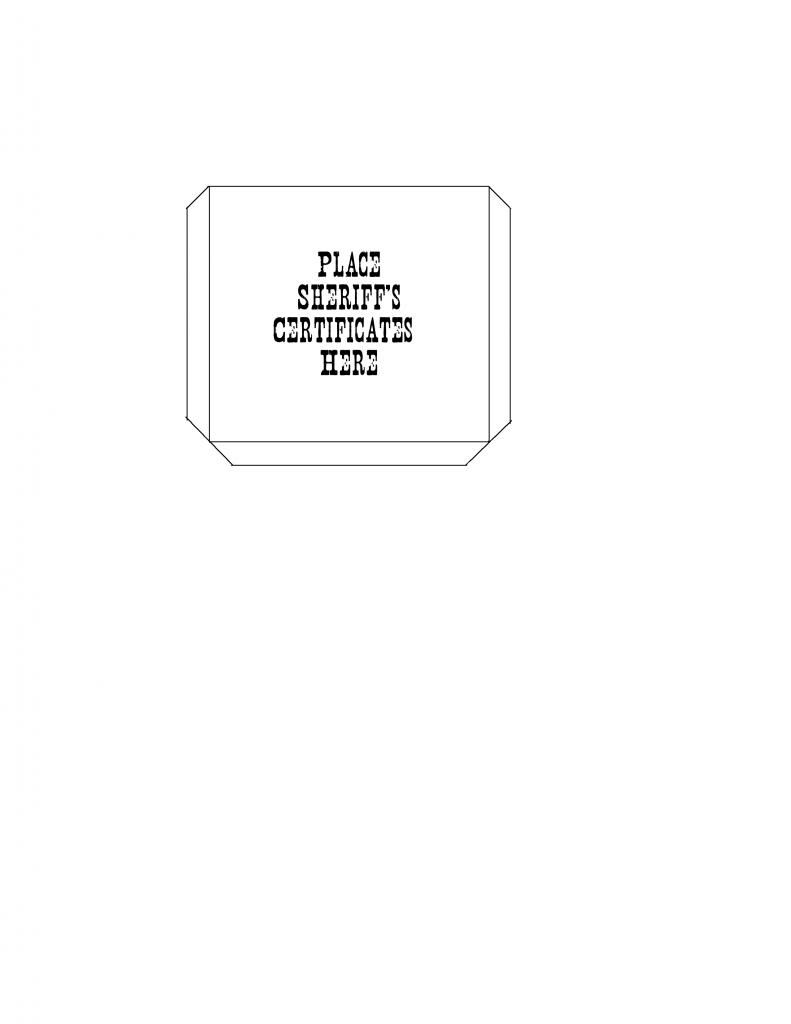
  • Cut out the pocket (second photo) and fold the flaps to make a pocket for your child to store their sheriff's certificates until they get enough for an award.
  • I laminated all of my parts to make them last longer.  You can do the same or just have them as paper.
  • Print your poster on off-white or yellowish paper to make it look more authentic (I wish I would have done that!) 

Friday, April 12, 2013

Mexican Stuffed Shells--Pinned it, Did it!

I often pin recipes on my personal Pinterest account but never actually make them.  Pinned it, Did it!  is the perfect excuse to start trying some of those recipes I've pinned.
Mexican Stuffed Shells was one that I had all the ingredients for on hand except for the shells.  I made a trip to the store for the pasta then got to work...

I quickly discovered that these tasty shells are super easy to make and one that the girls could easily help with if you let the meat mixture cool a bit.  (Tottie wanted to help me stuff the shells with the meat but I didn't  have time to wait for it to cool.)
Mexican Stuffed Shells 1 photo MexicanStuffedShells1.jpg
I WILL be making this recipe again!  They were so good and my whole family loved them.  They aren't exactly quick to make, but they are easy, which makes up for the time it takes to stuff all the shells.  
Mexican Stuffed Shells 2 photo MexicanStuffedShells2.jpg
Don't they look good to you?

Friday, March 29, 2013

Make your own laundry soap- Pinned it, Did it


I will admit I have always been skeptical of homemade laundry detergent. In fact, I often secretly laughed at those who made their own because I thought "there is no way it cleans as well as brand name, doesn't smell as good, doesn't whiten and brighten and could never wash way cleanly." Wrong! I found this pin on Pinterest and thought alright, I will give it a shot and see what I REALLY think.

LOVE it!!!! I love it so much that I thought I'd share it with you. For a grand total of  $38.78 I made enough laundry detergent to last my home of six people a year! I used the majority of her recipe but tweaked one little thing. The first thing you need to do is shred your bar soap (everyone complains about this part but I just popped it into my food processor and I was done in a matter of a minute). Once you have the soap shredded add it to a large bucket with all of the other ingredients and mix really well.

Here's what you will need:
1-2 (55 oz) Bottle of Purex Crystals Fabric Softener- Found in the detergent aisle (completely optional and up to you, it's not 100% natural however it smells yummy))
1 (4 lb 12 oz) Box of Borax- Found in the detergent aisle
1 (4 lb) Box of Arm & Hammer Baking Soda- Found in the cooking aisle
1 (3 lb) Container of OxyClean- Found in the detergent aisle. (Helps get the stains out)
1 (3 lb 7 oz) Box of Arm & Hammer Super Washing Soda- Found in the detergent aisle (totally natural)
2 (14.1 oz) Mrs. Meyer's Bar Soap (scent of your choice)

All you need is 1-2 tablespoons of detergent per load. Wash, rinse, dry as usual. It smells fantastic and works even better!

Friday, March 22, 2013

Easter Peep Basket- Pinned it, Did it

peeps
 The other day I was drooling over Pintrest posts (and I only say drooling because in all honesty I am obsessed with that site! I love the fabulous ideas people have, I love to see what people have done and figure out ways to improve upon them, and frankly I love to organize them). I saw the cutest Peep basket on there and immediately thought of my grandpa!
peeps


The 83 year old man has a mean sweet tooth and he can put away several Peeps in one sitting. Thing is though, he doesn't like them fresh and soft....he likes them stale and chewy or almost hard. Goofy man! He came over to our house last week after my lil' princess had her surgery to meet my lil' king at the bus stop and I thought I'd surprise him with a Peep basket as a thank you for his help! Oh man he was so excited!!!
peeps
It was really easy to do. I simply spent $2 at the dollar store (1 for the basket and 1 for the Easter grass). We had some sticks and Peeps already purchased and waiting for us at home. We filled the basket with the Easter Grass for a sturdy base.
peeps
After the basket was ready we inserted a candy stick into each Peep and added them to the basket one by one. When we were all done we were pretty excited with how it turned out and Grandpa was thrilled with the sugar overload!
peeps


Friday, March 8, 2013

Cake Batter Brownie Blondies--Pinned it, Did it!

I saw these cake batter brownies on Pinterest and knew they'd be a perfect Easter treat.  Plus, the caption stated, "All the pinners said they're to die for."  I made a special trip to the store just for the ingredients so Tottie and I could make them.
Tottie was so excited and couldn't wait!  She put on her apron and chef hat and we got to work...

We followed the directions on how to make these delicious treats and began to mix...
Cake Batter Brownie Blondies photo CakeBatterBrownieBlondes1.jpg
I started wondering why the batter was a sticky, marshmallow fluff consistency and became a bit skeptical of it.  My skepticism turned out to be correct because after I got the brownies in the oven and they were half-way done, I realized I forgot the milk!  (Ugh, Lindsi and I have been having a really hard time following directions in our Pinned it, Did it! posts lately.)  I'm pretty sure that little 1/4 cup of milk would have definitely helped the stickiness of the batter.

Despite forgetting the milk, these cake batter brownie blondies turned out GREAT!  They were a huge hit with my entire family (including Hubby who isn't really a sweets person).  I definitely suggest trying these yourself.  As the other pinners said, they really are "to die for."

Friday, March 1, 2013

Plan ahead cooking- Pinned it, Did it

I have a HUGE surgery coming up, in about two weeks. I am pretty nervous but incredibly excited. I know that it's going to be a ton of work for my hubby to take care of our 4 kids, work, a house, and me for those weeks so I wanted to do as much as I could to make things easier for him. If you're on Pintrest you have likely seen the pins related to crock pot meals. Well, I did it! I'm pretty excited! We've been doing this for a while now but today I finished making 2 and a half weeks worth of meals for the big surgery day!

I started with a list of meals I wanted to make: Chicken Wild Rice Soup, Beef Fajitas, Vegetable Beef Soup, Taco Meat,  Pot Roast, Turkey Breast, Omelets, Mini Corn Dog Muffins, and I even threw in some chocolate chip cookies to boot! Once I figured out the meals I made a list of items I needed and purchased them.
The grocery man came today with my order and I laid it all out on my counter and started to wash, cut, peel, chop and brown.

I tossed each necessary ingredient into a gallon sized ziploc bag and labeled them with the meal, temperature to heat and time to heat. It took me about 3 1/2 hours to get everything into their bags and another 45 minutes to clean up. But I know for a fact it will be well worth it!

Friday, February 22, 2013

Embroidery Floss Eggs- Pinned it, Did it

Jamie and I have always said we'd be honest when we "failed" at something...so here's another one of our honest posts.
Here's the original pin
here's mine
 Here's what you SHOULD do:

Blow up a balloon (pretty small), use GLUE to wet your embroidery floss and then cover the balloon with the gluey floss, After it completely dries pop the balloon and remove it. You will be left with a great looking Easter egg!
Here's what I did WRONG:
Instead of using glue, I used Mod Podge. I thought that it would be OK but it turns out that the Mod Podge left an additional shell on top of the balloon and didn't give me the effect I was hoping for.

Friday, February 15, 2013

Cadbury® Creme Eggs® Milkshakes--Pinned it, Did it!

Easter is one of my favorite times of year for candy because that's when Cadbury® Creme Eggs® come out.  I am seriously addicted to these eggs!
 I was browsing Pinterest last Easter and came across Cadbury® Creme Egg® Milkshakes.  OMG, yum!  I at first thought that this link would lead me to a recipe that made milkshakes that tasted like the best little eggs ever, however, these milkshakes are made with them.

They are nothing more than Cadbury® Creme Eggs®, vanilla ice cream, and a little bit of milk blended together.  If you want to get all technical about ratios how how much goes into the shakes you can visit the original site recipe.
Though simple, this milkshake is to die for!  Super sweet, however, so I wouldn't recommend drinking a glass the size of what they made.

What is your favorite Easter candy?

fall cookies
Click on the button above to learn more about Pinned it, Did it!

Friday, January 11, 2013

Healthy Chocolate Frosting Shots--Pinned it, Did it!

I'm not exactly sure when or how I first discovered the blog Chocolate Covered Katie but I've been lurking around it for quite some time.  I've pinned a few of her recipes but mostly I've just bookmarked her entire site!
I FINALLY decided to try something from Katie's blog!  Her chocolate frosting shots aren't something I've pinned yet but I'm going to now!  They are both easy and yummy!

To make chocolate frosting shots you need just 4 ingrediants:
  • full fat coconut milk
  • cocoa powder
  • vanilla extract
  • sweetener such as stevia or powdered sugar
Because I think Chocolate Covered Katie is such an awesome site I'm going to make you go there for the actual recipe.
Yes, her's look much more appetizing than mine! Mine kinda look like poop compared to hers!

Ok, I do have to make a couple confessions...  
1) While I thought the frosting was heavenly on graham crackers and also think it would be good on other things, I wasn't thrilled with it in the shot form (i.e. by itself).  My daughter also didn't like it by itself but thought it was ok on graham crackers.  
2) I like sweet things so I did end up adding powdered sugar to my frosting (and probably more than I should have).  Katie does not add it to hers but says that you can add it to taste.  

What do you think?  Would healthy chocolate frosting be something you would try?

Friday, January 4, 2013

How To Draw--Pinned it, Did it!


I don't know about your kids but my girls LOVE to draw!  I saw this pin (that ultimately leads to this website which is much better) a while ago and thought it would be fun for Nutty to try.  Well, both Nutty and Tottie ended up trying the drawings...
Photobucket
Nutty (6 years old) was able to follow the original patterns/drawings.  Tottie (4 years old) needed a little extra help by copying how I drew them based on the patterns (my drawings are the first photo).  I broke each step into smaller steps (i.e. one line or shape at a time).  I was completely impressed how each girl did!  Compared to the original drawings, they did  great job!
  Photobucket
I give this pin a thumbs up!  Yes, even a 4 year old can learn to draw (with a little extra help)!  What do you think?  Could your kids do these?

Friday, December 7, 2012

Pinned it, Did it---Snowday Ice Cream

This post was actually written last winter and for some odd reason we never published it.  We found Snowday Ice Cream on Pinterest but have since lost the original pin.  Here's our take on it though :)  Yes, the lack of snow continues this year! 

Where we live (the frozen tundra) we normally have a surplus of snow for this tasty treat. Notice I said "normally?" Yeah well this year, not so much...in fact this year was the first year I can remember in my 30-something years where we had a brown Christmas. Well we finally got a little bit of snow (just barely enough to cover the ground) and I can finally share this tasty treat with you.
snow ice cream recipe

Here is what you will need:
8 cups of CLEAN snow- steer clear of the yellow snow, for obvious reasons
1 can of sweetened condensed  milk
1-2 tsp vanilla extract (or almond is great too!)
sprinkles (because who doesn't like sprinkles)
snow ice cream recipe

Grab your largest bowl and fill it with the fresh snow that has just fallen.
Estimate 8 cups (give or take a little) and pour the sweetened condensed milk and flavoring into the snow and mix well. When you are done add some sprinkles, whipped cream, a cherry on top, or whatever else you like on ice cream and ENJOY!
snow ice cream recipe

*the only bummer thing is that this "ice cream" doesn't keep well....so don't bother trying to freeze the left overs because you won't enjoy it the second day.

Friday, November 30, 2012

Milk Art--Pinned it, Did it!

I've seen milk art all over Pinterest and was excited to try it with my girls.  Unfortunately, it wasn't quite as awesome as I hoped it would be...
I'm not saying it wasn't cool and we didn't have fun...I'm just saying it wasn't as cool as the original post from Pinterest.  Theirs was just so neat and at the end was a really fun video.  Ours didn't look like either of those.
We started by putting drops of food coloring in a thin layer of 2% milk on a plate...
Then we dropped dish soap onto our food coloring drops and watched it react with the fat in the milk.  The food coloring instantly dispersed all over the milk.  It was neat to watch but again, not as cool as the video in the original post.
In fact, my girls had more fun swirling the food coloring with a fork and making the above conglomerate.
I then thought long and hard and took a second look at the original post. They had more food coloring and had it all in one place vs random drops.  So...we tried again...Much better!!  It was quick but cool.  Again, however, the video in the original post was even better and I had hoped ours would do the same.  It just didn't.
Our milk art vs the original post milk art.

Have you done milk art with your kids?  How did yours turn out?


Related Posts Plugin for WordPress, Blogger...