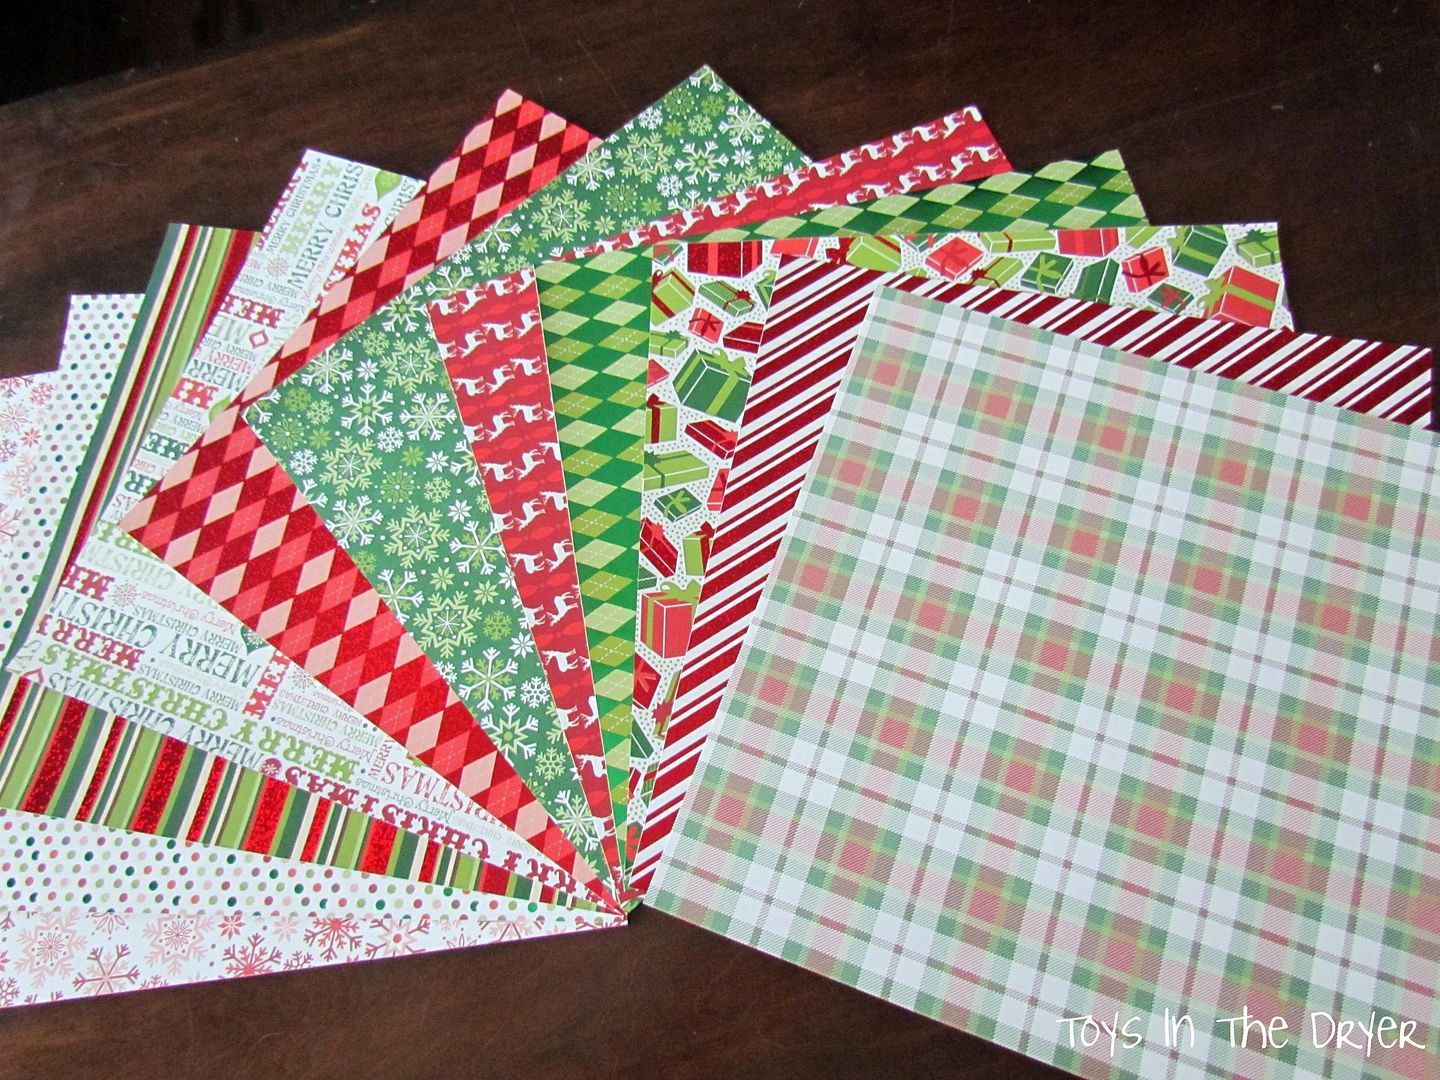
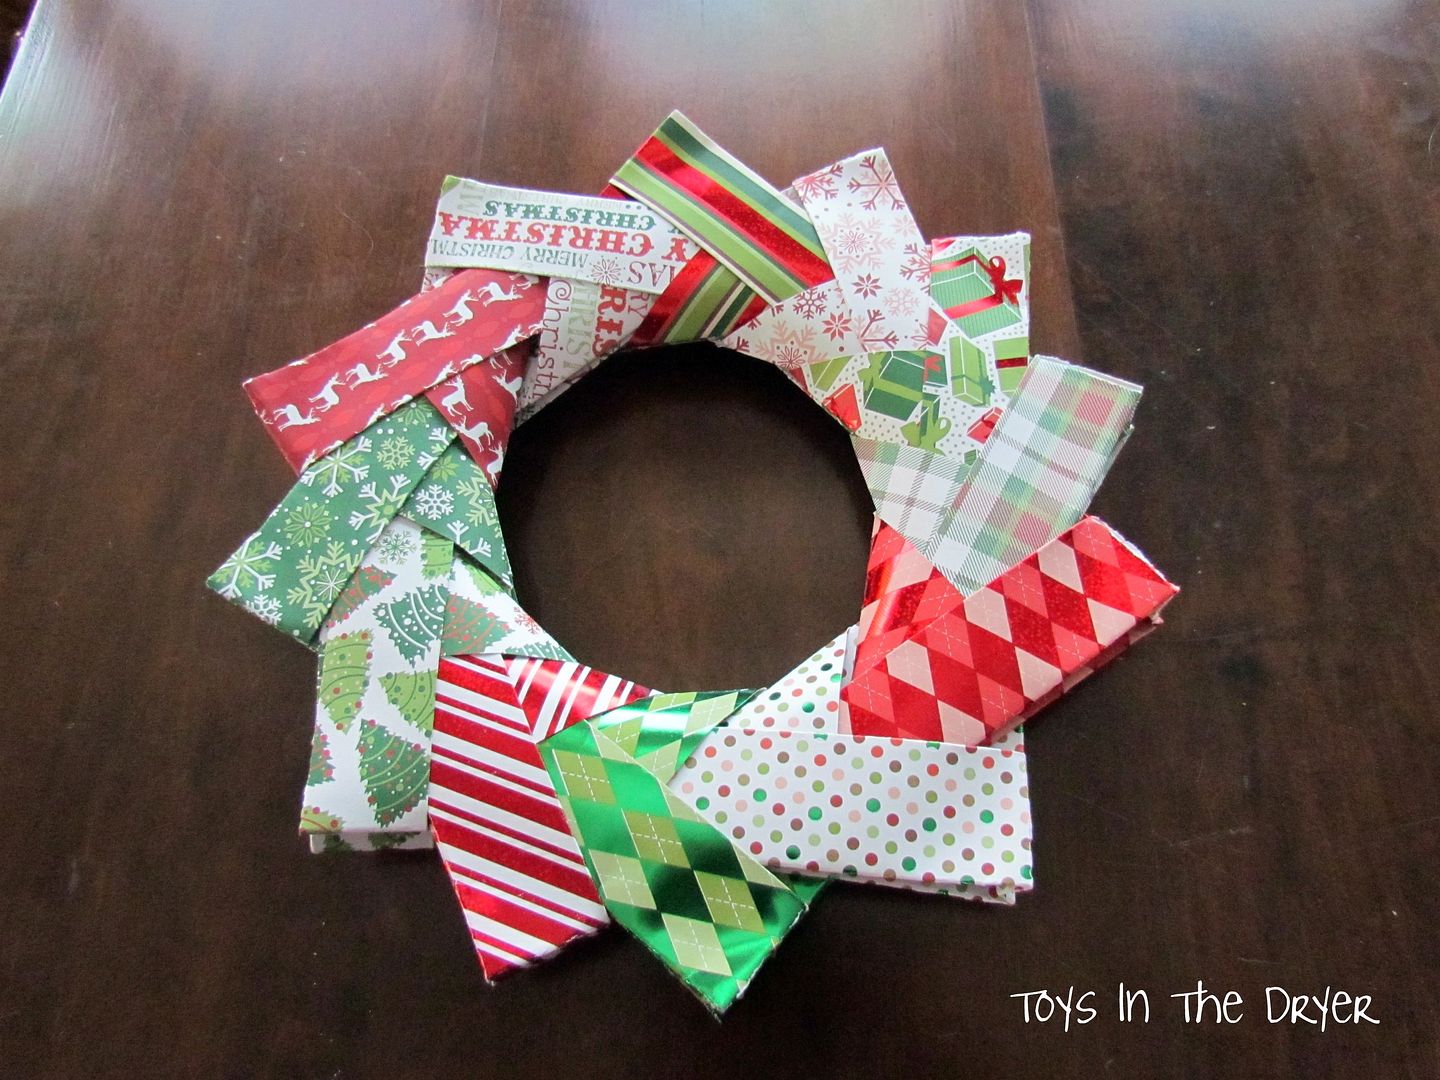
I was blog hopping the other day (yup, I'm a rabbit) and saw a really neat tutorial for a few Origami projects. The one that really struck me as neat was this tutorial for a wreath. I had to play around quite a bit because the tutorial was in Japanese (I think) and the measurements were in metric. The lady who shared the tutorial used paper that was about half the size, thus leading to half the size wreath...I just so happened to have a bunch of Christmas themed 12"x12" paper laying around and I thought I would try and make one with my oldest boy. I think you could say it was a success! (He.....OK, I didn't want to stop making them!)
Here is what you will need:
12 sheets of colorful paper (pattern and print of your choice)
a ruler
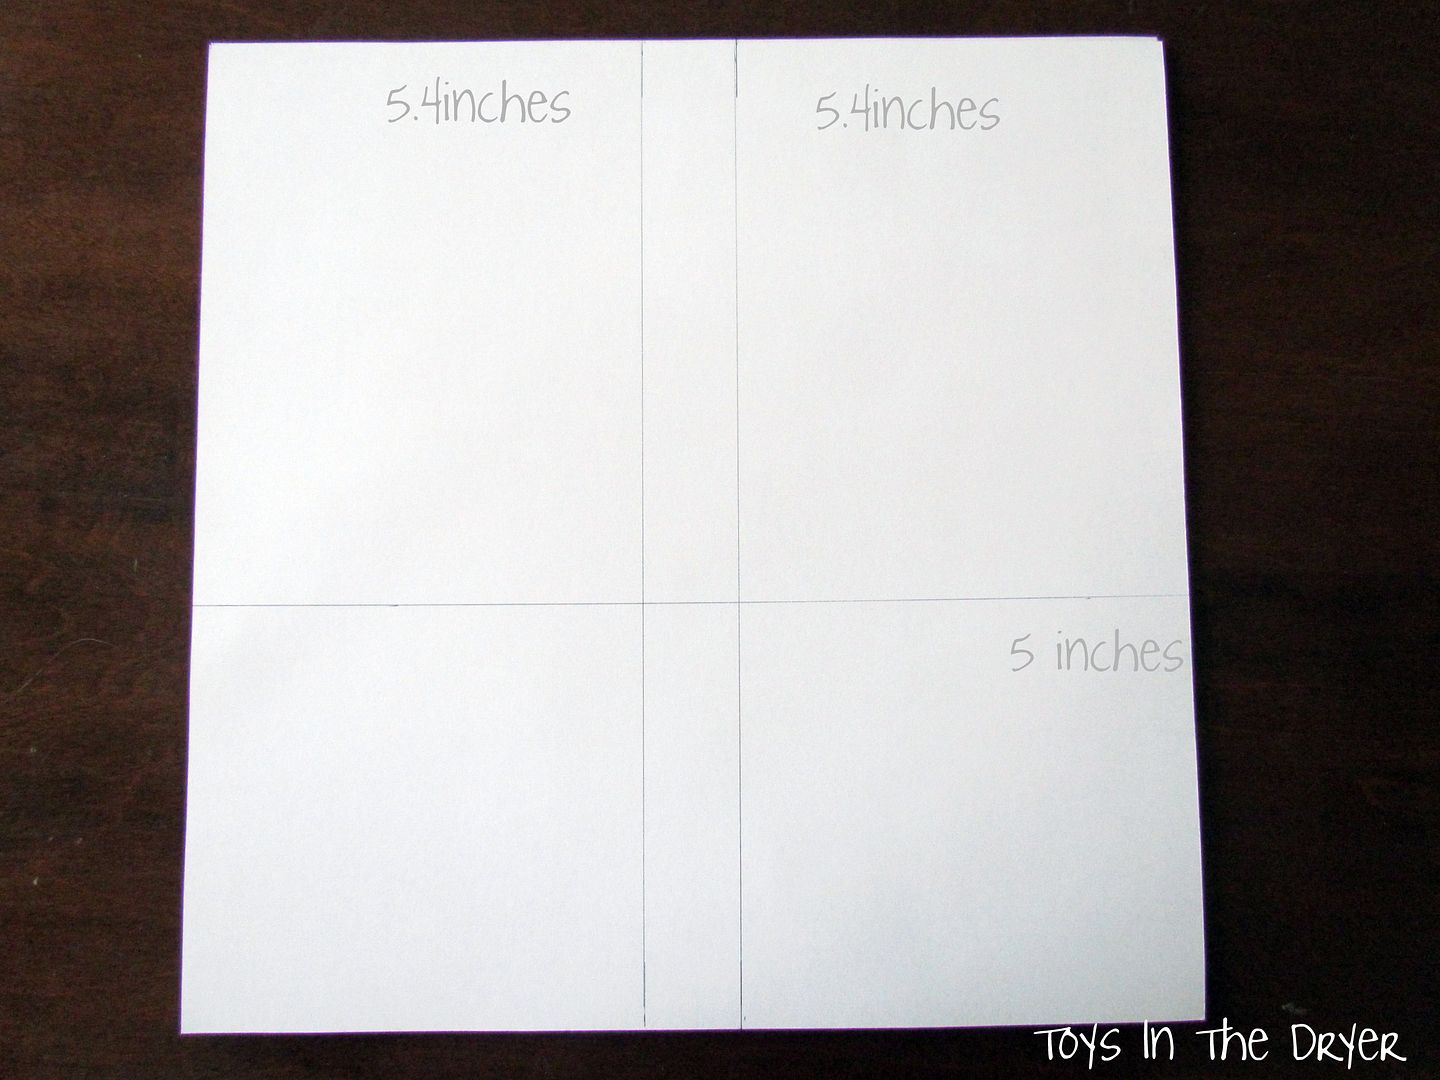
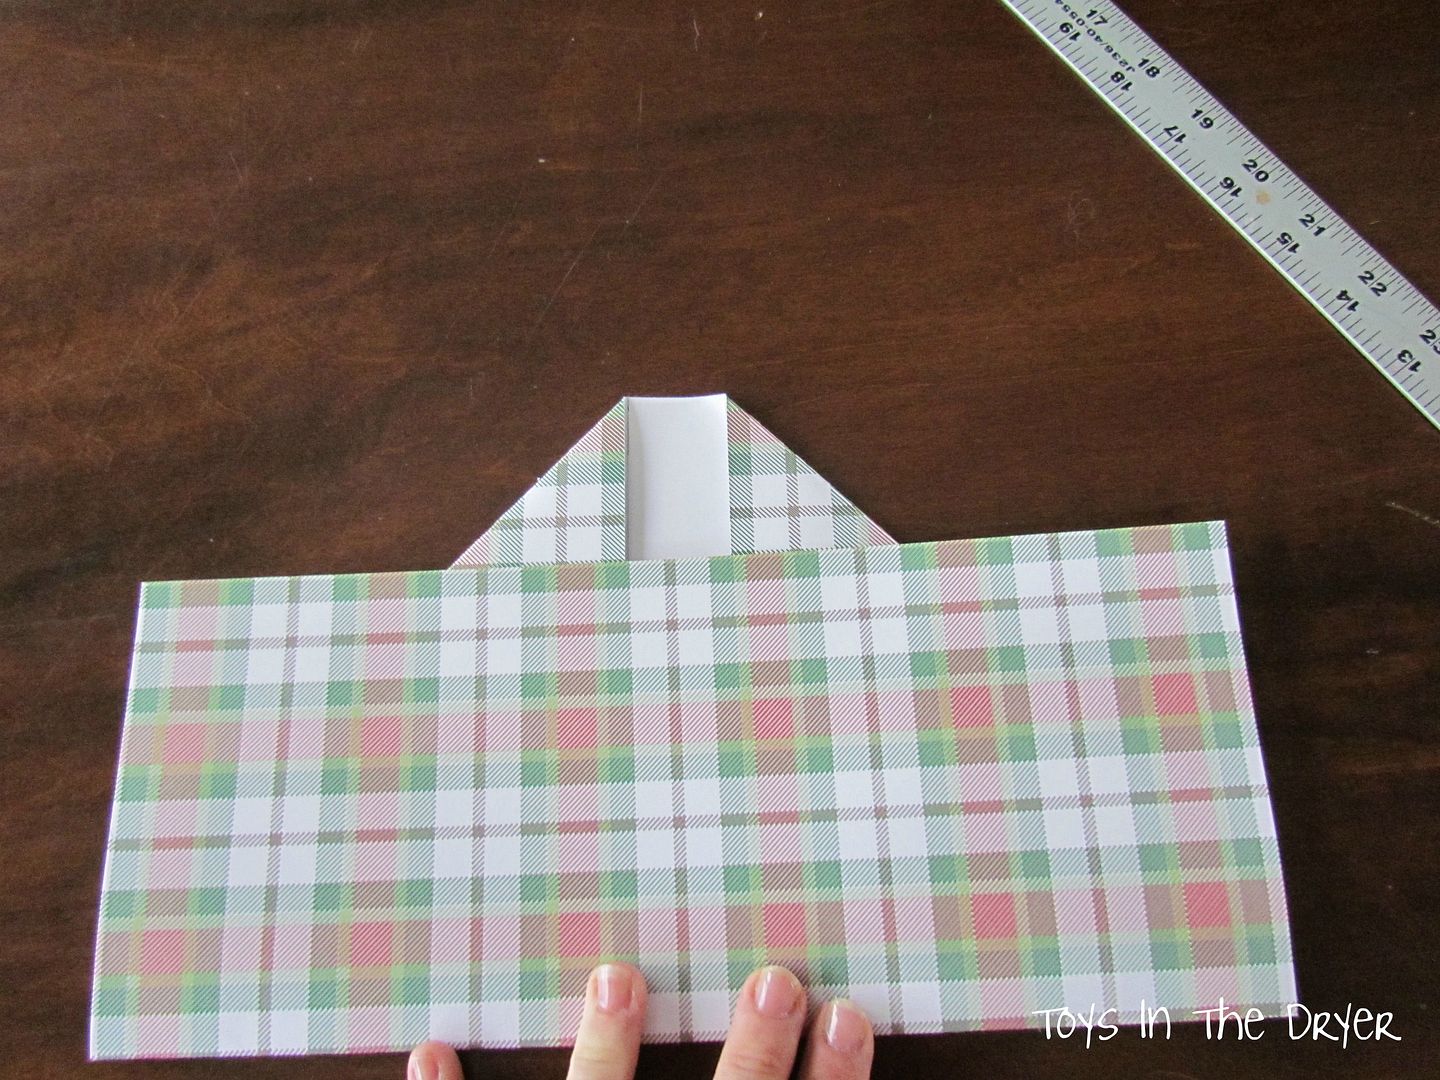
Carefully mark each sheet of paper on the back side. One line should run 5 inches from the bottom of the paper, another line should run the opposite direction about 5.4inches from each side....like so.
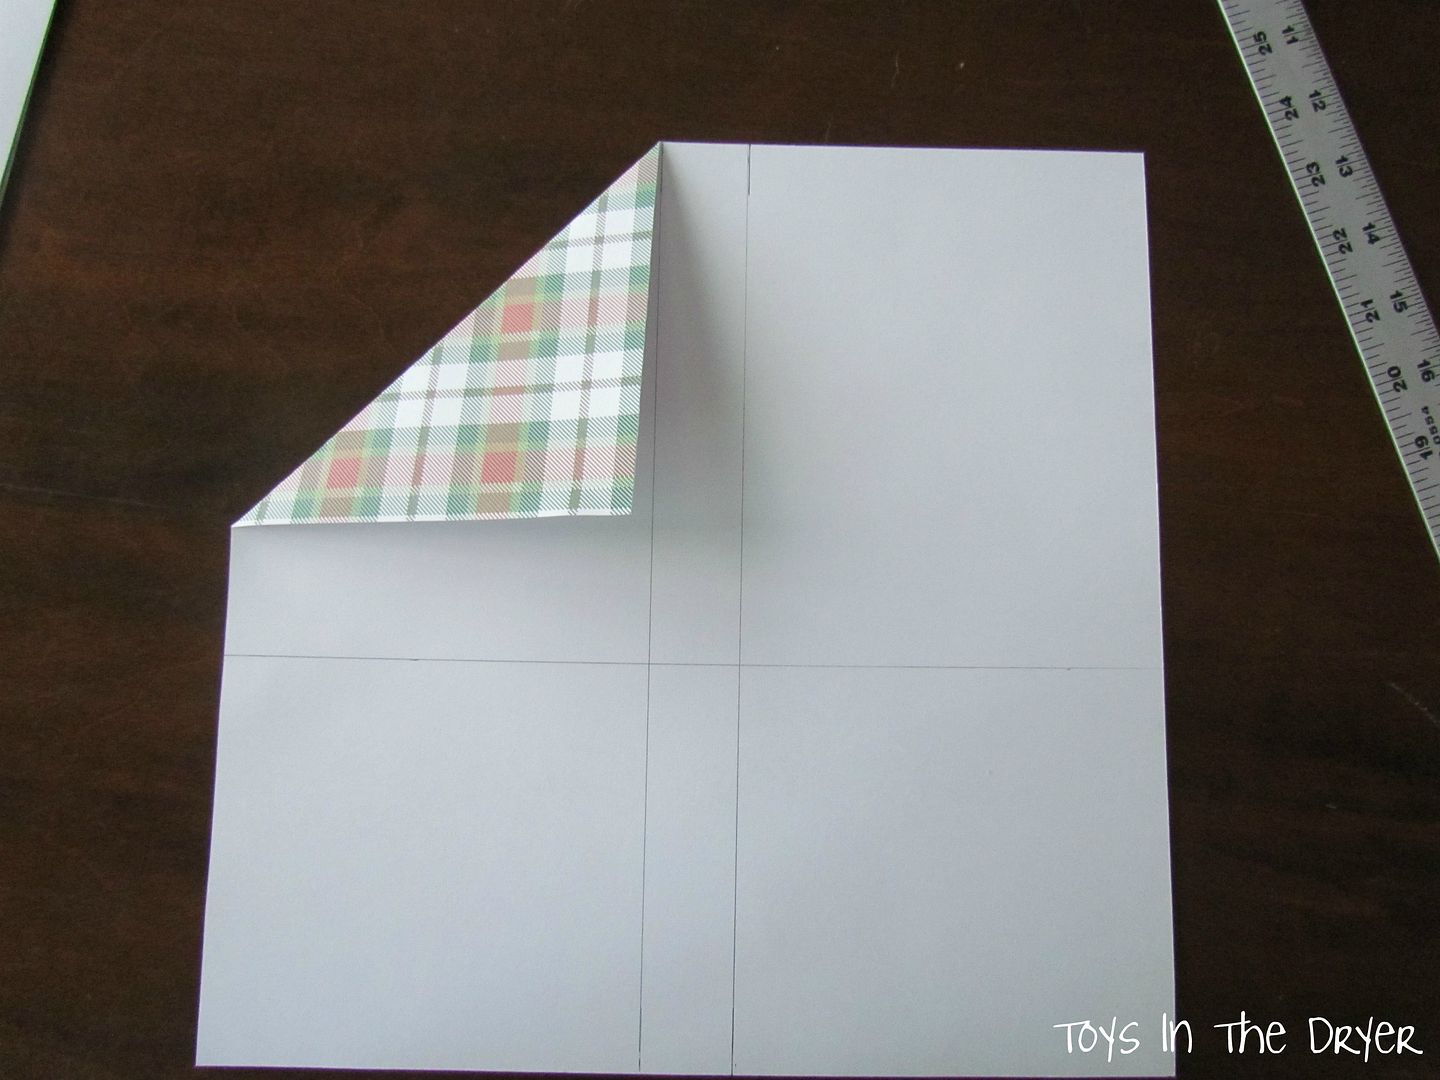
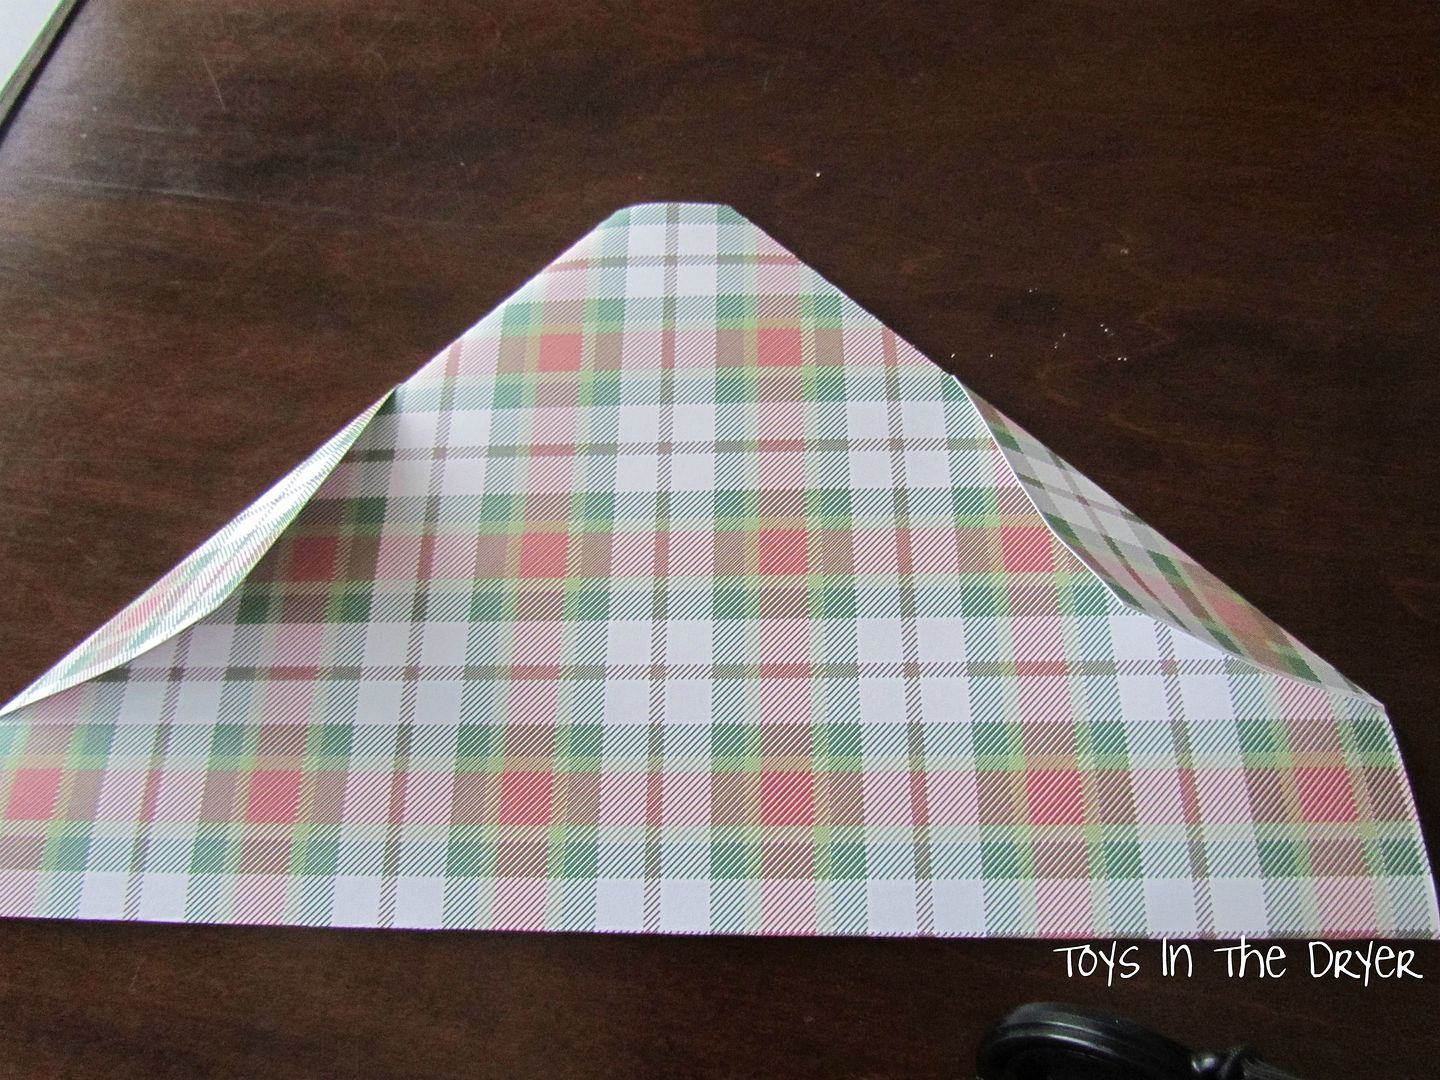
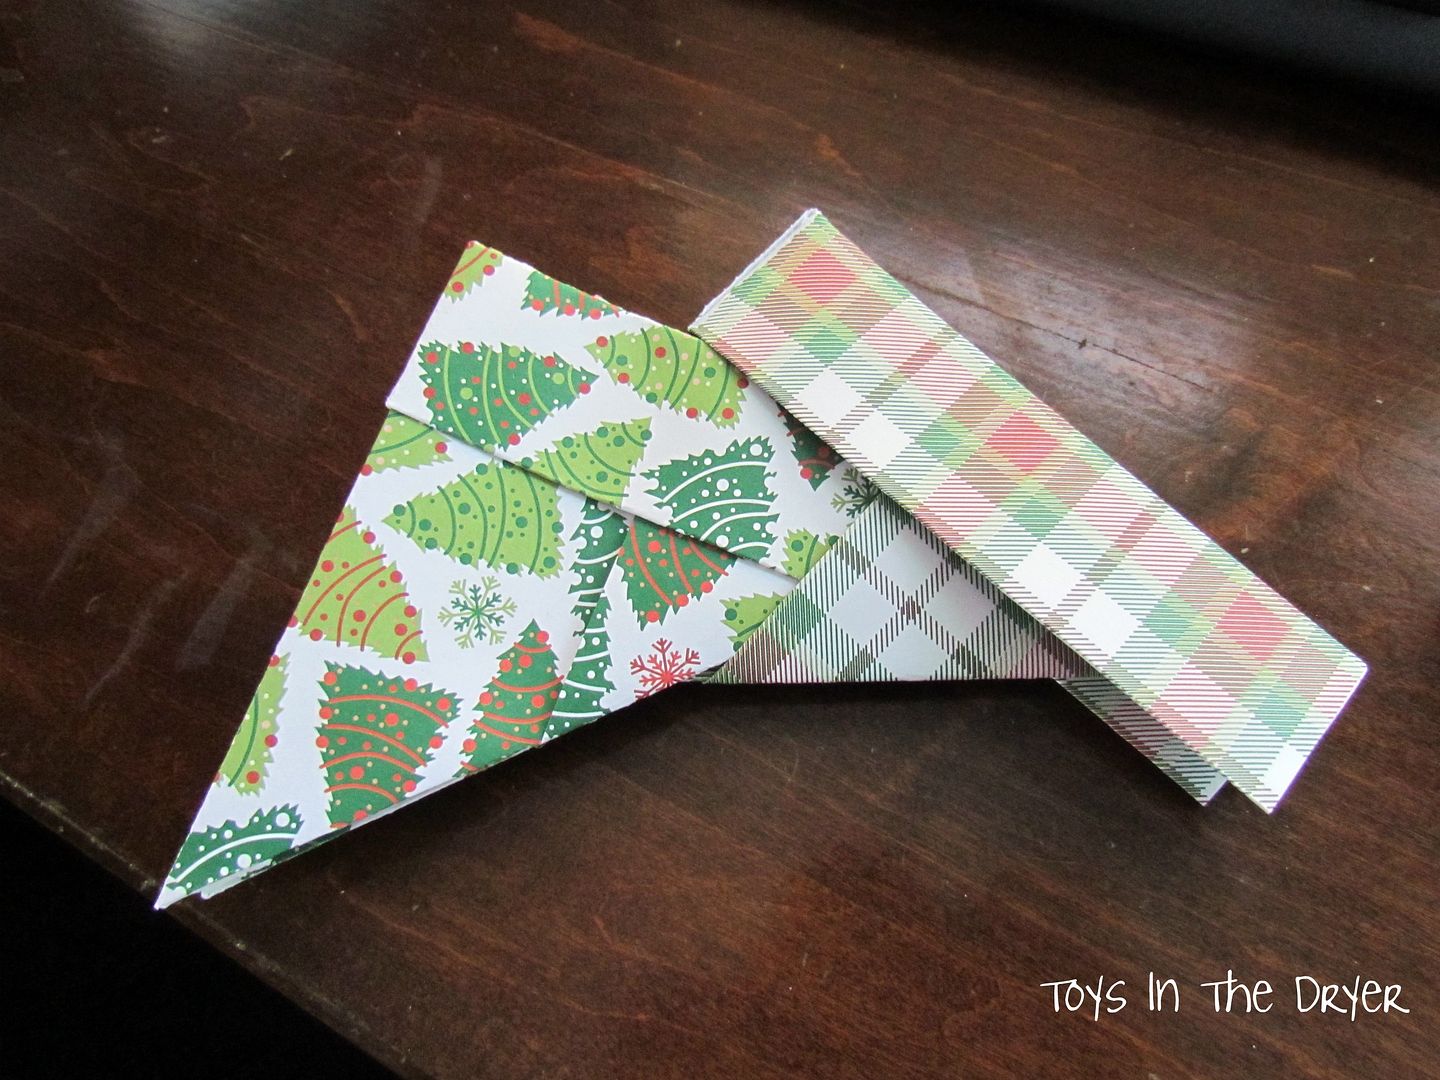
Fold two of the corners down to the lines as demonstrated in the photo.
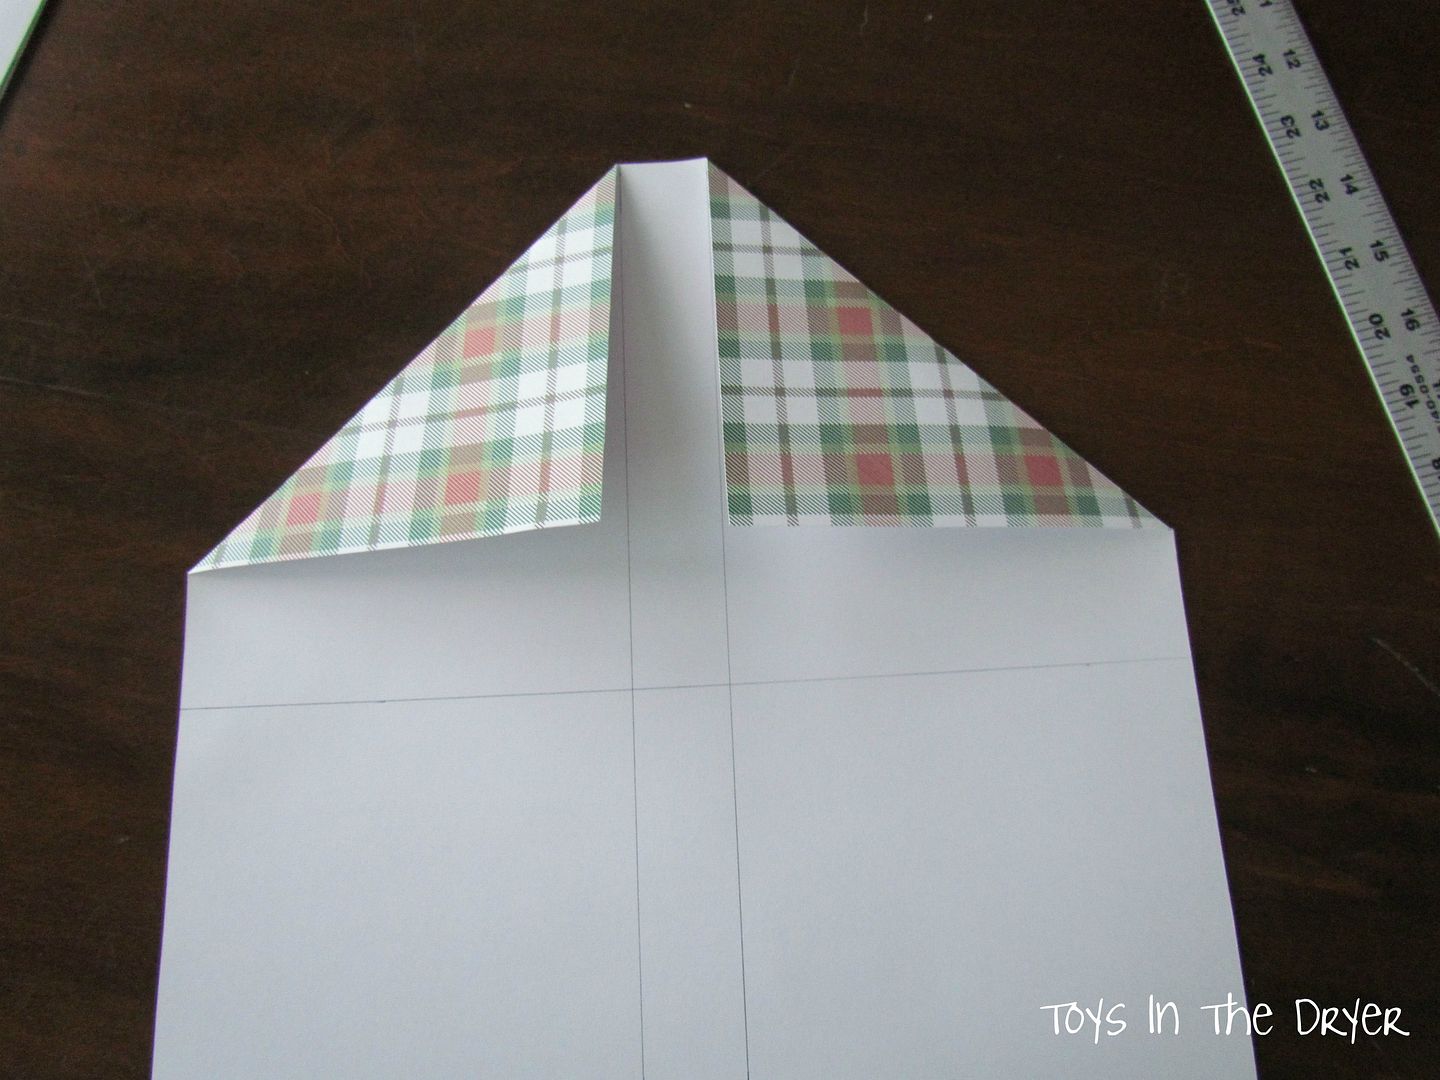
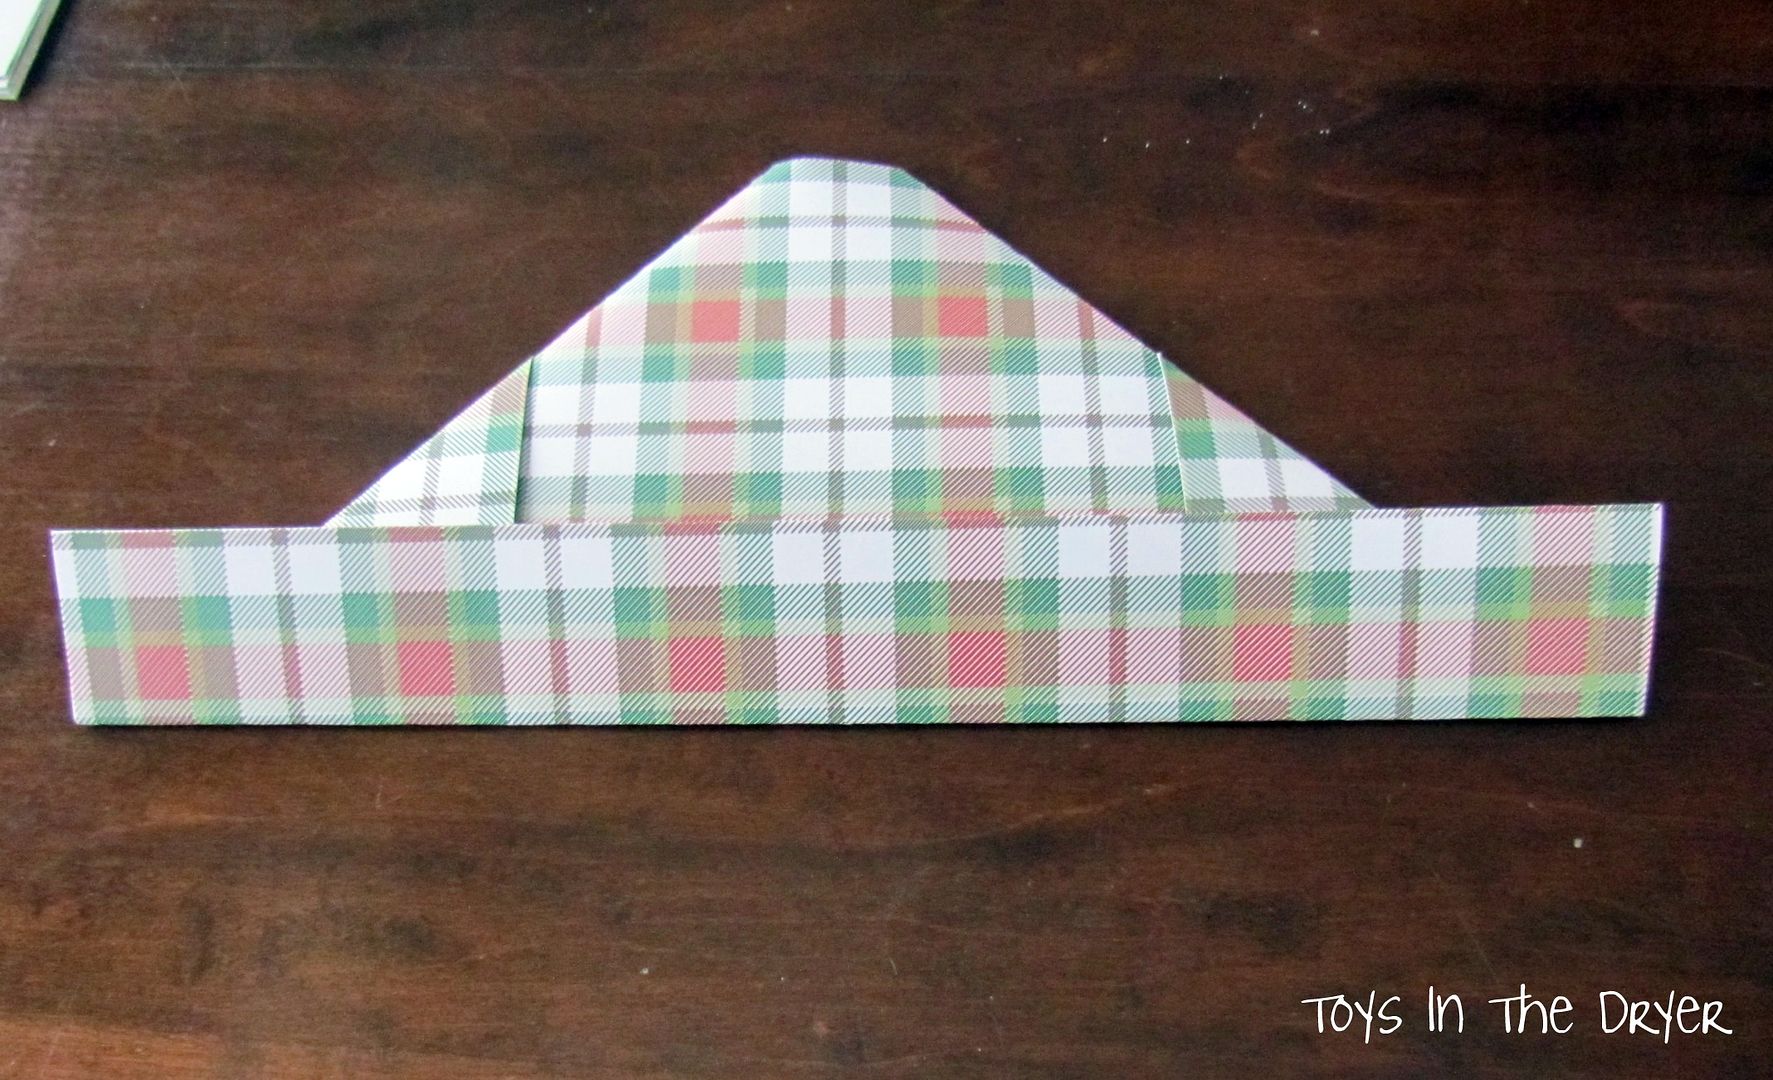
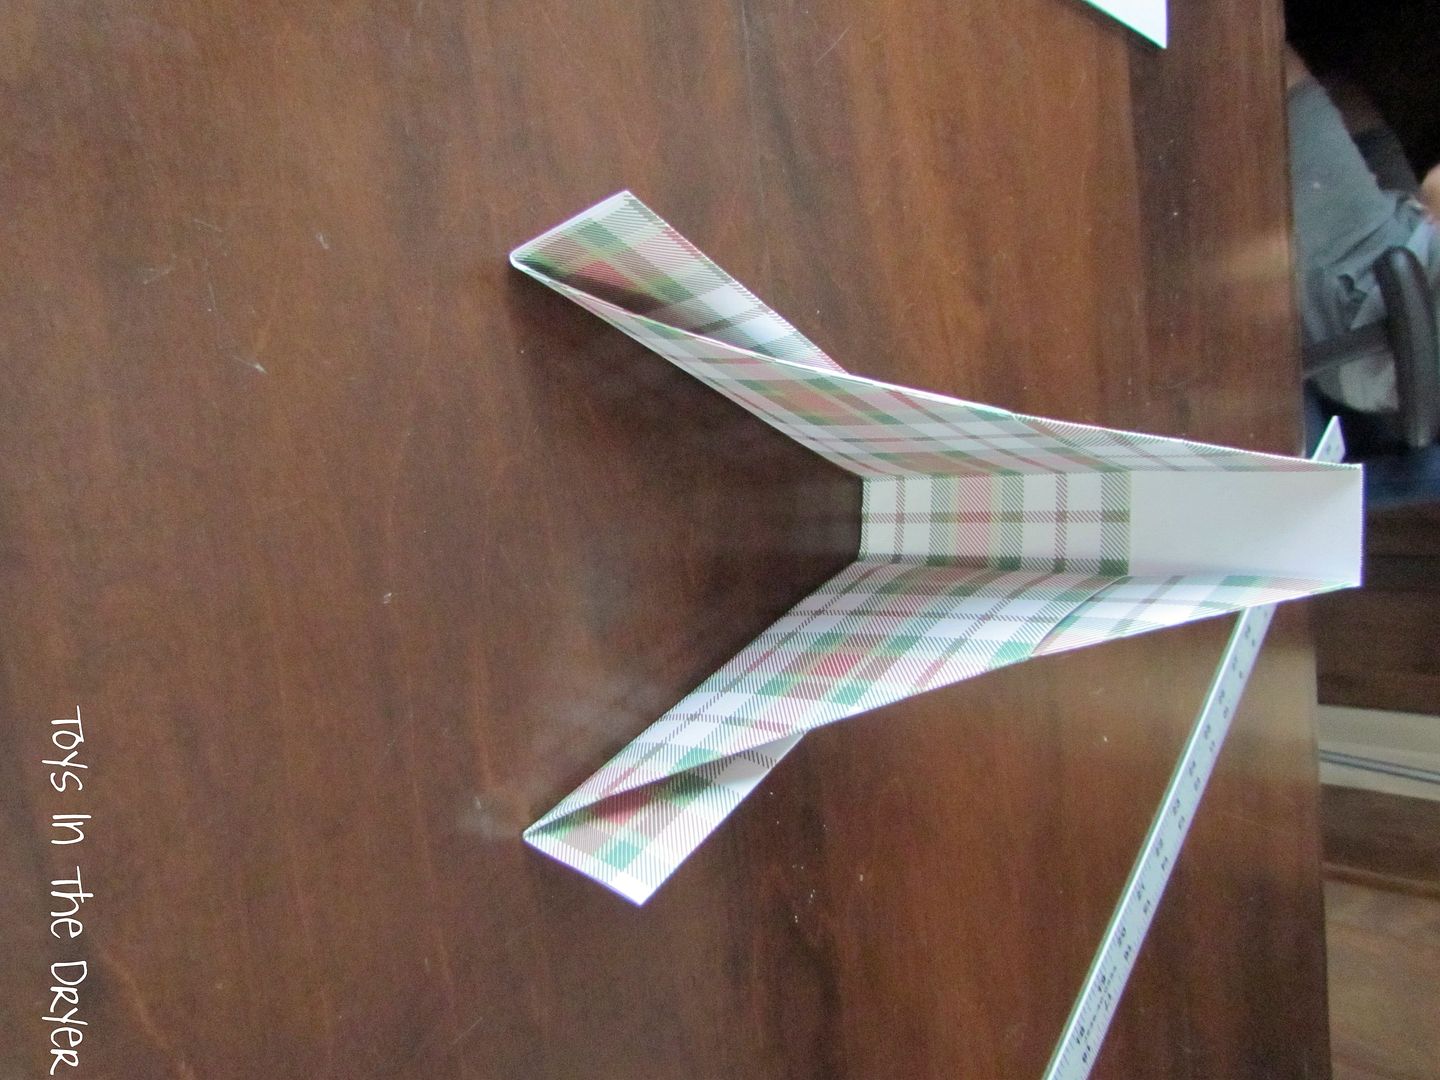
Continue along following the folds I have made in order.
Once you have all 12 sheets of paper folded you can insert them into each other and after the last piece you will have a BEAUTIFUL wreath.
I used a dab of hot glue (I like it and that is why) to add some extra strength and attached a little red ribbon to the back side and hung it on my door.

Very cute idea! I'm stopping by from the Tip Junkie party. I would love for you to check out my blog & link this up to My Favorite Things party! It's going on all week,
ReplyDelete& be sure to check out my giveaway too!
Thanks
~Iffy~
www.stayathomenation.blogspot.com
Oh, Lindsi, I love this!! I just found it and pinned it for next Christmas!
ReplyDelete