Thursday, September 20, 2012

Lunch Box Notes

We all know that bento box lunches are the rage lately.  Search the internet and you'll find all kinds of moms showing off how creative they can be with their kid's lunches.  In fact, Lindsi has come up with some great bento lunches!  I, however, am not that creative, nor do I feel I have the time to go crazy packing a lunch that my daughter may (or may not) scarf down in 10 minutes.  I bet most of you feel the same (kudos to those who are more like Lindsi though!).
So how do I make my daughter's lunch special?  How do I compete with an awesome bento box?  I put random notes in her lunch box!

This is not a new idea.  In fact, my mom used to put notes in my, my sister's, and even my dad's lunch box when I was growing up.  From a simple, "I love you," to a longer heartfelt letter, I loved being surprised when I opened my lunch.

I now pass the tradition on to Nutty and will continue it when Tottie is in school.  Like my mom, I have no set schedule.  Random notes are much more fun.

For now, my notes are simple.  Nutty is only in first grade and I want her to be able to read them herself.  They'll get more meaningful and personal as time goes on and she is able to read more.  Despite the simplicity, Nutty enjoys the notes and though she doesn't say it straight out, I know they make her feel special at lunch time.

Do you put notes in your child's lunch?

Wednesday, September 19, 2012

Fall Sun Spiral

My girls love anything you can hang from trees.  They love wind chimes, sun catchers, and wind socks.  Tottie and I had some time together this morning before preschool so I thought it would be fun to make a fall sun spiral with her.  When it was finished and hanging on the tree, she was so excited to watch it twirl around and catch the light!
To make your own fall sun spiral you need:
  • Clear contact paper (2 pieces, equal sizes)
  • Small leaves you find on the ground
  • Glitter
  • Any other flat, small decorations you may want (we used foam shapes)
  • Sharpie
  • Scissors
1) You'll start by drawing a spiral on one piece of your contact paper.  Make sure it is on the contact paper side and not the backing side.  Also make sure your lines are wide enough apart to fit your leaves in between them and have a bit of room left.
2) Next, peal the backing off the contact paper and add the leaves, glitter, and other decorations to the sticky side.  Make sure to keep the decorations inside the lines or you'll end up cutting them later.
3)  Take your second piece of contact paper and use it to cover the first piece, sticky side to sticky side.  Press down all over the papers to seal the edges and as much of it as you can.  Pay close attention to trying to seal the lines.  
4)  Cut along the lines.  (Look how determined Tottie is to get it right!)  Remember to cut off the excess contact paper at the beginning of your spiral and to leave a circle in the middle of your spiral.
5)  Punch a hole in the middle of the circle at the end of your spiral and use string to hang it from a tree.  Have fun watching it twirl around and catch the light!
Tottie had so much fun making the first fall sun spiral that she wanted to make a bigger one to hang on our door inside!  Though I tried to tell her it wouldn't twirl like the first, she was determined to do it anyway.

Do your kids like to make things to hang from trees?

Tuesday, September 18, 2012

Kids In The Kitchen--Guest Post

Getting your kids in the kitchen may seem like a lot of work, but it is one of the best ways to teach them life long lessons! I am going to tell you about the amazing benefits that you and your child will receive from spending time together in the kitchen while we bake monkey bread.

Let’s start with washing our hands. This is the perfect time to teach your child a thing or two about microbiology. You can say something like this:

There are teeny, tiny bugs that are invisible to your eye. They live all over the place! Some of them help us, but some of them can make us sick. It’s important to wash our hands so that we only keep the good ones around us.  Let’s sing happy birthday twice as we rub our hands together really fast with soap, and then we can rinse them with water. Why do we have to rub our hands together really fast? Good question! That’s what’s going to get the bad bugs off, since soap alone won’t do the trick, so rub, rub, rub!

Click photo to enlarge

Now it’s time to start baking the ooeey, gooey monkey bread!!

Step 1: Read through the recipe. If your kids are at an age where they can read, have them read it to you while you gather the supplies together. Hey, look at that! They are getting some reading practice and they will hardly even notice it! If they complain, then have them gather the supplies while you read it out loud to them. Little do they know, they have to read the labels on the containers to be sure that they have the right ingredients. Sneaky, sneaky…

Step 2: Make sure that you have all of the equipment that you need. A knife, a cutting board, a measuring cup, a measuring spoon, a plastic bag that zips shut, a baking pan, a microwave safe bowl, and a timer. As you do this you can discuss the importance of being prepared. Not only will it save you time, but you are less likely to be frustrated!

Step 3: Have your child read the directions of the recipe to you, or you can read it to them. Then begin the proces...
**While cutting up the dough, you can discuss knife safety and demonstrate to them how to safely use these sharp instruments.
**When you measure out the sugar, you can discuss different ways you can use the measuring cups to equal one cup.
**Be sure to show them how to level off the measuring spoon of cinnamon so that they can learn that baking requires precision. You can even discuss some of the chemical reactions that they may see in other recipes to help you explain the idea of why precision is important.
**When you melt the butter in the microwave, discuss why a microwave safe bowl is important. Let them know that you never want to put metal into the microwave and tell them why.
**Show them how to safely handle hot containers of food and explain to them why they need to wait for you to do these parts of the recipe.

Step 4: Once the recipe has been put together, bake it in a 350 degree F oven for 28 minutes. This is the perfect time to ask your kids if they have any questions. They may have questions that can open up a line of communication for you to discuss other things, like what is going on at school, or what they have been learning at friends houses.

Step 5: Once the monkey bread has cooled, be sure that you eat some of it together. By watching you eat something that they made, you are showing them that you appreciate their efforts. You are also showing them that you trust them to be good cooks. I promise you, not only will you and your kids have bonded, but their confidence will definitely be boosted too.

Carmen is the mom of three rambunctious little boys. She blogs about her family’s adventures at Adventures of the Triple B's, a place for parents with active kids to find comfort in stories that may or may not sound familiar. She uses her background in child development and her own experiences as a mother to offer tips about how to keep active children out of trouble. She talks about how to keep them safe, how to clean up their innumerable messes, and she offers recipes that they may slow down enough to actually eat. If you sometimes stop and ask yourself, “Why me?” especially while your child is scaling the walls, then come on over! Besides finding Carmen on her blog, you can chat directly with her on Twitter,Facebook, or by emailing her at adventuresofthetriplebs@gmail.com.
Monday, September 17, 2012

Saying Good-Bye to Lindsi

Photo from Jamie

It is with sadness in my heart that I let you, our readers, know that I am leaving Toys In The Dryer. It is something that Jamie and I have discussed in length and we both agree that given personal circumstances, it is the best choice for me at this time. The majority of things will remain the same around here, you just won't get my witty banter LOL. There will be a few minor changes but nothing extraordinary. You will continue to hear from me from time to time because I will "guest post" when I have the time to. Jamie will also be using some of my completed posts that are currently in draft.  Both Jamie and I have a mutual understanding that in the future I may come back full time, but for now I will take a step back.

Thank you to all of our loyal readers, we are SO grateful for your support, love and understanding.

Friday, September 14, 2012

Fall Cookies- Pinned It, Did It


fall cookies

Have you ever had one of those moments (usually happens to me on Pintrest) where you stop and you go "oh DUH!"? Well that is what came to mind when I saw the original pin. I saw these cookies and knew I had to give it a whirl. It is SO easy too!
fall cookies

All you need is a bag of cookie mix, a rolling pin and a leaf shaped cookie cutter....and viola! Beautiful fall colored cookies.

I made a double batch of sugar cookies to start. Next, I divided the batter up into four and colored each one a different fall color.
fall cookies

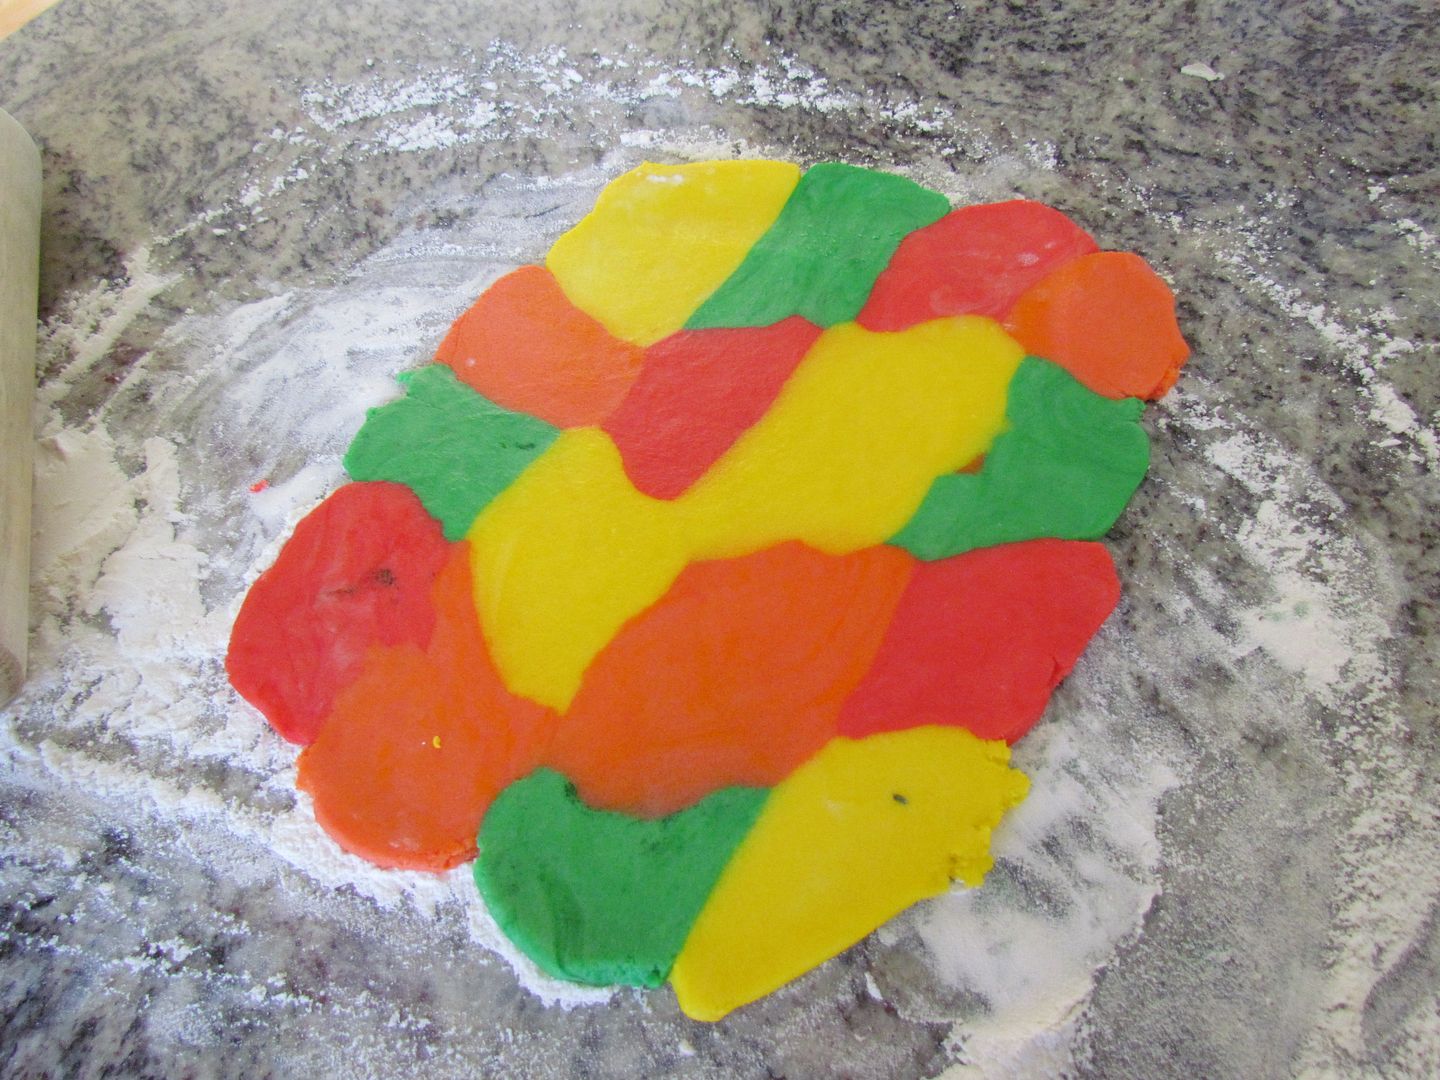
I grabbed a small chunk from each colored batch and lined it up next to each other then rolled it out.
fall cookies

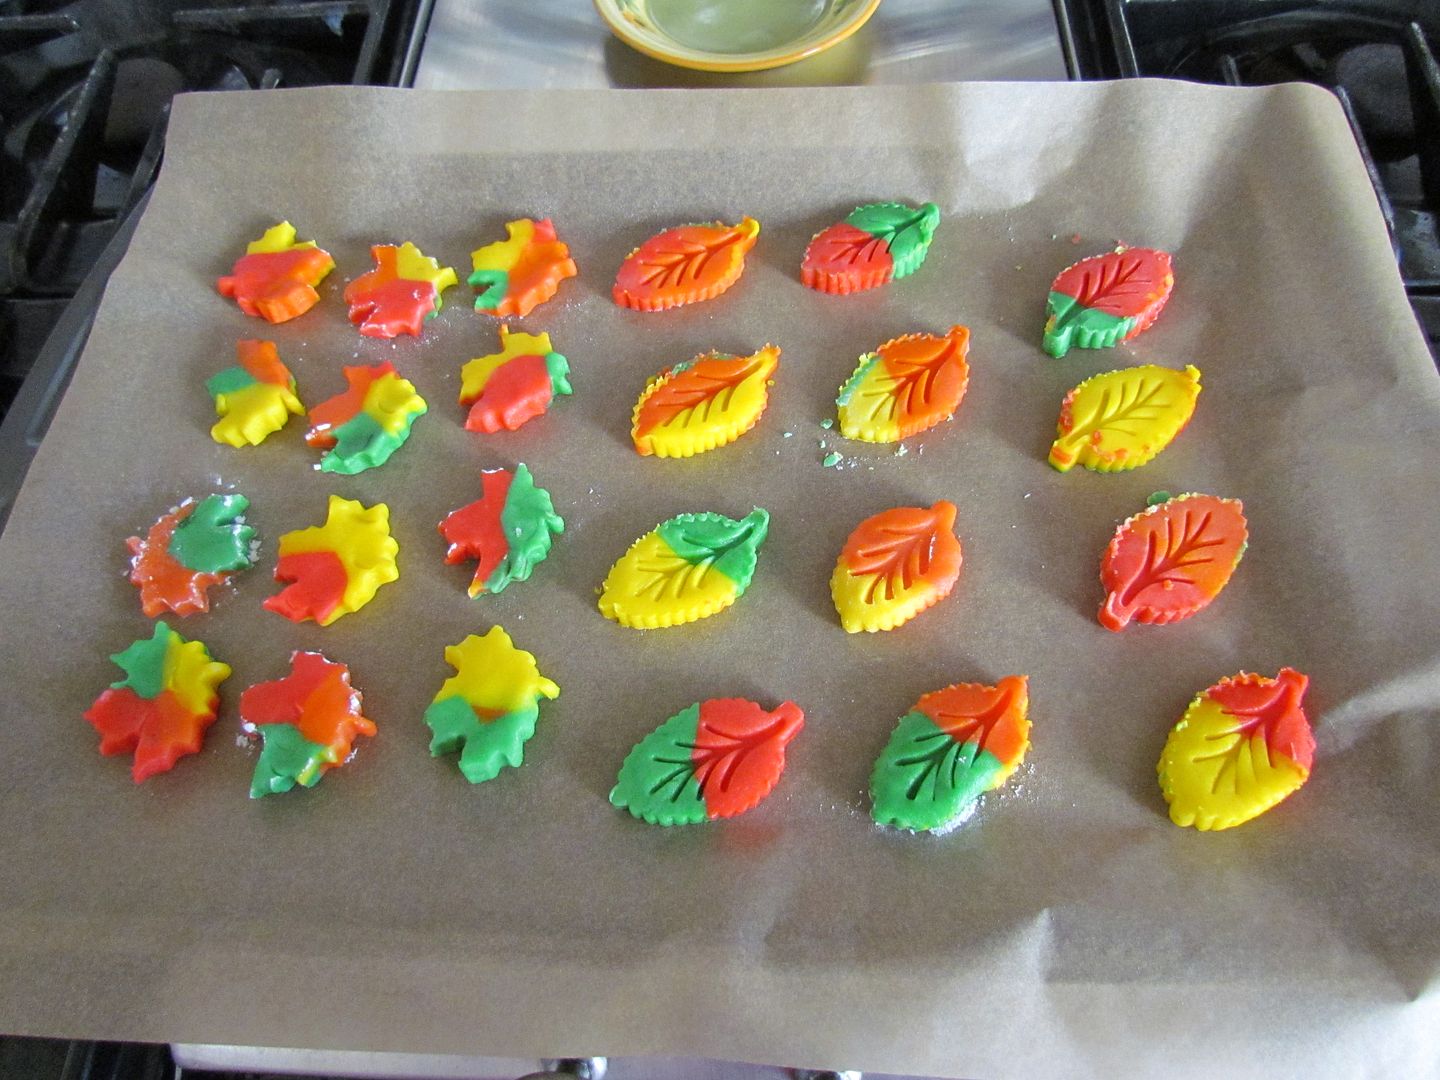
We used our two leaf shaped cutters to make the cookies and baked.
fall cookies

This sure was fun! I am totally adding this to my "to do list" for each fall.
fall cookies
Click on the button above to learn more about Pinned it, Did it!
Related Posts Plugin for WordPress, Blogger...