Tuesday, December 20, 2011

Ice Box Pudding

Don't let the title fool you...this is NOT pudding!  It's a desert made by layering Lady Fingers with rich chocolate filling and served with whipped cream.

This recipe has been a family tradition since well before I was born.  I has been handed down from my Great-Great-Grandma, to my Great-Grandma, to my Grandma, to my dad mom, and now to me.  It has traditionally been the desert served for the men's birthdays (instead of cake), but in my immediate family, it is the desert served on Christmas Eve.  You see, my dad's birthday is Christmas Eve.  My Grandma was adamant that on Christmas Eve they celebrated my dad's birthday and not Christmas.  Thus Ice Box Pudding is served on Christmas Eve.


Somewhere my mom has the recipe written in my Great-Grandma's handwriting but unfortunately, she couldn't find it in time for this post.  Above is the recipe that was handed down to me.  Written in my mom's handwriting, laminated, and ringed into a small book full of other family recipes.

Photo credit here. Keep reading to find out why I had to borrow a photo.

For such a long-standing family tradition, I realized that we had no pictures of our Ice Box Pudding or us eating it!  You'll have to excuse the lack of photos for this post.  I had to search the internet high and low to find an example that even remotely looked like our Ice Box Pudding.  The above is pretty darn close.  This year I'm determined to get some photos (but not before this post goes up)

Ok, enough rambling...on to the recipe...
  • 2 Baker semi-sweet chocolate (4 oz)
  • 3 Tablespoons sugar
  • 4 Tablespoons water
  • 4 Eggs (separated)
  • 1 teaspoon vanilla
  •  About 1.5 packages of pre-made lady fingers
  • Cool Whip
Melt the first three ingredients together.  Cool a little, then beat in the 4 egg yolks.  Beat the 4 egg whites till stiff then fold into the chocolate.  Add the vanilla.**
Layer in a bread pan, beginning with chocolate, then lady fingers, then chocolate...end with chocolate.  Refrigerate over night.  Top with Cool Whip before serving.

**This recipe has gone through some revisions through the years. Because it was originally made with raw eggs, we are now working on adapting it using additional cooking time and egg white substitutes (to avoid Salmonella!).  After you beat in the 4 egg yolks, warm to a temp of 160 degrees (stirring constantly) then quickly plunge into ice water to cool.  Use heavy whipping cream, powdered egg whites, or meringue powder as a substitute for egg whites.  Please note, if you use the original recipe I have posted here, we are not responsible if someone get sick from raw eggs.  Eat with caution.  (Sorry, had to post a disclaimer).

Family traditions make for special memories. In our home, it is Ice Box Pudding on Christmas Eve.  Do you have any special holiday traditions that you follow every year?  Share them here by commenting or share them over in the Toys In The Dryer Community so we can chat about them!

Monday, December 19, 2011

Magic Reindeer Food

Are your kids worried that Santa doesn't know how to find their house?  Do they feel bad that Santa gets sweet cookies and milk but his reindeer get carrots?  Try this fun Magic Reindeer Food activity to help ease their minds!


I was introduced to Magic Reindeer Food last year by a parent from Nutty's swimming lessons.  She was giving it out as an advertisement for her photography business and I thought it was so cute!  My girls had a ton of fun sprinkling it on the snow Christmas Eve too!


Here's what you'll need:
  • 1/4 cup raw, uncooked oatmeal
  • 1/4 cup sugar
  • A sprinkle or two (or more) of red, green, or silver sugar crystals (for cake decorating)
  • Small plastic baggies
  • Paper (preferably cardstock)
  • Printer or markers to make your own tag
  • Stapler with staples or ribbon

1)  Make a tag that labels the reindeer food and has the instruction poem on it (make your own, find one on the internet, or attempt to download mine--sorry, I don't know how to make it downloadable)

2)  Mix the oatmeal, sugar, and colored crystals (to your liking) in a bowl

3)  Divide the mixture among bags

4)  Attach the tags to the bags with a stapler (or you could punch a hole it it and tie it around the top of the bag with ribbon)

5)  Give it to your kids just before Christmas.  You can also have your kids give it to friends or you can do what the mom in Nutty's swimming lessons did and add your website address or phone number to the tag and hand it out as advertising).  This year Tommy (our Elf On The Shelf) is bringing back the Reindeer Food from the North Pole.
 Nutty sprinkling our Reindeer Food in the snow the night before Christmas last year.

6)  Have your kids sprinkle the reindeer food on the lawn/snow the night before Santa comes to your house.

7)  Don't forget to mess up the food a little bit after the kids go to bed to make it look like Santa's reindeer ate it.  If your kids are smart like mine, they'll ask why there aren't reindeer tracks in the snow.  I told them they were flying (hovering) over the snow when they ate it so they didn't leave tracks :)

Do you think your kids would like Magic Reindeer Food?

Friday, December 16, 2011

Fun Stuff Fridays (#4)- 3 weeks long for the holidays

Welcome to Fun Stuff Fridays. We had over 200 submissions last week and we were blown away! We are so impressed by everyone's creativity, passions, talents, and adventures. Wanna know more about our linky? Click on "Fun Stuff Fridays" above, then "about". With over 200 entries/submissions it took us a while to go through each one and narrow it down to our top three. Everyone who submitted had such great ideas! We wish we could feature all of them! Can't wait to see your amazing submissions this week! Remember, that this weeks linky party will be THREE weeks long because of the holidays coming up. Feel free to submit as many ideas as you want over that time. And remember- spread the word!

Our joint favorite pick was the Indoor Snowball Fight submitted by Next To Heaven. I mean let's be honest here people, this is simply one of the coolest ideas out there! This is on our list of things to do for our neighbors for next year FOR SURE! So fun, creative, and who doesn't love a good snowball fight?

Jamie's number one pick was Coffee Filter Snowman submitted by Happily Mother After. This cute craft is something kids of any age can participate in. You could have each person in your family make one and then you'd end up with the most adorable family of snowmen!

Lindsi's favorite pick from this past week was Mr. Reindeer submitted by Playing With Words 365.  For starters, the reindeer is so adorable! It's a great way to engage your child in learning. She offers printable foods with letters on them to help with letter sounds, letter recognition, and spelling. Our kids would love to have a reindeer to feed!


Fun Stuff Fridays


Fun Stuff Fridays

Thursday, December 15, 2011

Thrifty Christmas Shopping

Today we have the great privilege of guest hosting Ruby and Macy from Real Housewives of Minnesota!  We met Ruby and Macy at the Minnesota Blogger Conference and were immediately drawn to them because they are awesome girls, they are a blogging duo just like us and, they blog about being thrifty!  In this post they talk about saving money while shopping for Christmas presents.  Without further ado...

How To Be Thrifty When ChristmasShopping
When it comes to holiday shopping, it’s easy to spend oodles! But it doesn’t have to be that way. There are plenty of ways to save when doing your Christmas shopping. Here are some thrifty tips to keep your pocketbook safe this holiday season.


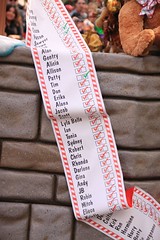
A Christmas Fantasy Parade: Santa's Naughty or Nice List
Photo by armadillo444


First off, prepare your list. Take a moment to sit and write out who you have to buy gifts for. Think hard now, and be sure to include any teachers, nannies, coaches, etc. Be sure to cover all your bases before you move on to the next step. 

Now that you’ve made your list, stick to it. The list does not expand. This list is your final list. Anyone who is not on your list does not get a gift. Whether you see something they’d like or not. Part of saving money, comes from only buying what you need to buy.

Next, brainstorm a few ideas for what you might want to give the people on your list. Write your ideas down. And, if your friends and family are cooperative, have them get you their wish-list early – I shoot for Thanksgiving. If it helps (which it probably will!), set a budget for each person and jot it down next to their name. Make it your goal to spend less than what you budgeted. It’s a great feeling when you spend less than you expected to!

Now for the actual gift getting part. I’m a big fan of making things when you can. With the help of Pinterest.com (LOVE!), there are all kinds of homemade gifts and crafts that you can put together and give. But if you’re running out of time or would rather buy a gift, there are plenty of ways to save big!


My Little Consumer

Photo by Myles!

Now that you are about ready to hit the stores, list in hand, take a minute to do a few steps of prep work – you’ll be glad you did!
  • Glance through the newspaper advertisements first. Companies are at their prime for advertising right now and there are some great deals to be had if you just educate yourself beforehand. Make a note of how much something is at a certain store. Many stores such as Walmart will price match competitor prices. This is good information to have because it can prevent you from running around town going to different stores. I think we can all agree that one stop is better than five. 
  • Now that your mind is primed with some ideas for shopping and where you can find some good deals, narrow down your list to a couple ideas for each person of gifts you would like to give and that fall within your budget. 
  • Jot down on your list some ideas of where to get each gift. This makes the big malls seem much, much smaller AND will save you a ton of time when you get to the mall. Once you have your stores in mind that you’re going to go to, hit their websites, Facebook pages, and Twitter accounts to look for additional savings. Sometimes if you ‘like’ a company’s page on Facebook, they will have a coupon for you. Check their Twitter to see if they tweeted out a sale or coupon that you wouldn’t normally have found online. Also try googling the store + coupon to see if there is anything you might have missed. These are all great ways to save even more money. 
  • It’s tough to catch online sales right now because it’s getting down to the wire on shipping times. Make sure to check the ship dates and see whether a site guarantees shipment by Christmas. Normal shipping times at a certain store might be pushed out a bit because of the holiday sales. If you do find a site that will ship by Christmas, do your homework and look for coupon codes. A great site for this is RetailMeNot.com, and for free shipping, you can visit freeshipping.org for awesome deals. 
  • Lastly, don’t underestimate the power of stores like Marshall’s or TJ Maxx. These stores hold many designer items in store and are often sold for a fraction of the cost. It doesn’t get much better than that! 
So stick to your list, shoot for below budget, and do your coupon homework. All these things can score you great deals for your holiday shopping this year, and they’ll never know the difference!

Now that you've read their great post, go ahead and visit Ruby and Macy at Real Housewives Of MN and follow them on Twitter: @MNHousewives.
What the best Christmas shopping deal you've come across?

Wednesday, December 14, 2011

Origami Wreath

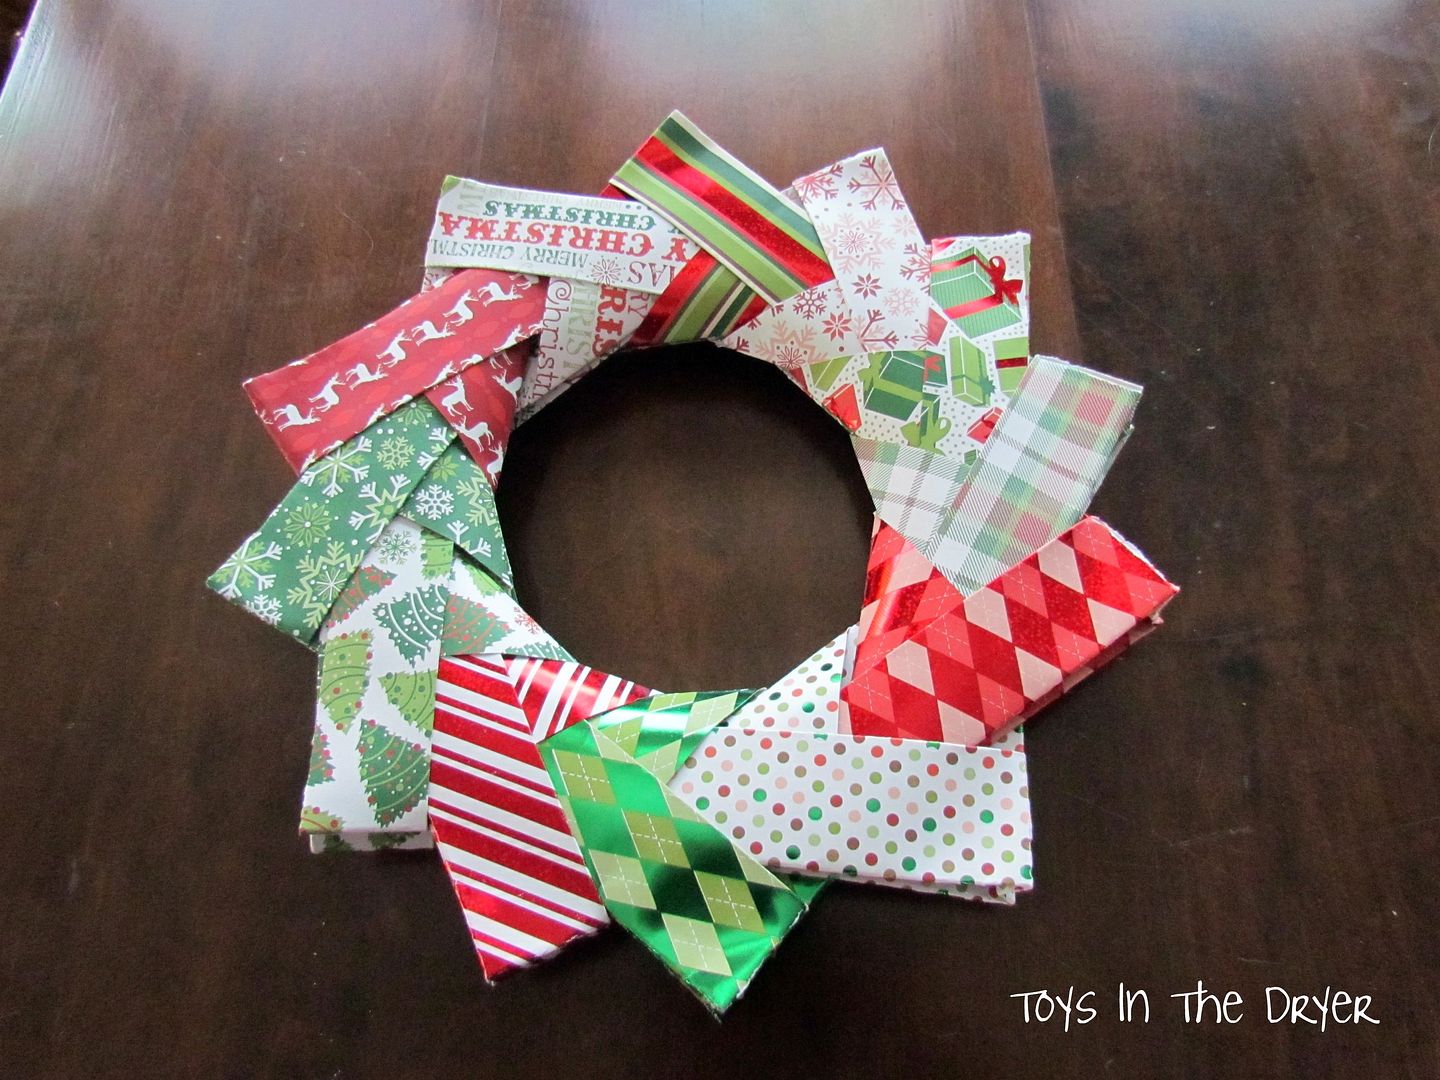
I was blog hopping the other day (yup, I'm a rabbit) and saw a really neat tutorial for a few Origami projects. The one that really struck me as neat was this tutorial for a wreath. I had to play around quite a bit because the tutorial was in Japanese (I think) and the measurements were in metric. The lady who shared the tutorial used paper that was about half the size, thus leading to half the size wreath...I just so happened to have a bunch of Christmas themed 12"x12" paper laying around and I thought I would try and make one with my oldest boy. I think you could say it was a success! (He.....OK, I didn't want to stop making them!)

Here is what you will need:
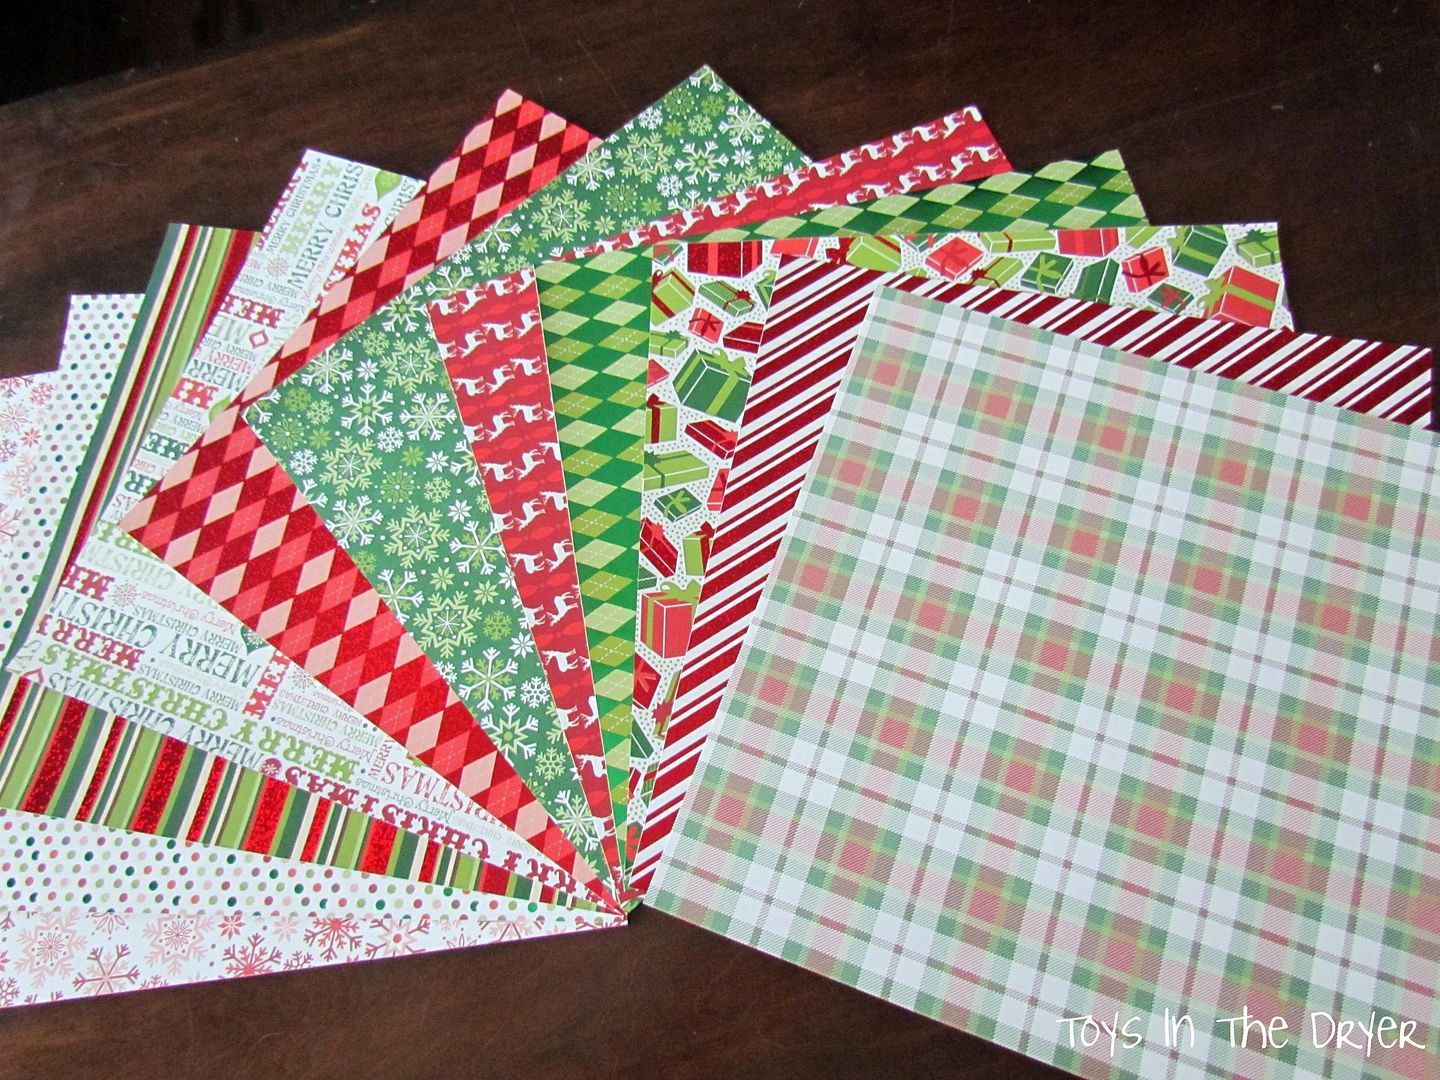
12 sheets of colorful paper (pattern and print of your choice)
a ruler
how to make an origami wreath

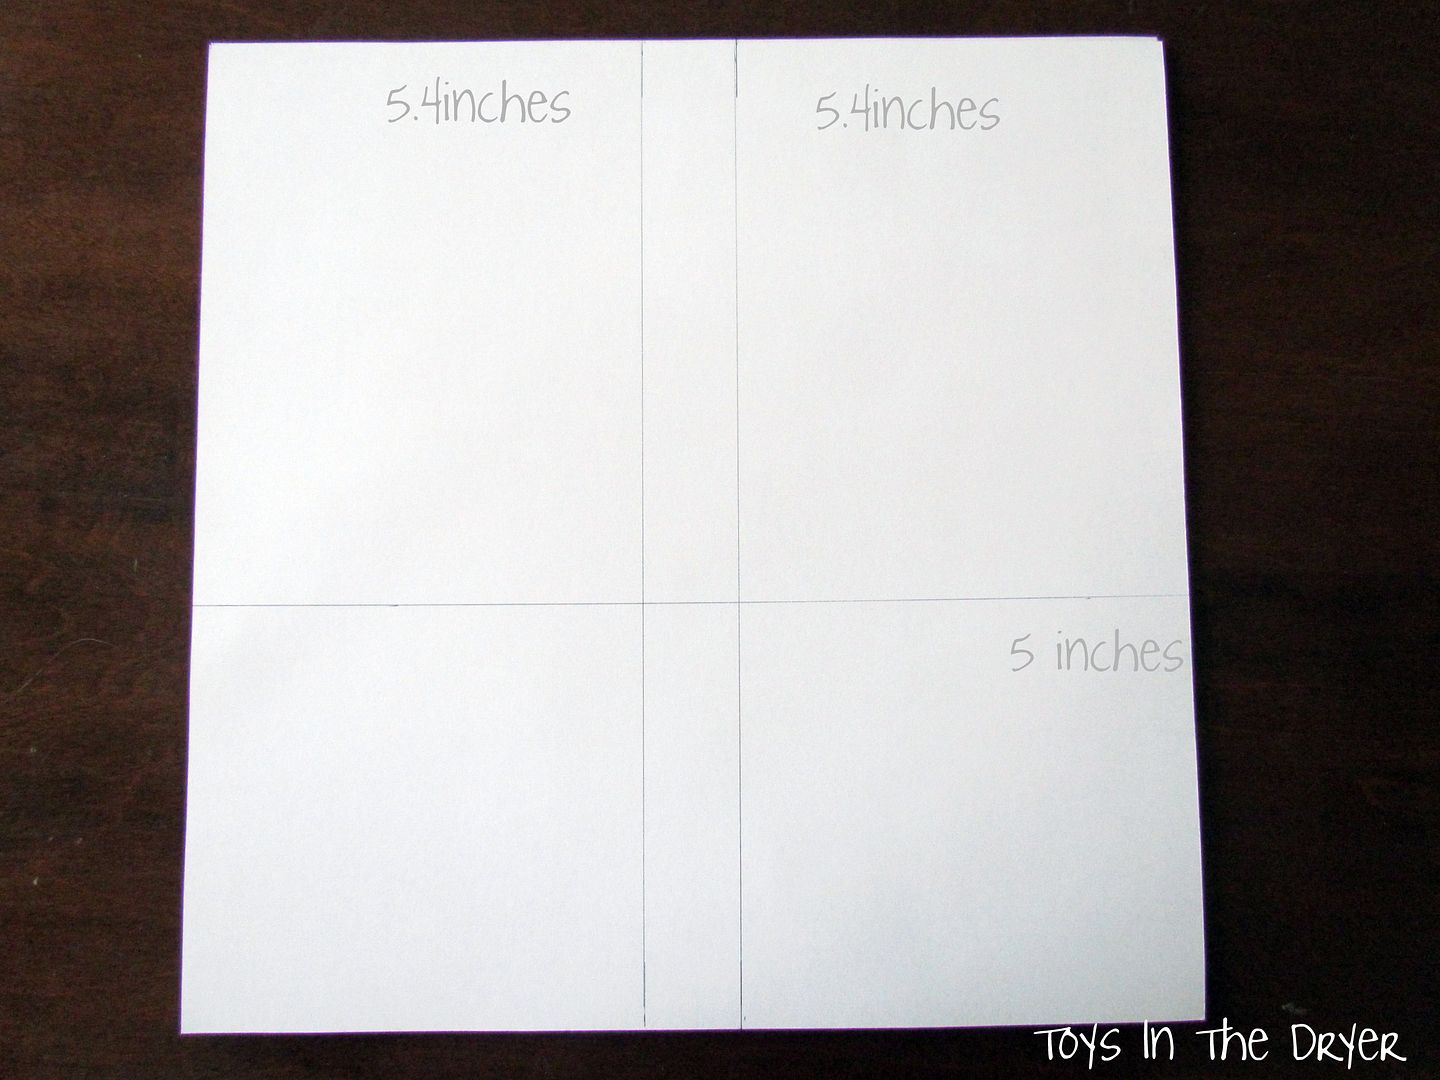
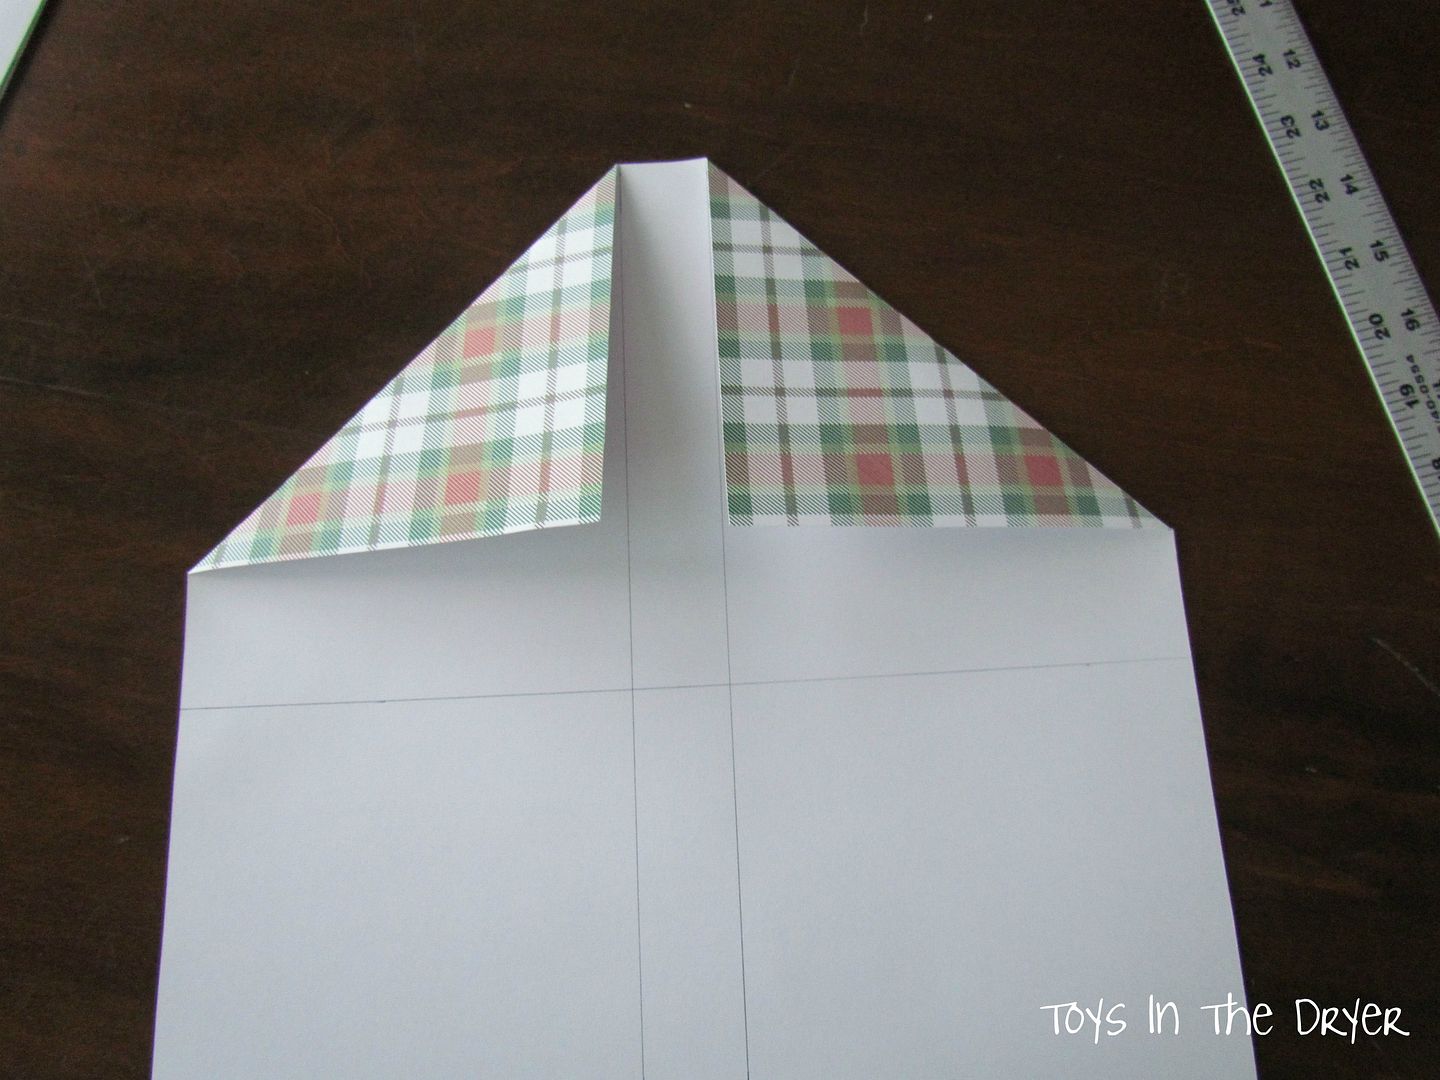
Carefully mark each sheet of paper on the back side. One line should run 5 inches from the bottom of the paper, another line should run the opposite direction about 5.4inches from each side....like so.
how to make an origami wreath

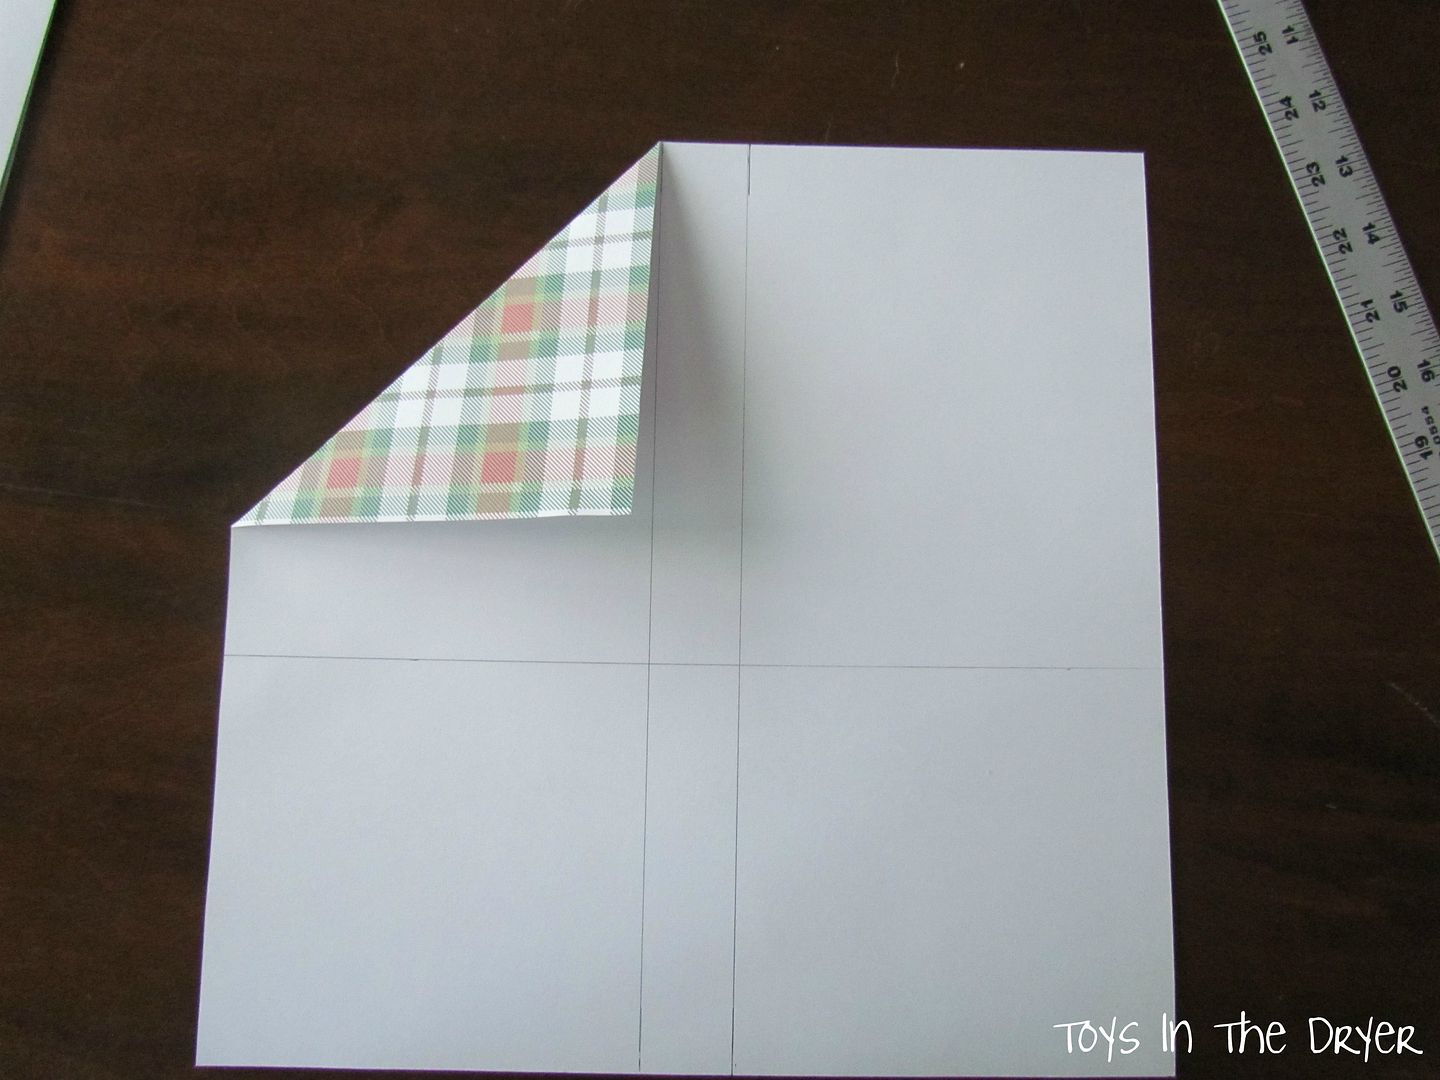
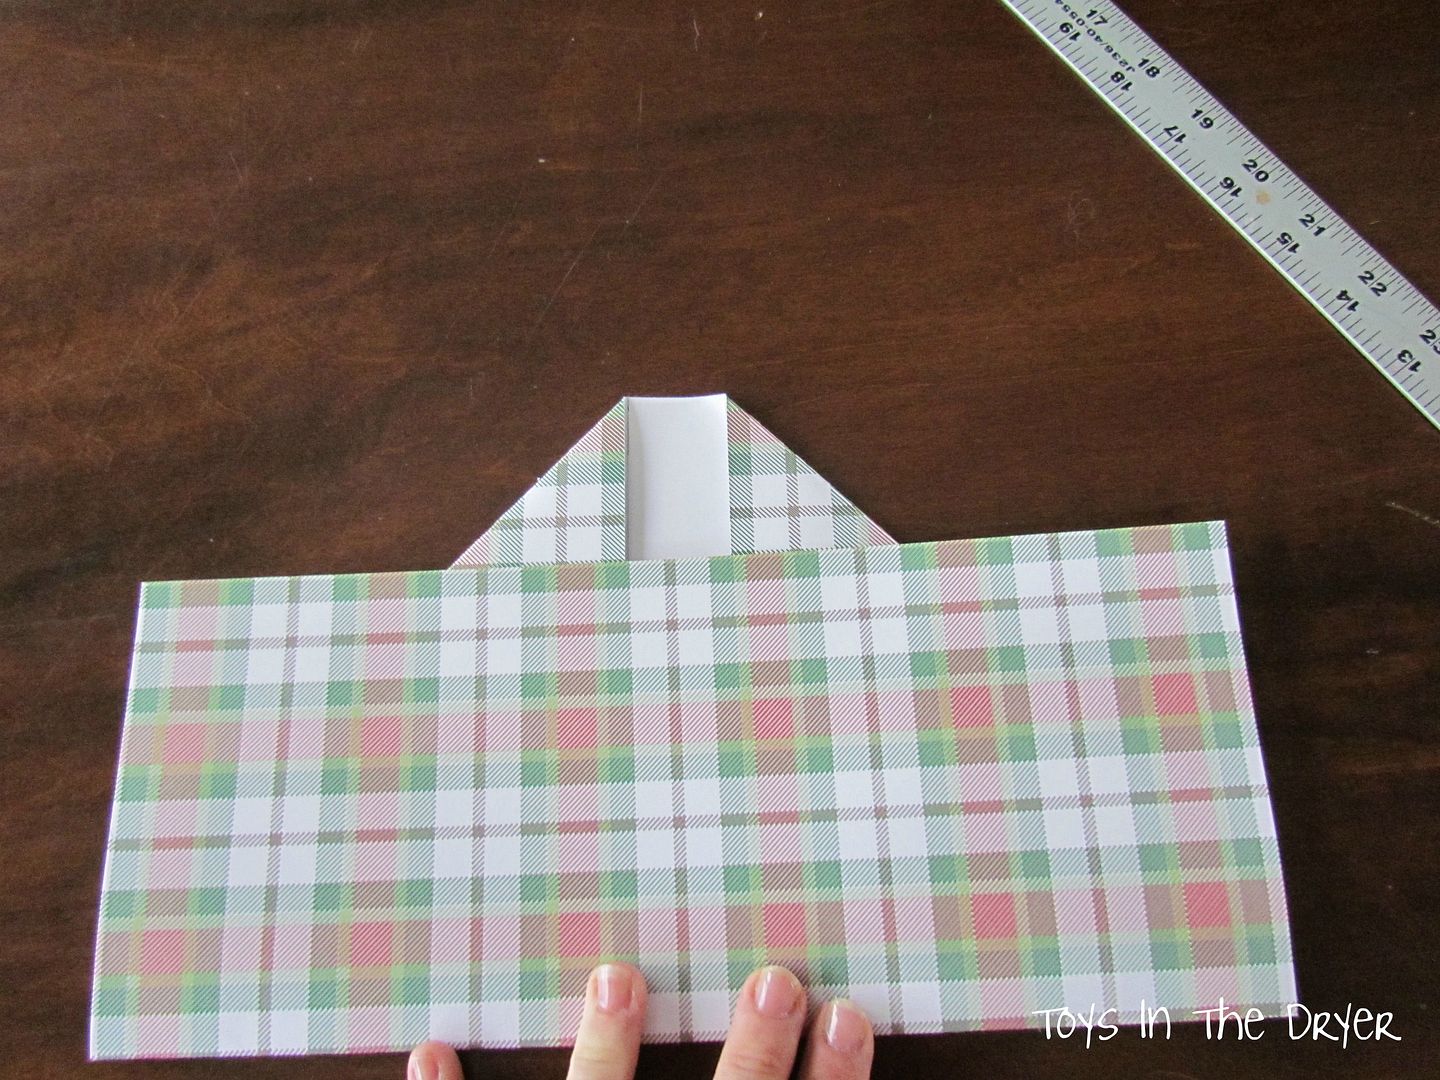
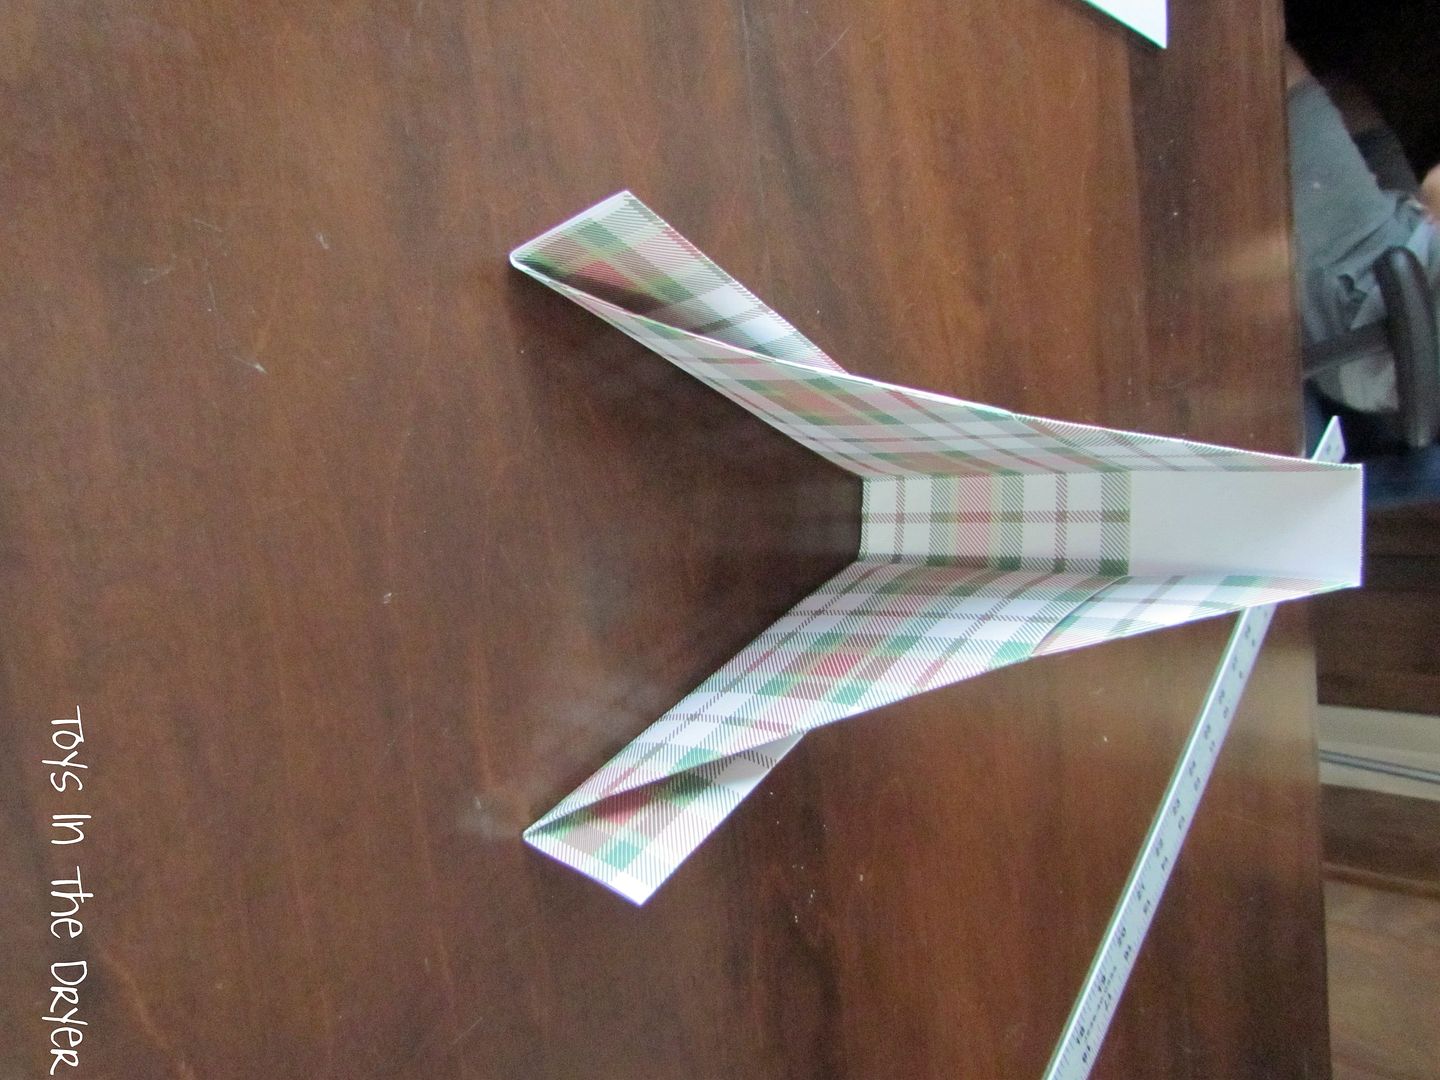
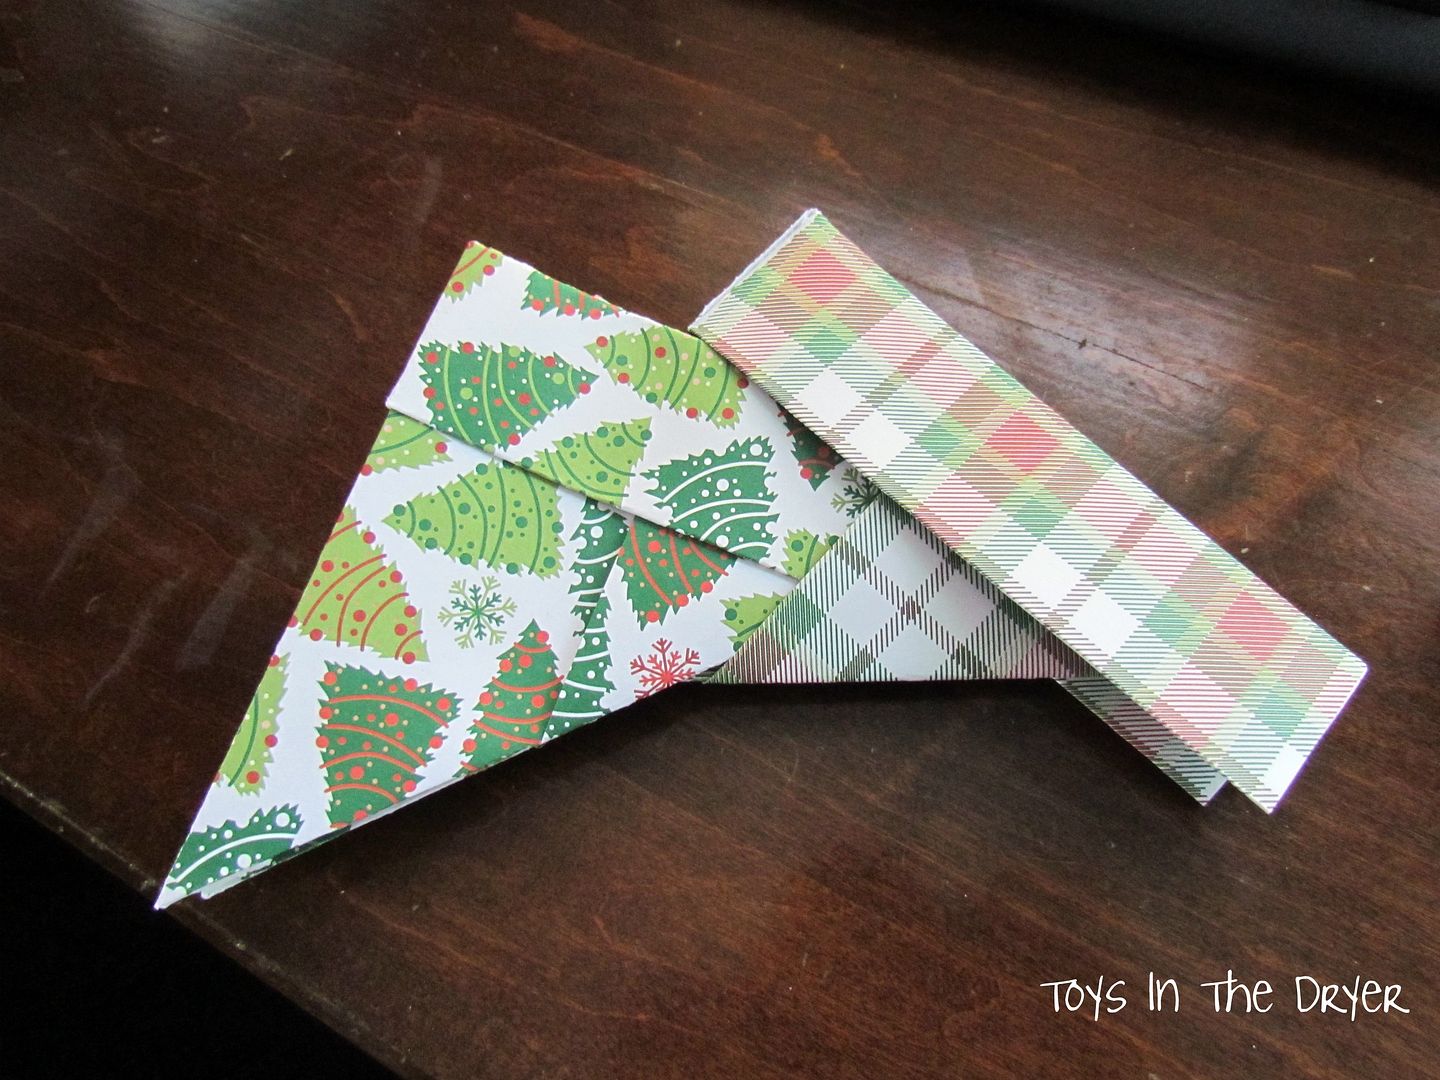
Fold two of the corners down to the lines as demonstrated in the photo.
how to make an origami wreath

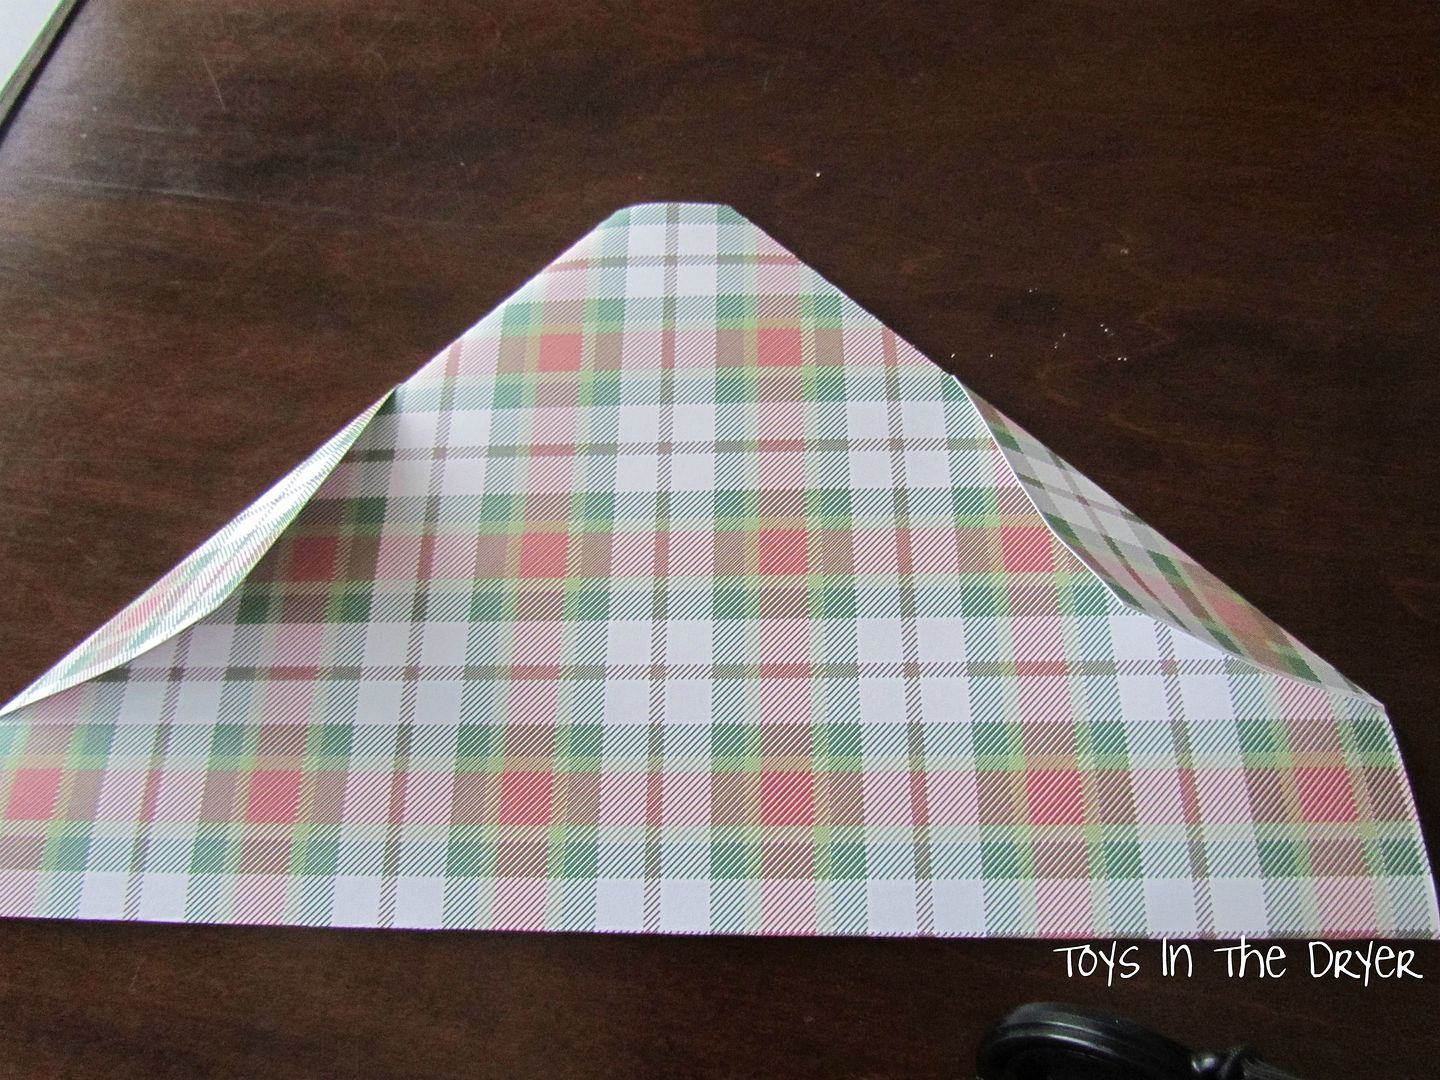
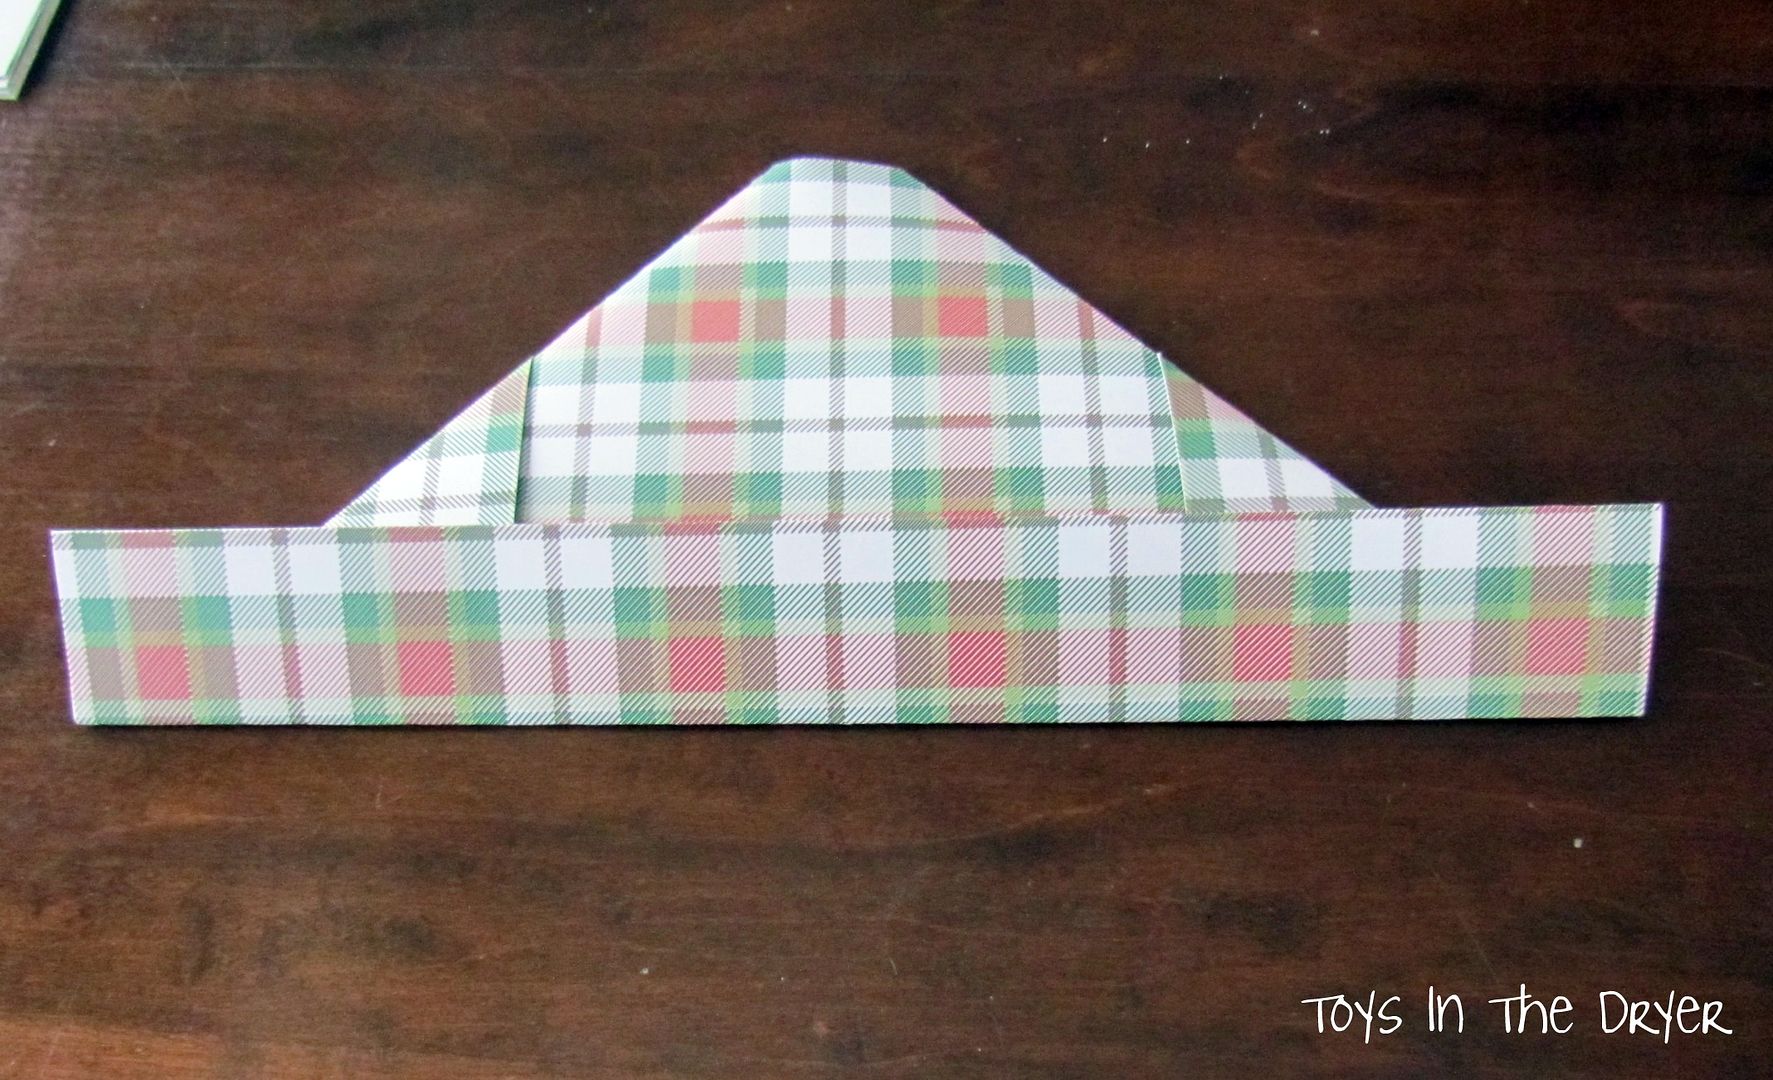
Continue along following the folds I have made in order.
how to make an origami wreath

Once you have all 12 sheets of paper folded you can insert them into each other and after the last piece you will have a BEAUTIFUL wreath.
how to make an origami wreath

I used a dab of hot glue (I like it and that is why) to add some extra strength and attached a little red ribbon to the back side and hung it on my door.
how to make an origami wreath

Related Posts Plugin for WordPress, Blogger...